, improves keyboard navigation, auto-wraps text in tags, skips background images in screen readers, and fixes span issues in text blocks.
- At Config 2025,** **[**Figma announced powerful updates**](https://www.figma.com/release-notes/?title=config-2025) including Figma Draw for freeform visual design, Grid for responsive layouts, Figma Buzz for brand asset creation at scale, Figma Sites for website building, and Figma Make to turn prompts into working web prototypes—all aimed at faster, smarter workflows.
- [**Sticky Header Effects (SHe)**](https://stickyheadereffects.com/) plugin is now part of POSIMYTH Innovations, known for features like shrink headers, background transitions, transparent headers, and logo color change—enhancing scroll-based interactions in Elementor.
- [**WordPress 6.8.1 Maintenance Release Now Available**](https://wordpress.org/news/2025/04/wordpress-6-8-1-maintenance-release/), fixing 15 bugs across the Core and Block Editor. This update addresses issues in multisite, the REST API, and block editing.
- **WooCommerce has partnered with Square** as its preferred solution for in-person payments, enabling seamless syncing of inventory, orders, and customer data across online and offline stores.
- [**WooCommerce 9.8.3 is now available**](https://developer.woocommerce.com/2025/04/30/woocommerce-9-8-3-dot-release/), fixing issues with scheduled actions for product transients and postcode field validation in the Checkout block.
- [**Google has lowered the minimum size for Customer Match**](https://searchengineland.com/google-slashes-customer-match-list-minimums-in-search-campaigns-to-100-users-455912) lists in Search campaigns from 1,000 to just 100 users. This change allows smaller advertisers to access advanced audience targeting capabilities that were previously limited to larger accounts.
- [**Google asserts that its AI-powered search**](https://www.searchenginejournal.com/google-claims-ai-search-delivers-quality-clicks-despite-traffic-loss/547401/) generates more “qualified clicks,” even as many publishers report declines in website traffic. However, publishers have no access to data to verify these claims, and while organic traffic is down, ad performance reportedly remains stable.
- [**Google has rolled out Smart Bidding Exploration**](https://www.searchenginejournal.com/google-announces-largest-ads-bidding-update-in-over-a-decade/547249/), its biggest bidding update in over 10 years. This feature helps advertisers discover untapped conversions by expanding eligible queries—without requiring changes to audience targeting.
## 💡— Figma Tips, Tricks & Tools
#### Tool of the Month
[**Coolors**](https://coolors.co/)
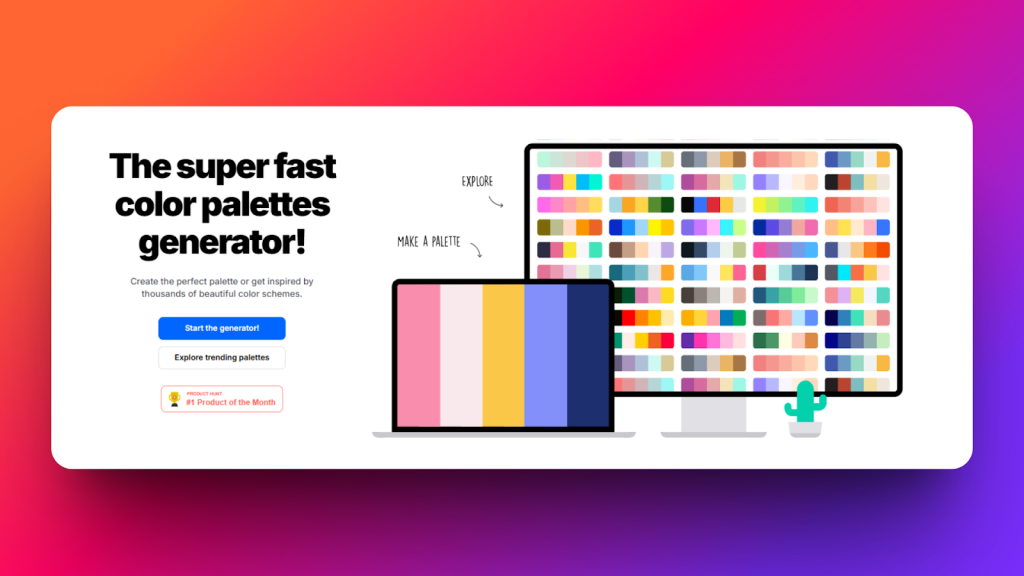
A fast and easy tool to generate color palettes for consistent and beautiful design.
#### Tip of the Month
**Use “Pick All” in Global Styles*
****Need to update multiple layers with one style? Use the new ****Pick All**** button in Global Styles to apply typography or color changes site-wide in seconds.*
## 🗣️— From the Community
#### Thanks and I highly recommend
*I had the pleasure of receiving assistance from Divyang Chaudhary from support UiChemy in solving serious issues during the migration process from Figma to WordPress. I received professional support, a lot of patience, and very courteous communication. 🙂 The problem was resolved. Thank you very much, and I highly recommend UiChemy. Zoja*
*[~ @zojazak](https://wordpress.org/support/topic/thanks-and-i-highly-recommend/)*
**Subscribe our Newsletter, get Monthly & Weekly Product updates, News and more….✉️**
[](https://learn.wdesignkit.com/wdesignkit-templates-make-wordpress-site-building-fast-and-easy/)
---
# April 2025 Updates: Export Non-Auto Layouts, Figma Updates, and WordPress 6.8 Highlights!
Source: https://uichemy.com/blog/april-2025-updates/
We’ve rolled out several new features to make your Figma-to-WordPress workflow even faster and smarter:
- **Convert Non-Auto Layout to Auto Layout**: Export designs without Auto Layout? Now, UiChemy automatically converts them for you — saving you manual effort and time!
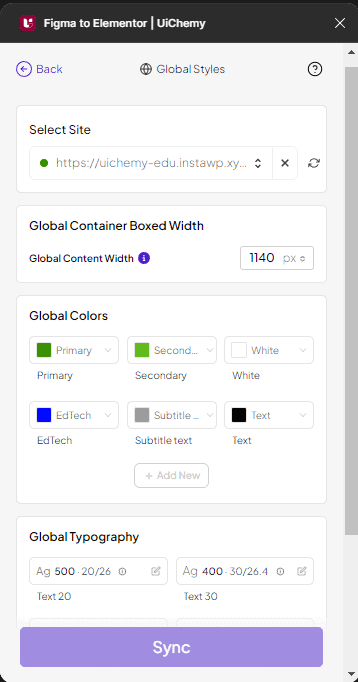
- **Global Box Width Container**: Take full control of container widths across your site with this new powerful feature.
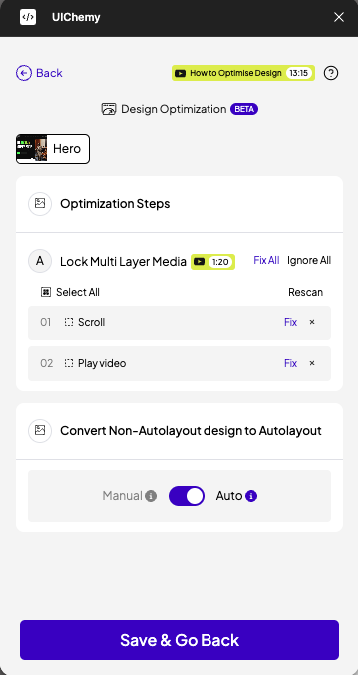
- **85% Reduction in Optimization Steps**: We’ve cut optimization steps from 14 to just 1, letting you focus on creativity while UiChemy 3.0 does the heavy lifting behind the scenes.
- **Smarter Global Styles**: We’ve improved Global Colors and Typography for more consistent styling and efficiency.
- **Auto-Recommended Export Methods**: UiChemy now intelligently suggests the best export method for your design, say goodbye to confusion!
- **Improved Live Import Connections**: Importing live sites is now smoother and more reliable, solving connection issues once and for all.
[](https://uichemy.com/v3/)
7. **Cleaner Design Exports**: We’ve made your exports lighter and cleaner by automatically removing unnecessary frames before export.
8. **Better Responsiveness**: Enjoy improved mobile responsiveness in your Elementor exports, out-of-the-box.
**In case you missed our last email, [UiChemy 3.0](https://uichemy.com/v3/) is here – our biggest update yet!**
*Check out all the new features and improvements in detail through our [Blog Post](https://uichemy.com/introducing-uichemy-3-0/) and detailed [Video Tutorial](https://youtu.be/CzYClxUyP_M?feature=shared).*
## 🔥— Feature Spotlight
**Smarter Export Methods – Let UiChemy Do the Thinking for You!**
One of the most exciting updates this month is the **Auto-Recommended Export Methods**. No more second-guessing, which export method works best for your designs. UiChemy now intelligently suggests the optimal export method for each project, saving you time and eliminating confusion.
Whether it’s choosing between full-site exports or partial exports, UiChemy ensures you're always making the best choice for a smooth, efficient workflow.
## 📈– What’s Next at UiChemy?
We’re building even more ways to simplify your design-to-WordPress workflow.
Coming soon:
- **10 Ready-to-Use Templates** – Pre-tagged elements with global styles, so you can tweak content and export to Elementor in minutes.
- **Smarter Design Conversion** – Smoother, faster exports with better accuracy.
- **Auto Locking** – Save time letting UiChemy handle layer locking automatically.
- **Enhanced Global Styles** – More control over your color and typography system.
## 🎙️– Webinar / Live Session Announcement
We’re hosting a live session where our team will answer **all your questions about UiChemy** — from using the plugin efficiently to upcoming features.
**Topic:** *All Your UiChemy Questions — Answered in One Go!
*📅**Date:** 28th May
⏲️**Time:** 7:00 PM IST
📍**Location:**[ YouTube Live](https://www.youtube.com/watch?v=buIsae9Ugpg)
*Got questions? Bring them to the webinar!*
**You can also check out** **our [past webinars](https://www.youtube.com/playlist?list=PLFRO-irWzXaIWeNyXU6N-PXDxeVtiJNU7) or [subscribe](https://www.youtube.com/@posimyth) to stay updated on future sessions.**
## 📰 — Figma & Tech Bytes
- [**Figma introduces UI3**](https://www.figma.com/release-notes/?title=all-ui3) to simplify the design interface, focusing on a more intuitive and consistent experience. The update features resizable panels, improved placement of tools, and seamless integration with other Figma products like FigJam and Figma Slides, which enhances overall workflow for designers.
- [**WordPress.com has introduced a new free AI site builder**](http://wordpress.com/) that allows users to create a website in seconds by simply providing a description prompt. Matt Mullenweg shared on X that this AI builder will soon be available for all WordPress websites.
- Figma introduces [**"Edit Image" for AI-powered image edits**](https://www.figma.com/release-notes/?title=updates-to-ai), including background changes and object movement, free during beta. A new model picker lets users choose from GPT-image-1, Gemini Imagen 3, or Titan V2. AI features are available for Professional, Organization, and Enterprise plans.
- [**WordPress 6.8**](https://wordpress.org/news/2025/04/cecil/) Is Here With Global Style Book Support, Speculative Loading, bcrypt Password Hashing, and Database Optimizations
- Figma's Connected Projects feature improves [**collaboration between freelancers**](https://www.figma.com/release-notes/?title=connected-projects), agencies, and clients. It allows co-editing of designs, resource sharing like libraries, and easy teamwork, all while staying on individual Figma seats.
- [**Elementor updates bring instant AI logo generation**](https://elementor.com/blog/editable_blocks_ai_generated_logos/), curated wireframe sections, and enhanced image tools to Elementor, helping users save time and boost creativity with faster customizations and approvals.
- [**Figma introduces 9 updates to speed up workflows**](https://www.figma.com/release-notes/?title=design-system-quality-features), including a shortcut to jump to the main component, the ability to hide/show variable paints, and options to duplicate and copy styles. Additional improvements include better UI descriptions, draggable variable modals, auto-saving of variable changes, tooltips for component names, and more alignment fixes.
- Elementor has released the [**alpha version of Editor V4**](https://www.therepository.email/elementor-releases-alpha-of-editor-v4-its-biggest-overhaul-in-eight-years), marking a major shift towards a CSS-first approach. This release introduces a modular class system, new styling controls, and simplified markup, aiming to enhance performance and streamline workflows for professional users.
- [**WordPress 6.8.1 Released**](https://wordpress.org/news/2025/04/wordpress-6-8-1-maintenance-release/) With 15 Bug Fixes Covering Core, Block Editor, Multisite, and REST API.
## 💡— Figma Tips, Tricks & Tools
#### Tool of the Month
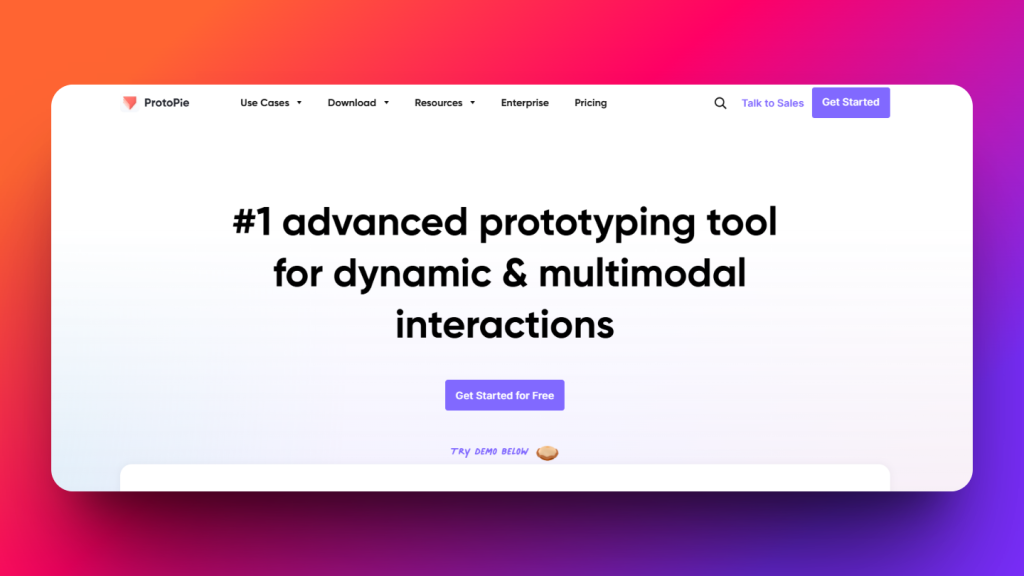
**[ProtoPie](https://www.protopie.io/)** – The #1 advanced prototyping tool for dynamic and multimodal interactions.
Perfect for creating realistic prototypes with logic, conditions, and sensor-based triggers — all without code.
[](https://www.protopie.io/)
#### Tip of the Month
**Maximize Your Design Workflow with Global Styles**
Did you know, with the new enhancements to **[Global Colors and Typography](https://uichemy.com/docs/export-figma-design-to-elementor-with-global-style-using-uichemy/)** in UiChemy, you can maintain consistent styles across all your Figma designs effortlessly. Whether you're working on a new project or updating an existing one, global styles ensure that you’re always on-brand with just a few clicks.
*Pro Tip: Use the **Global Box Width Container** to easily control your container widths across your entire site without having to adjust individual sections*, *making your workflow even smoother.*
## 🗣️— From the Community
#### Very nifty plugin for Figma to Elementor Transfer
*Great features with even better support. Love what you guys build and support. Highly recommend both free and paid plugin.*
*[~ @webservptyltd](https://wordpress.org/support/topic/very-nifty-plugin-for-figma-to-elementor-transfer/)*
**Subscribe our Newsletter, get Monthly & Weekly Product updates, News and more….✉️**
[](https://uichemy.com/blog/july-2025-updates/)
---
# March 2025 Updates: Tips,Tools & News Every Figma-to-WordPress Creator Should Know!
Source: https://uichemy.com/blog/march-2025-updates/
**[UiChemy ](https://uichemy.com/)is on a mission to make Figma-to-WordPress effortless.
**Here’s everything you need to know this month — from Figma updates to our next big feature drop.
## 🔥– Feature Spotlight
We recently released **[UiChemy v3.0](https://uichemy.com/v3/)**, packed with powerful upgrades.
The most exciting update?
**From 14 Steps to Just 1**
[](https://uichemy.com/v3/)
**
**Now, converting your Figma design is faster than ever. With just a single step, our smart optimization system handles the rest, cutting time and complexity for your workflow.
👉🏻 *[Read the full blog post for a detailed explanation.](https://uichemy.com/introducing-uichemy-3-0/)*
## 📈– What’s Next at UiChemy?
We’re making major improvements to UiChemy’s **Design Optimization Engine.**
Some users shared that certain Figma designs don’t convert as expected. We’ve heard you, and we’re now working on enhancing optimization logic so more design styles are supported and generate better results.
**Goal:** Ensure every design works beautifully, no matter how unique the layout.
## 🎙️– Webinar / Live Session Announcement
We’re hosting a live session where our team will answer **all your questions about UiChemy** — from using the plugin efficiently to upcoming features.
**Topic:** *All Your UiChemy Questions — Answered in One Go!
*📅**Date:** 16th April
⏲️**Time:** 7:00 PM IST
📍**Location:**[ YouTube Live*
*](https://www.youtube.com/watch?v=buIsae9Ugpg)*Got questions? Bring them to the webinar!*
**You can also check out** **our [past webinars](https://www.youtube.com/playlist?list=PLFRO-irWzXaIWeNyXU6N-PXDxeVtiJNU7) or [subscribe](https://www.youtube.com/@posimyth) to stay updated on future sessions.**
## 📰– Figma & Tech Bytes
- [**During the April '25 Release Notes livestream**](https://www.figma.com/release-notes/?title=april-1-livestream), Figma announced several updates aimed at improving design workflows, team collaboration, and performance enhancements. Key highlights included new prototyping features and improved component properties.
- Figma adds [**shimmer effect to highlight AI-generated interactions**](https://www.figma.com/release-notes/?title=shimmer-effect) making it easier to spot connections created by AI over manual ones.
- [**Elementor introduced Ally**](https://elementor.com/blog/introducing-web-accessibility/), a free accessibility widget with features like contrast adjustments and text resizing, reinforcing the importance of web accessibility as required by EU regulations and global standards.
- Figma adds [**smart symbols for all fonts automatically converting characters**](https://www.figma.com/release-notes/?title=smart-symbols) like (c), (R), (TM), -> into symbols like ©️, ®️, ™️, → when "**Use smart quotes/symbols**" is enabled available in Figma, FigJam, and Slides.
- [**Figma’s 2025 Config conference expands**](https://www.figma.com/blog/a-first-look-at-config-2025/) to San Francisco and London with a three-day summit in SF and a one-day event debut in London to connect and inspire the global product community.
- WordPress has released the first [**Release Candidate (RC1) for version 6.8**](https://wordpress.org/news/2025/03/wordpress-6-8-release-candidate-1/), now available for download and testing. Users are encouraged to test this version on staging environments to help identify any issues before the final release, scheduled for April 15, 2025.
## 💡– Figma Tips, Tricks & Tools
#### Plugin of the Month
[**Weekly Planner App UI Kit**](https://ui8.net/mockup-bureau/products/weekly-planner-app-ui-kit)
[](https://ui8.net/mockup-bureau/products/weekly-planner-app-ui-kit)
An elegant, ready-to-use UI Kit for iOS planners. Great for productivity-based apps, client demos, or side projects.
#### Tip of the Month
Even if your design doesn’t use auto layout, **UiChemy will now auto-convert it with flexbox**, giving you clean, responsive output without the need to restructure everything in Figma.
[🎥 **Watch the full update video** ](https://youtu.be/CzYClxUyP_M?feature=shared)
## 🗣️– From the Community
#### Best Figma to WordPress Tool Ever Made
*We were hesitant to use this tool because we had bad experiences with the Fignel and Yokoto for figma to Elementor Process. However, after we started using it and received a lot of help from the support team, our team became experts. This tool saves us 80% of our design conversion time.*
*It’s a new workflow to adapt to, but once we implemented it, it saved us time and allowed us to take on more projects.*
[*~ @vincentbao*](https://wordpress.org/support/topic/best-figma-to-wordpress-tool-ever-made/)
**Subscribe our Newsletter, get Monthly & Weekly Product updates, News and more….✉️**
[](https://uichemy.com/blog/july-2025-updates/)
---
# Introducing UiChemy 3.0 – A Smoother, Simpler Way to Convert Figma to WordPress
Source: https://uichemy.com/blog/introducing-uichemy-3-0/
We heard you. Many of you found our Figma-to-WordPress workflow too complex, and we felt the same frustration. That’s why we went back to the drawing board and built something better.
Note : This update released for Figma to Elementor workflow and then it will be released to Bricks and Gutenberg version in coming weeks.
Today, we’re excited to introduce **[UiChemy 3.0](https://uichemy.com/v3/), **a more intuitive way to bring your Figma designs to WordPress.
[](https://uichemy.com/v3/)
## What’s New in UiChemy 3.0?
We made improvements based on your feedback. Here’s what you can expect:
### 1. No More Forced Auto Layout
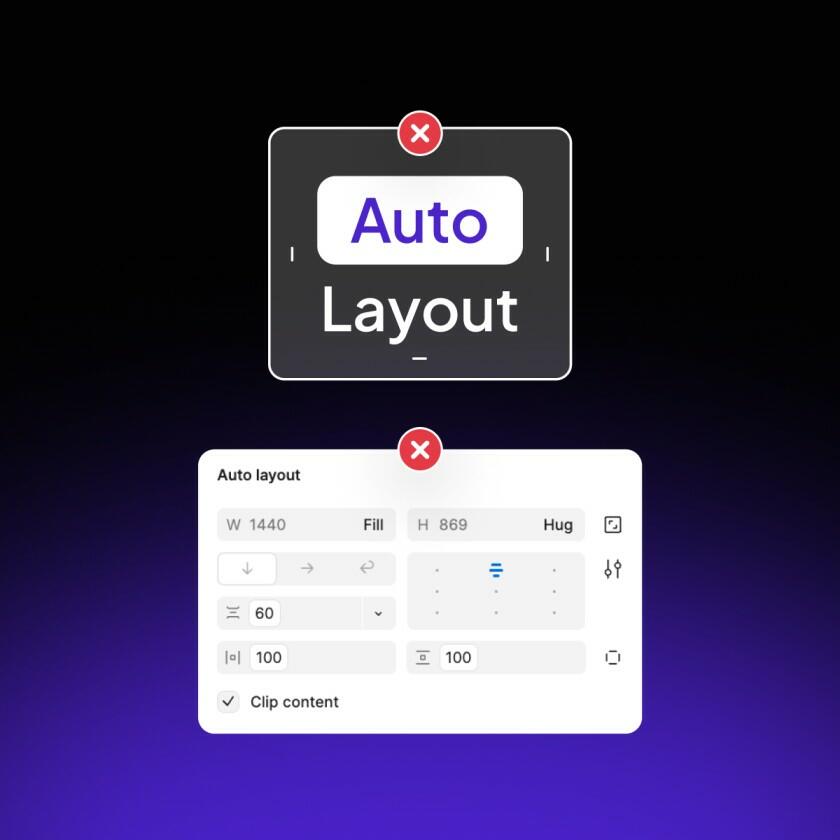
Design the way you like! You no longer have to use Auto Layout to make UiChemy work. Whether you prefer freeform designs or structured layouts, you’re in control.
### 2. A Drastically Simplified Figma Optimization Process
The 14-step optimization process is now just **1 step**. We streamlined everything so you can focus on designing, not on tedious setup tasks.

### 3. Global Styles & Box Width Support
Now you can keep your **Colors, Typography, and Box Width settings** synced across both Figma and WordPress with ease. No more mismatches or manual adjustments.
### 4. Better Responsive Design

Your designs will now adapt beautifully to all screen sizes. Whether it’s desktop, tablet, or mobile, UiChemy 3.0 ensures your site looks perfect everywhere.
### 5. A Smarter, More Intuitive Export Flow
Not sure which export method to use? UiChemy now **handles it for you**, making the process seamless and frustration-free. No more guesswork, just export and go live.
## See UiChemy 3.0 in Action
We put together a **quick introduction video** to show you just how smooth the new process is.
[](https://www.youtube.com/embed/CzYClxUyP_M)
## A Special Thanks to You!
This update wouldn’t have been possible without your feedback and support. You pushed us to improve, and we’re grateful for it. We’re committed to making UiChemy the best tool for Figma-to-WordPress conversions, and we’re just getting started.
### Limited-Time Launch Offer
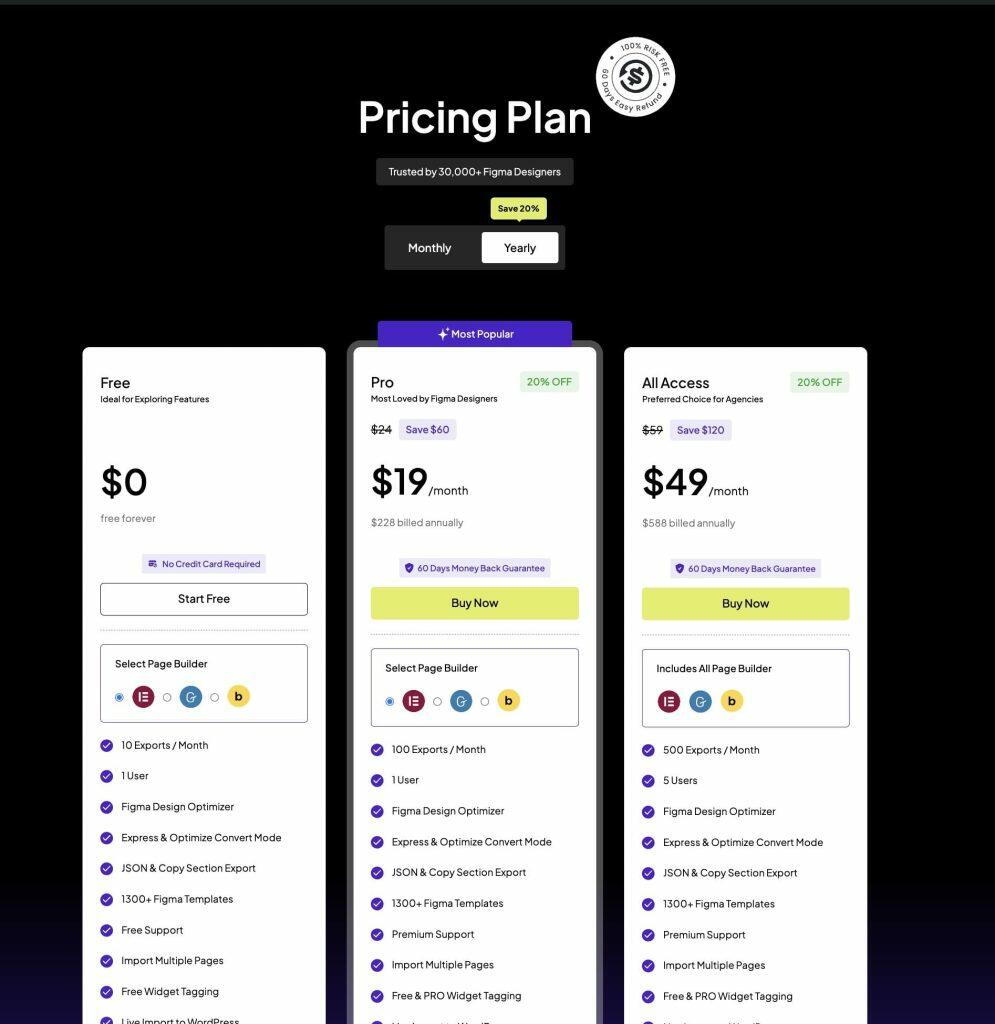
To celebrate UiChemy 3.0, we’re offering a **[special discount on our pricing plans](https://uichemy.com/pricing/)**. If you’ve been on the fence, now’s the perfect time to upgrade. Check out our pricing page for details.
Have questions or thoughts to share? Drop them in the comments below, we’re always listening!
We can’t wait to see how UiChemy 3.0 makes your workflow easier.
Thanks for being part of this journey!
---
# Massive New Updates with UiChemy — New Website, Onboarding & More
Source: https://uichemy.com/blog/massive-new-updates-with-uichemy-new-website-onboarding-and-more/
Big things are happening at UiChemy!
We’ve always aimed to make converting your Figma designs to WordPress as smooth as possible. But we know that for new users, getting started with the UiChemy Figma plugin can sometimes feel overwhelming.
That’s why we’re excited to roll out some major updates—ones that will make your experience even better. We’ve introduced a brand-new onboarding guide, redesigned our website, and added a few more features to ensure your journey from design to WordPress is seamless.
How does that look?
Here's a video overview.
https://www.youtube.com/watch?v=fbLXlDUmLtU
## New Onboarding for First Time UiChemy Users
During our user research, we discovered that many users were getting stuck and unsure of how to get started with UiChemy.
Since UiChemy is solving a unique problem, many people would prefer knowing how exactly this works
That’s why we’ve introduced a step-by-step onboarding guide to walk you through how UiChemy works.
This guided assistance will show you everything you need to know to successfully convert your Figma design into WordPress.
You can start from scratch with your design, but to make things easier, we’ve included a pre-optimized template in the onboarding process. Using this template as a base can help you get even better conversion results.
Take a look
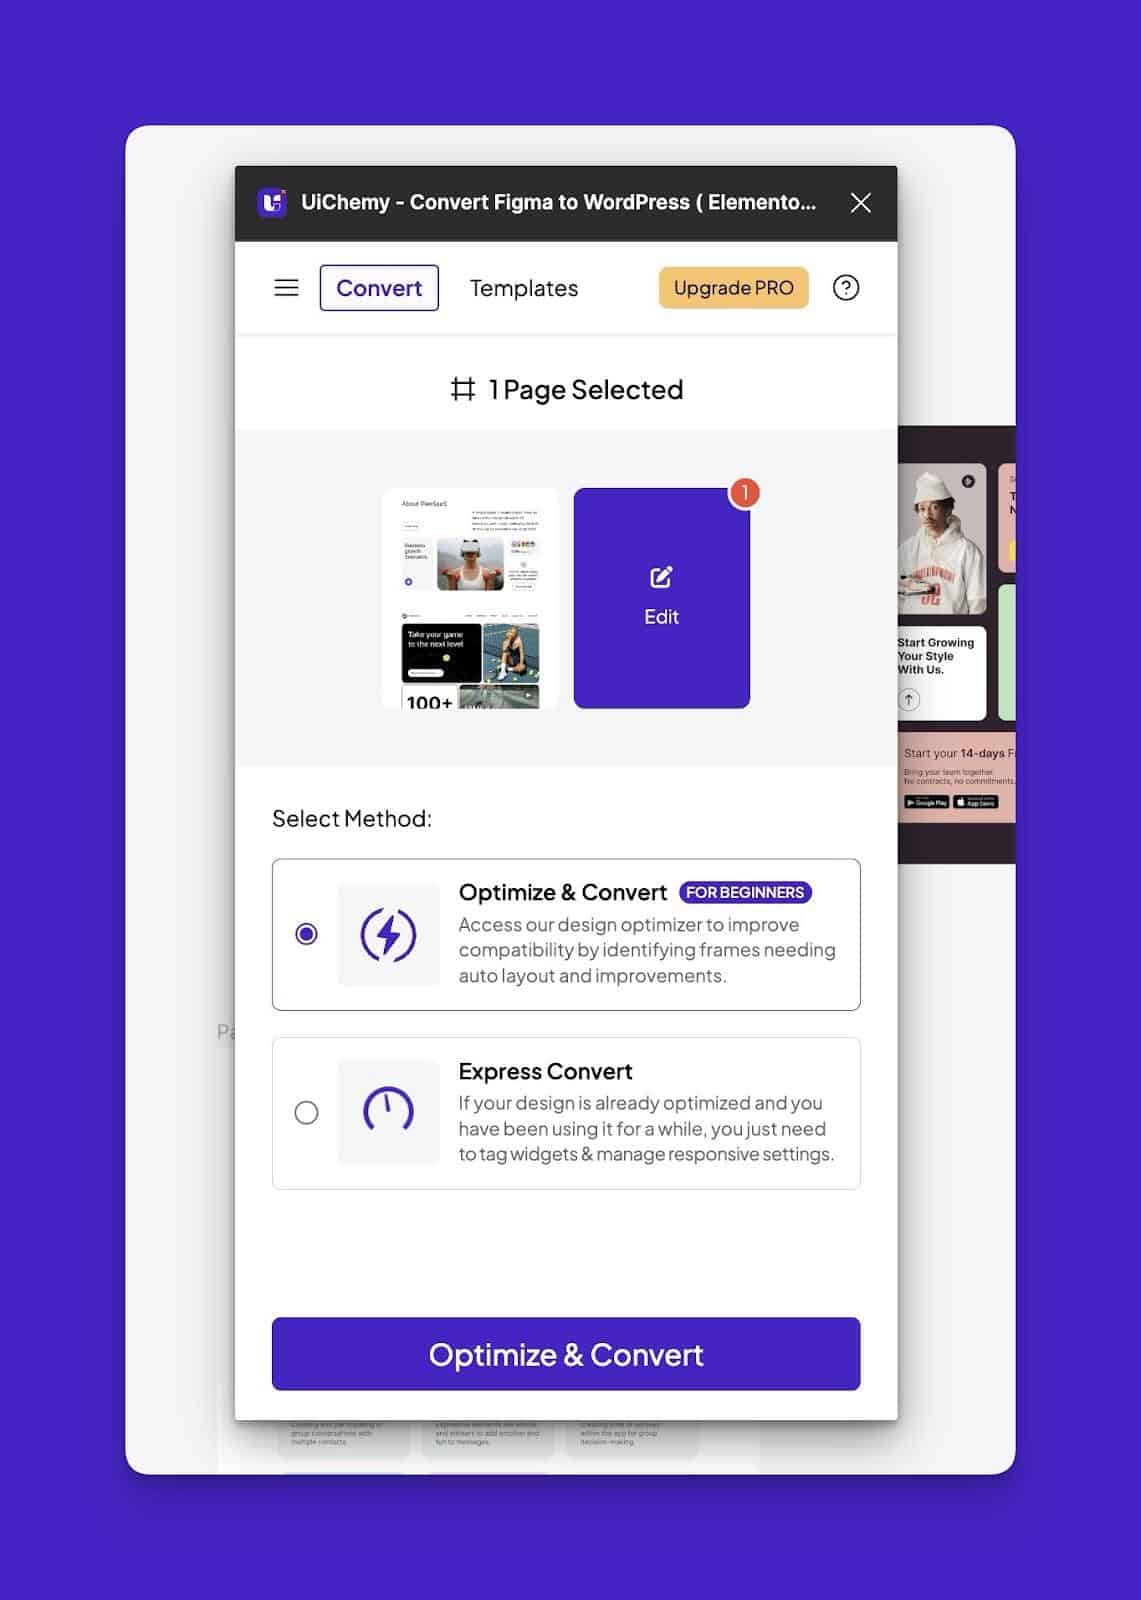
**Onboarding Steps, in a Nutshell:**
- Auto-selects a pre-optimized template to get you started.
- Guides you through the Optimize and Convert process (recommended).
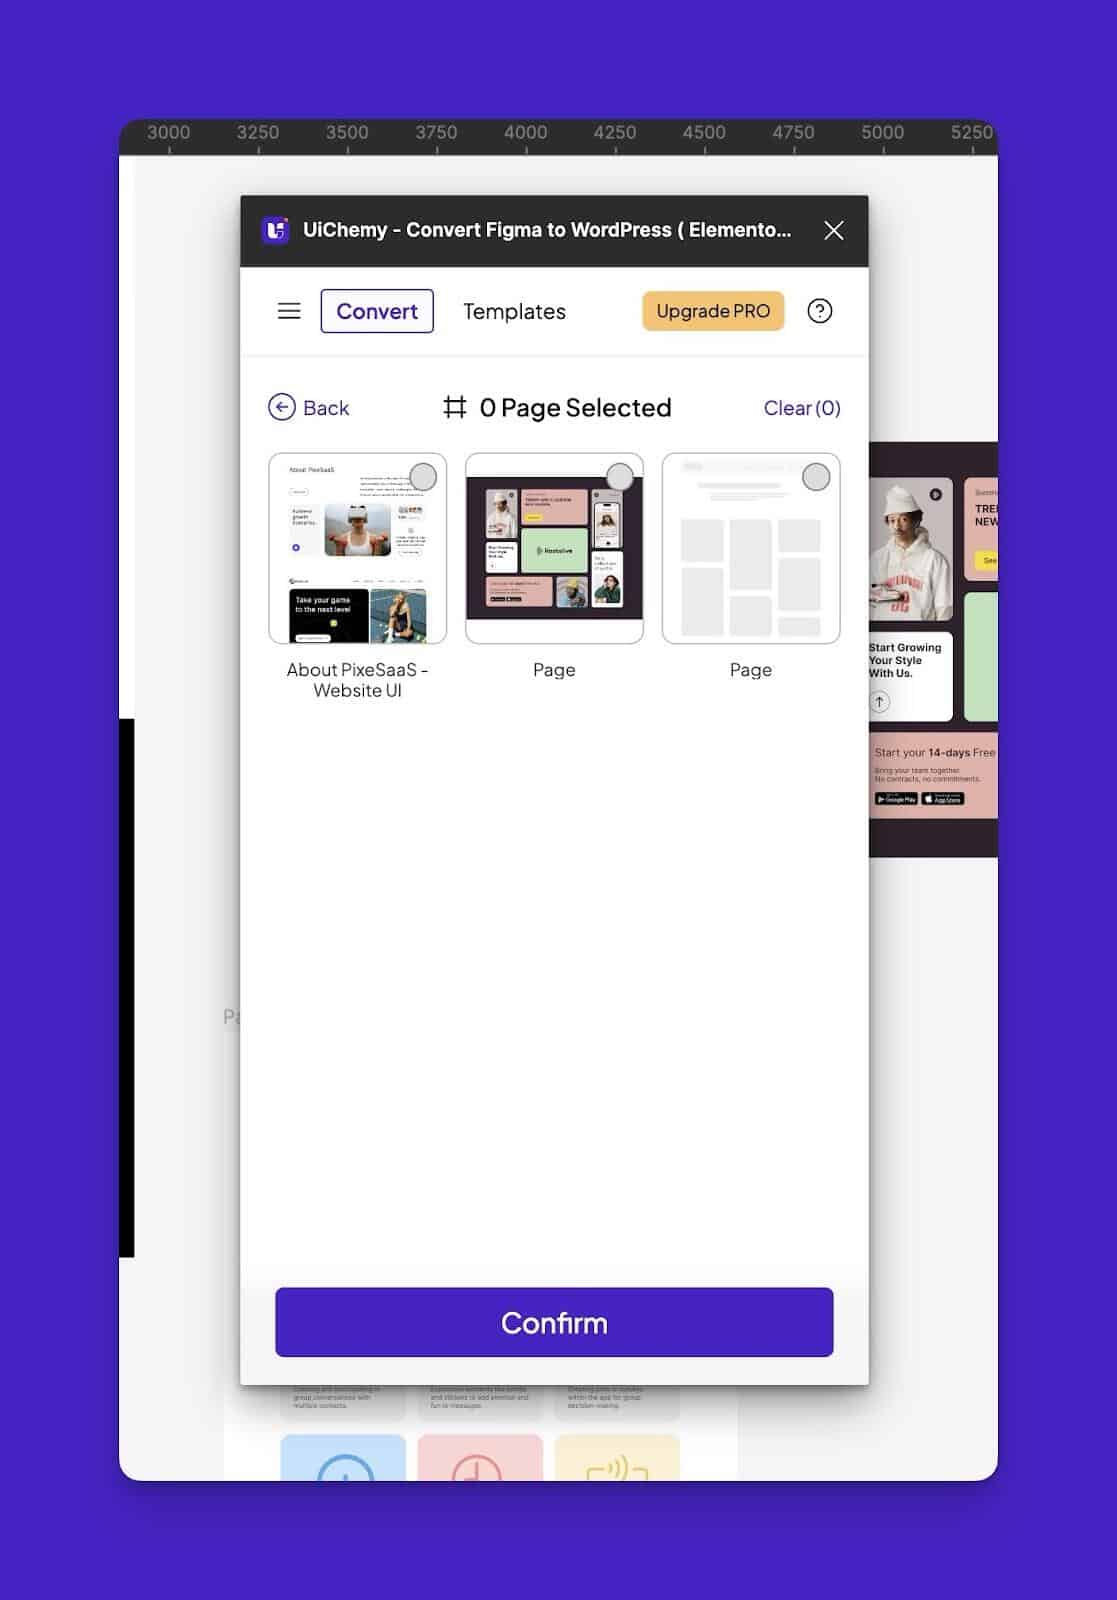
- Since it’s a pre-optimized template, it defaults to Express Convert for quicker results.
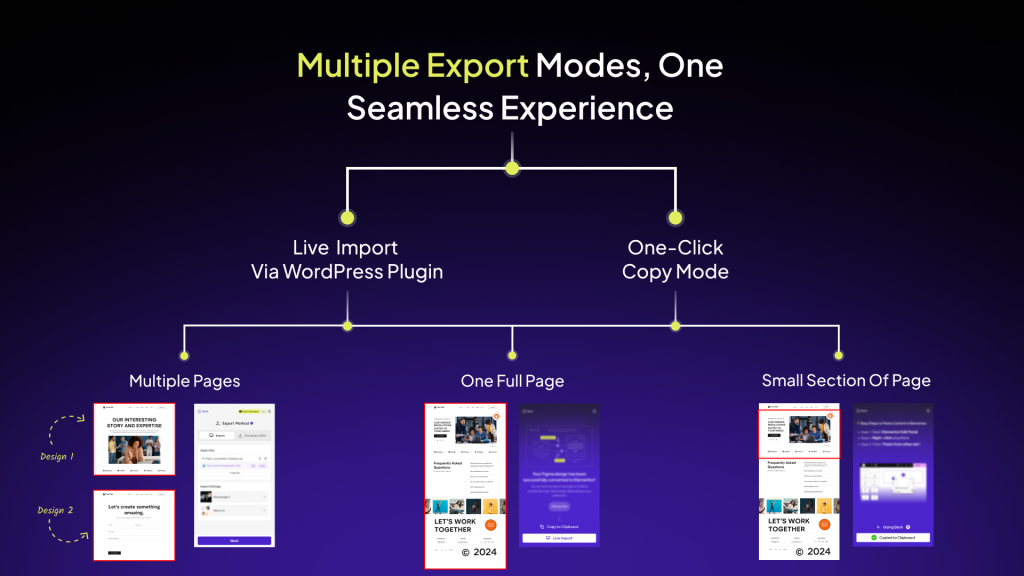
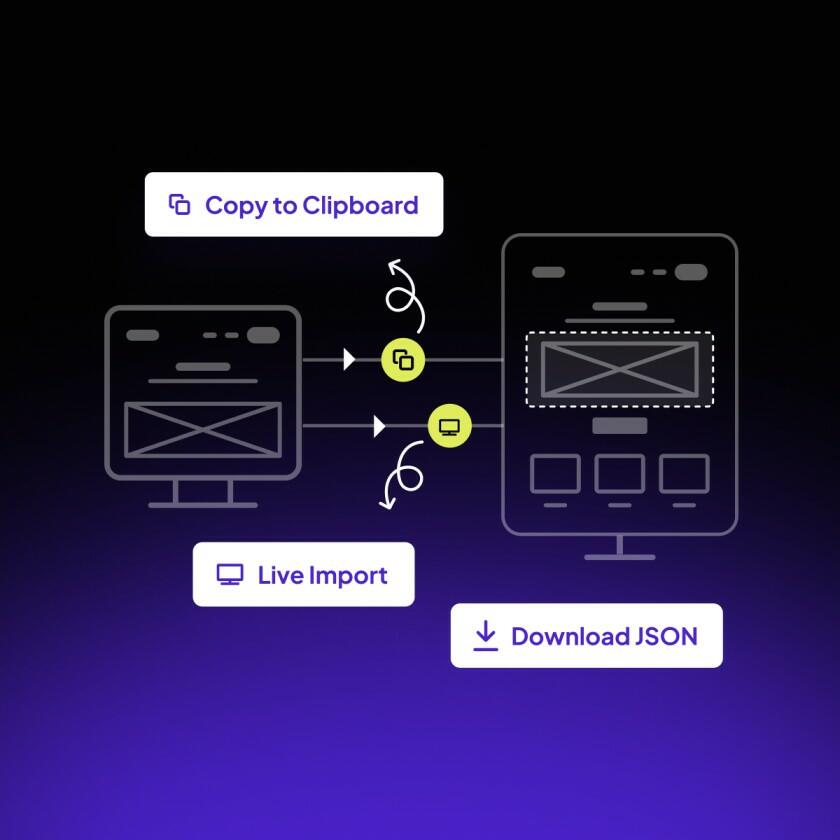
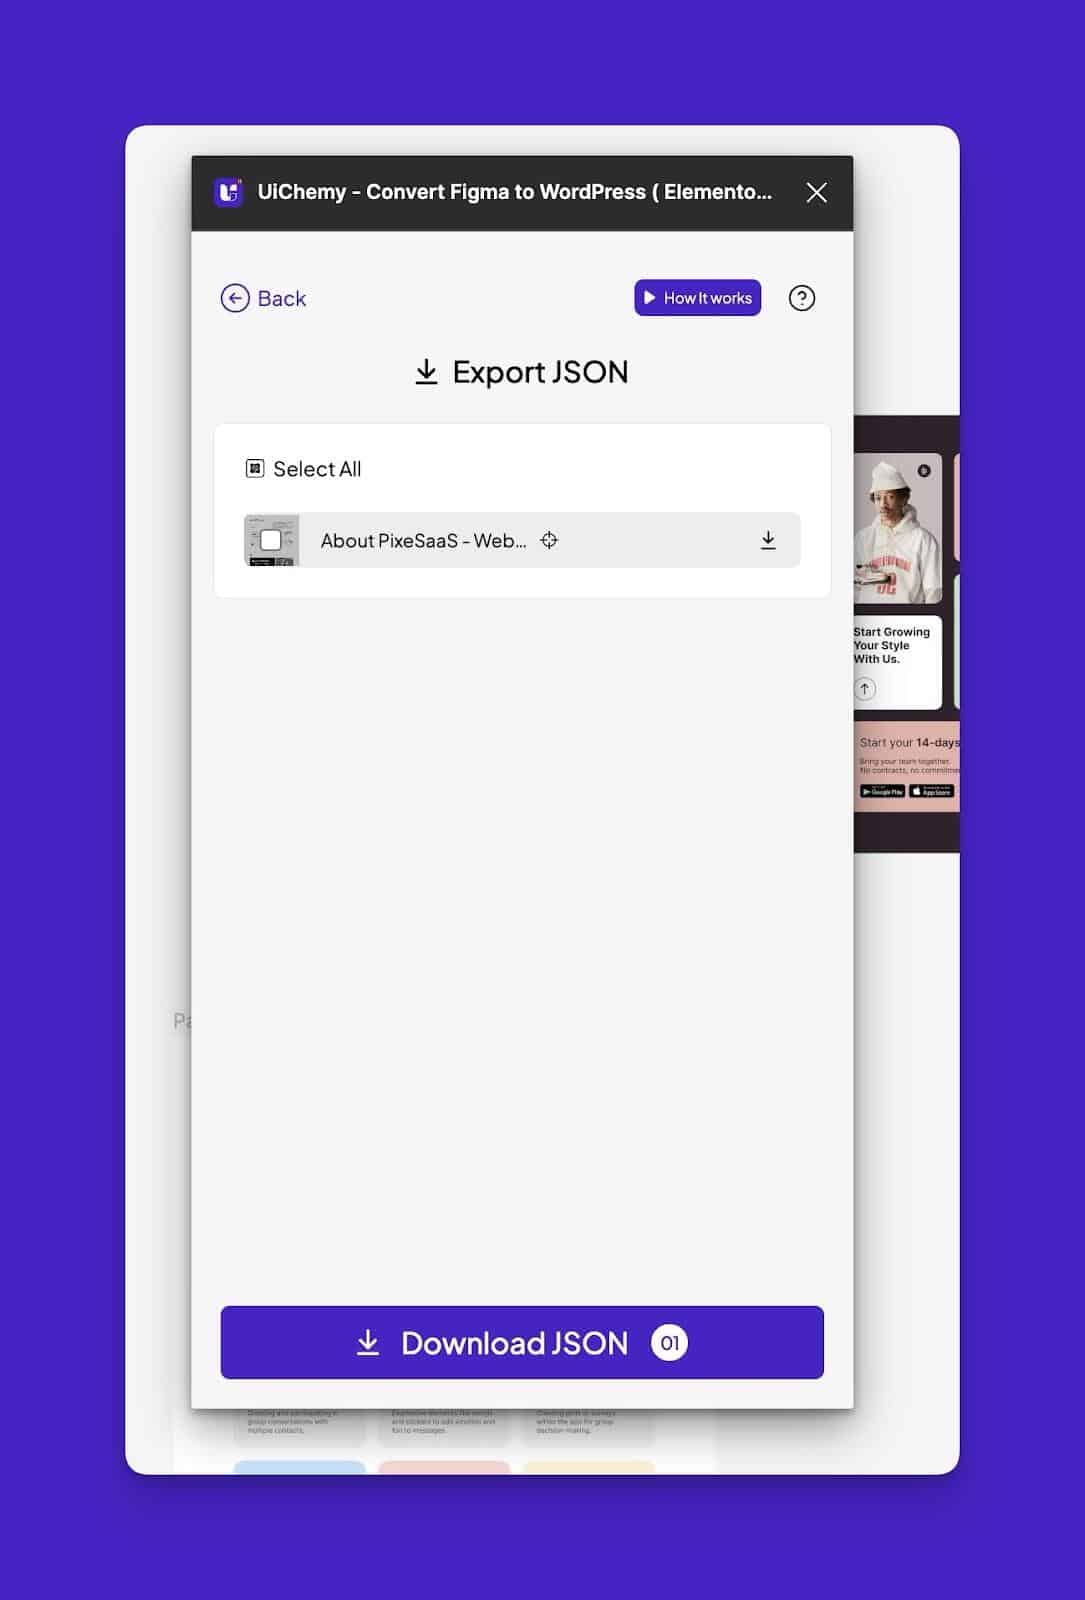
- Shows two export options:
**Download JSON** – for manual uploads. [[Check documentation](https://uichemy.com/docs/figma-design-to-elementor-using-uichemy/#How-to-Use-Manual-Download-For-Elementor-and-Bricks)].
- **Live Import** – for directly exporting to your connected WordPress site. [[Check documentation](https://uichemy.com/docs/what-is-direct-import/)].
- It walks you through the **Live Import** process.
- If you’ve connected a site before, it will ask you to select it and verify the connection. Otherwise, you’ll need to connect a new site by adding your site URL and token key. [[Check documentation](https://uichemy.com/docs/live-import-add-sites-import-settings/)].
- Once connected, it imports the template into your site as a page.
- Finally, the design is exported, and you can view the page live on your website.
We’re confident this new onboarding process will offer a smoother experience for all new users, helping them quickly get the hang of UiChemy.
## Completely Redesign of the Website for better understand of UiChemy in Action
Our old website did its job, but UiChemy has grown so much that we knew it was time for a change. With all the new features and updates, we’ve given the site a full makeover to better highlight what UiChemy can do and make it easier for you to find answers to any questions you have.
**Why This New Design?**
We’ve shifted to a product-first approach, making sure that every page, section, and word answers the key questions and concerns we hear from users.
Here are some of the common questions we’ve addressed:
- **Does this tool really work? It seems too good to be true.**
- **What’s the cost of bulk exporting?**
- **Will I get support if I run into issues?**
- **Can I see a demo before buying?**
- **If I make changes in Figma, will they sync back?**
With this in mind, we redesigned the site to directly address these concerns and make your experience smoother.
Here’s what you’ll find:
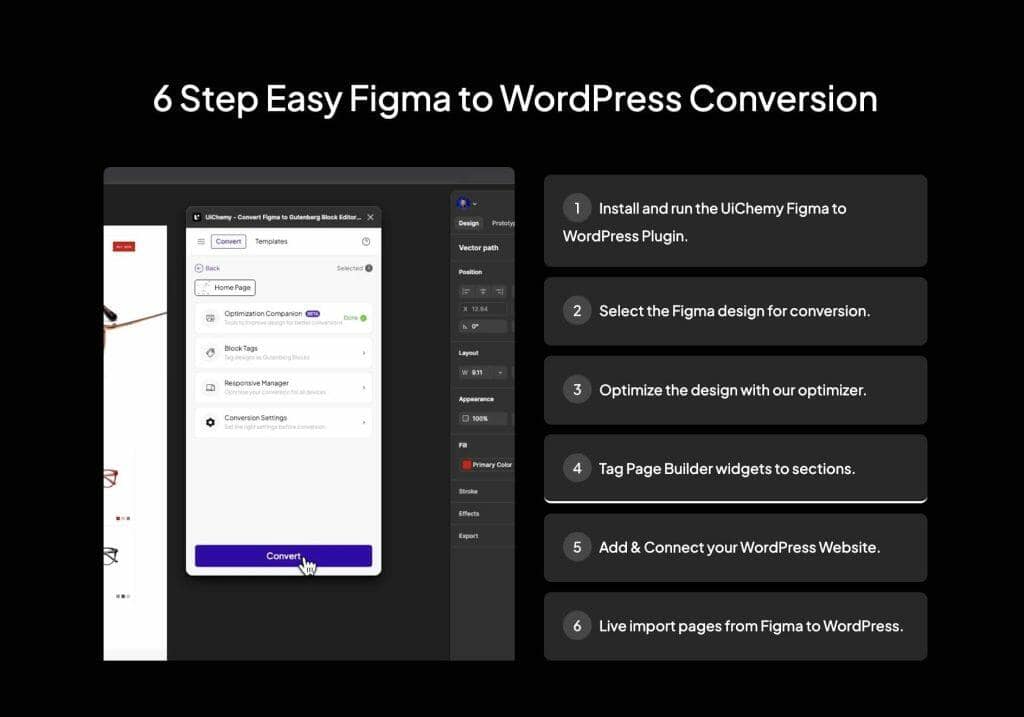
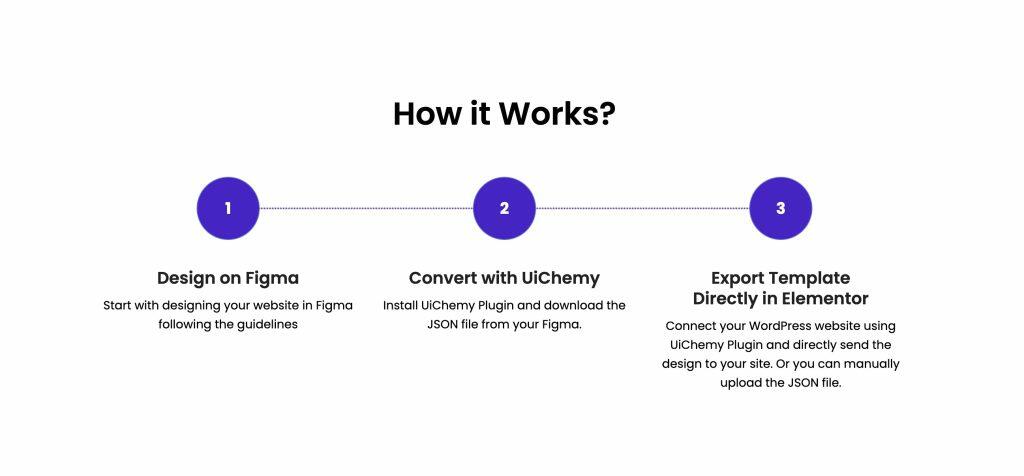
**Step-by-Step Walkthrough**: Many users were finding it difficult to get started with UiChemy that’s why we’ve added this section to broadly show exactly what steps you need to perform to convert your Figma design to WordPress.
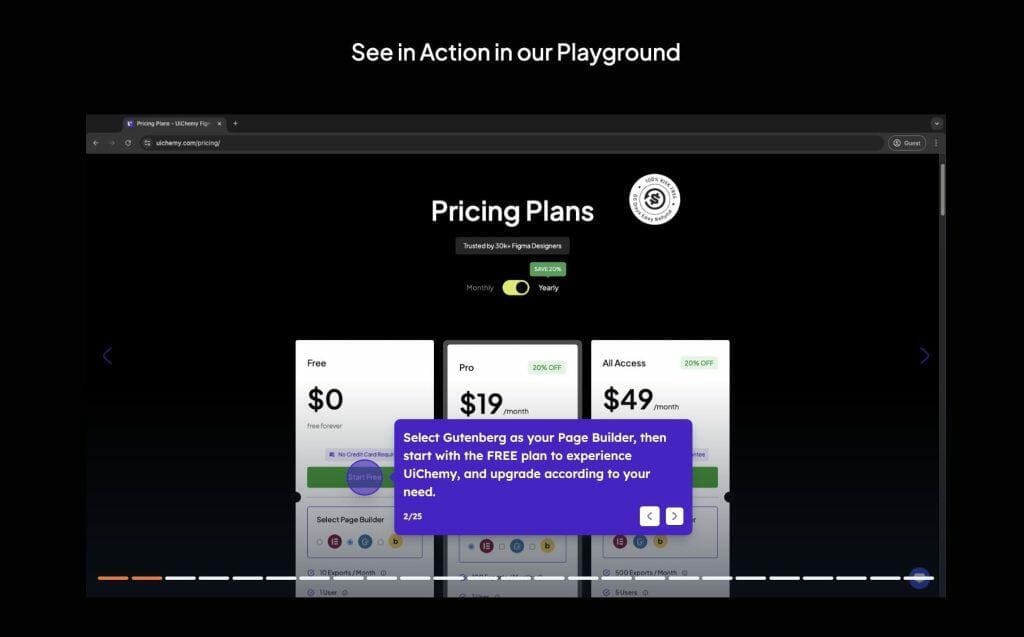
**Interactive Playground**: Many users wanted to see a demo beforehand, so we’ve added an interactive playground for you to try out UiChemy yourself with our 20+ steps.
This will give you an inside sneak pick of the actual UiChemy Figma plugin, from how to get the plugin to export the design.
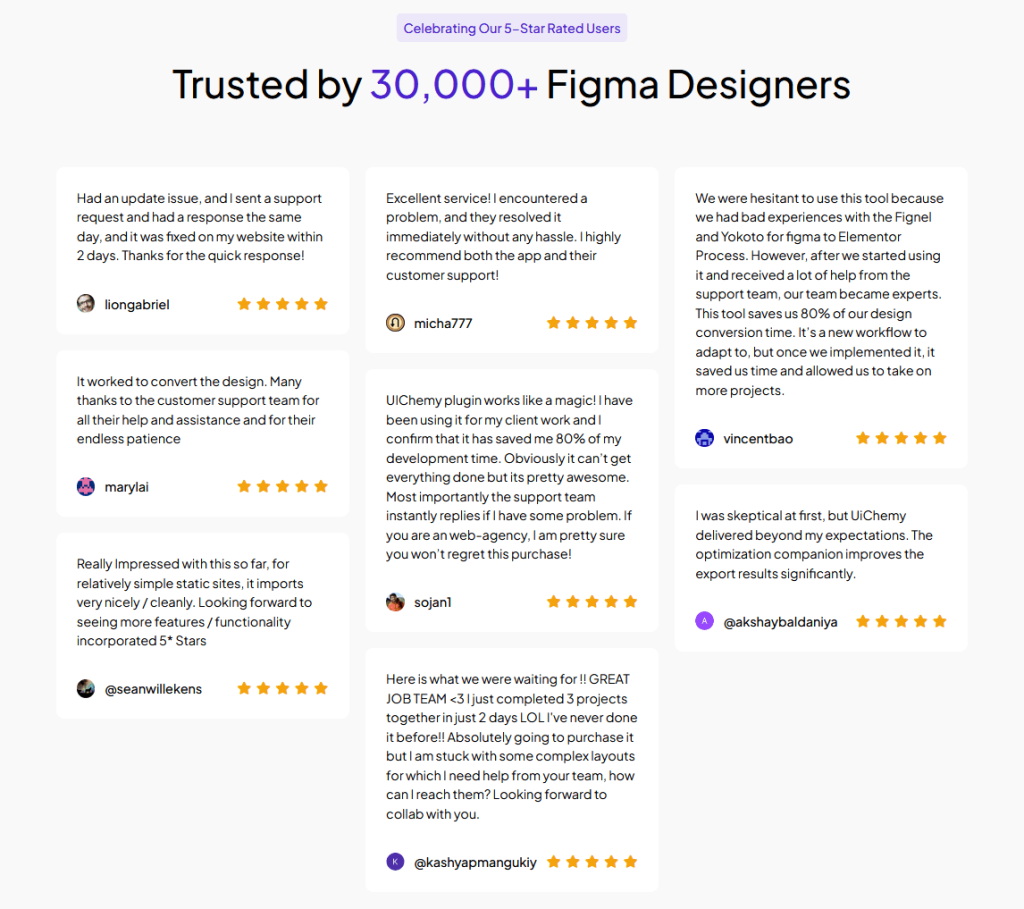
**Trust and Reliability**: Many users were doubtful if UiChemy would work for them or not. So we’ve added user reviews, media mentions, and logos to reassure you of UiChemy’s trustworthiness among designers, agencies, and developers.
**Transparent Pricing**: To clear any confusion around our pricing, we’ve made it more transparent and customized to different needs. Whether you’re looking into bulk exporting or testing the tool for the first time, we’ve clarified cost and value.
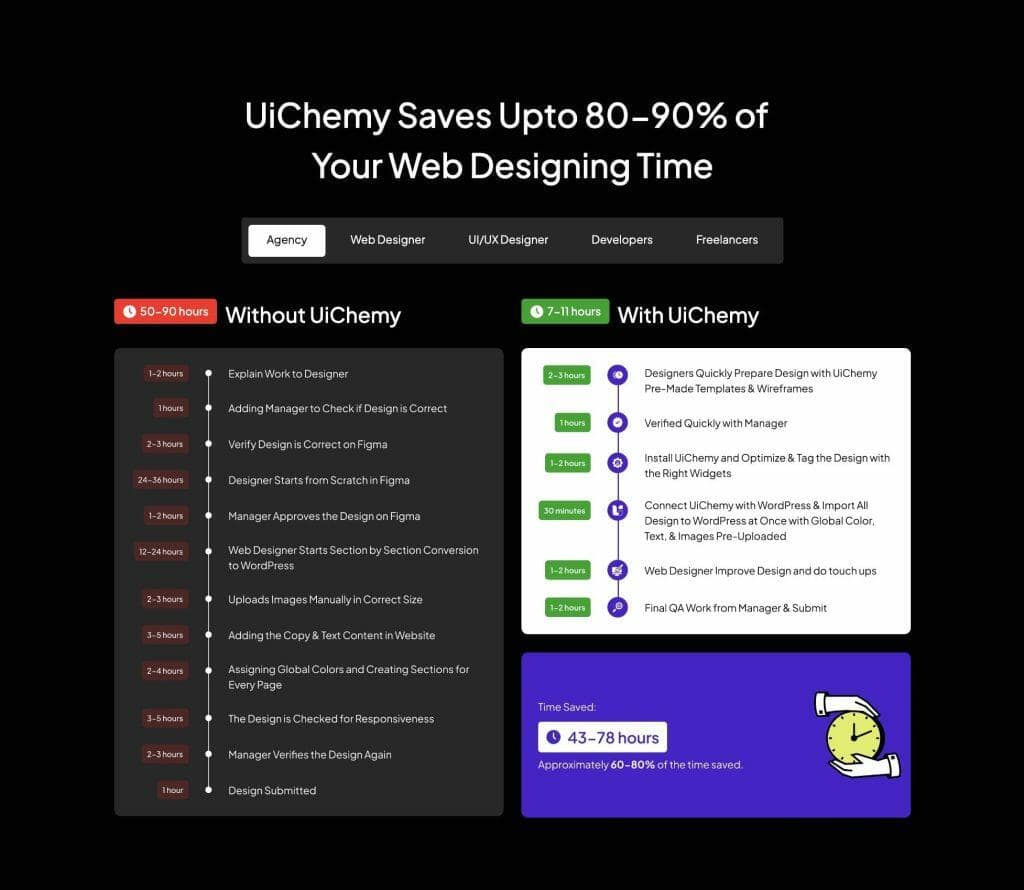
**Increased Productivity**: One of the main reasons for building UiChemy was to help you work faster, smarter, and more efficiently, that’s why we have highlighted how UiChemy can cut up to 80% of your time in the design-to-development process.
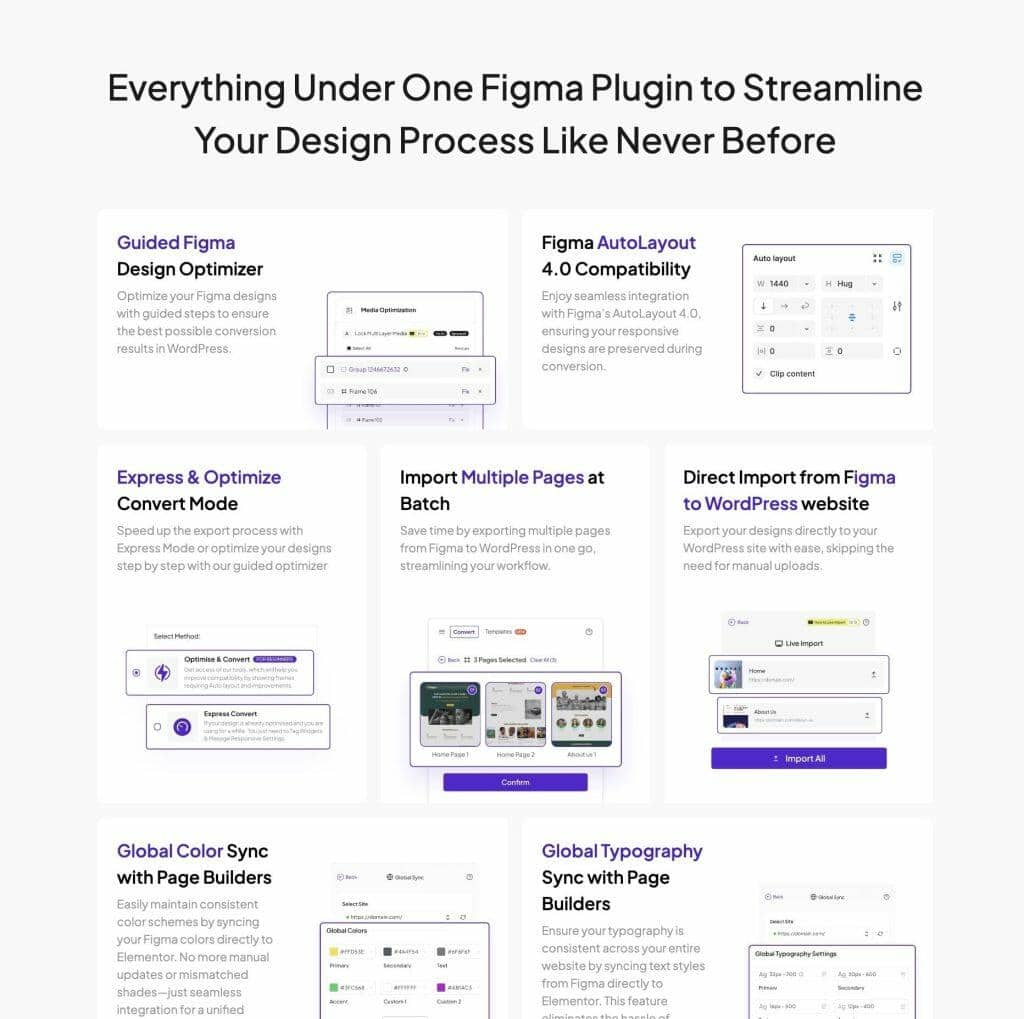
**Visual Explanation**: Additionally, we’ve removed technical jargon by introducing an animated Bento grid system that visually presents features in a straightforward, easy-to-understand manner.
## What’s Coming Up?
We’re committed to making the Figma-to-WordPress conversion process as smooth and user-friendly as possible.
We’ll continue improving the UiChemy WordPress plugin for even more accurate conversions.
In addition, we’re integrating UiChemy with our Nexter theme and theme builder, allowing you to create fully editable WordPress sites without any extra costs.
Stay tuned for more exciting updates!
---
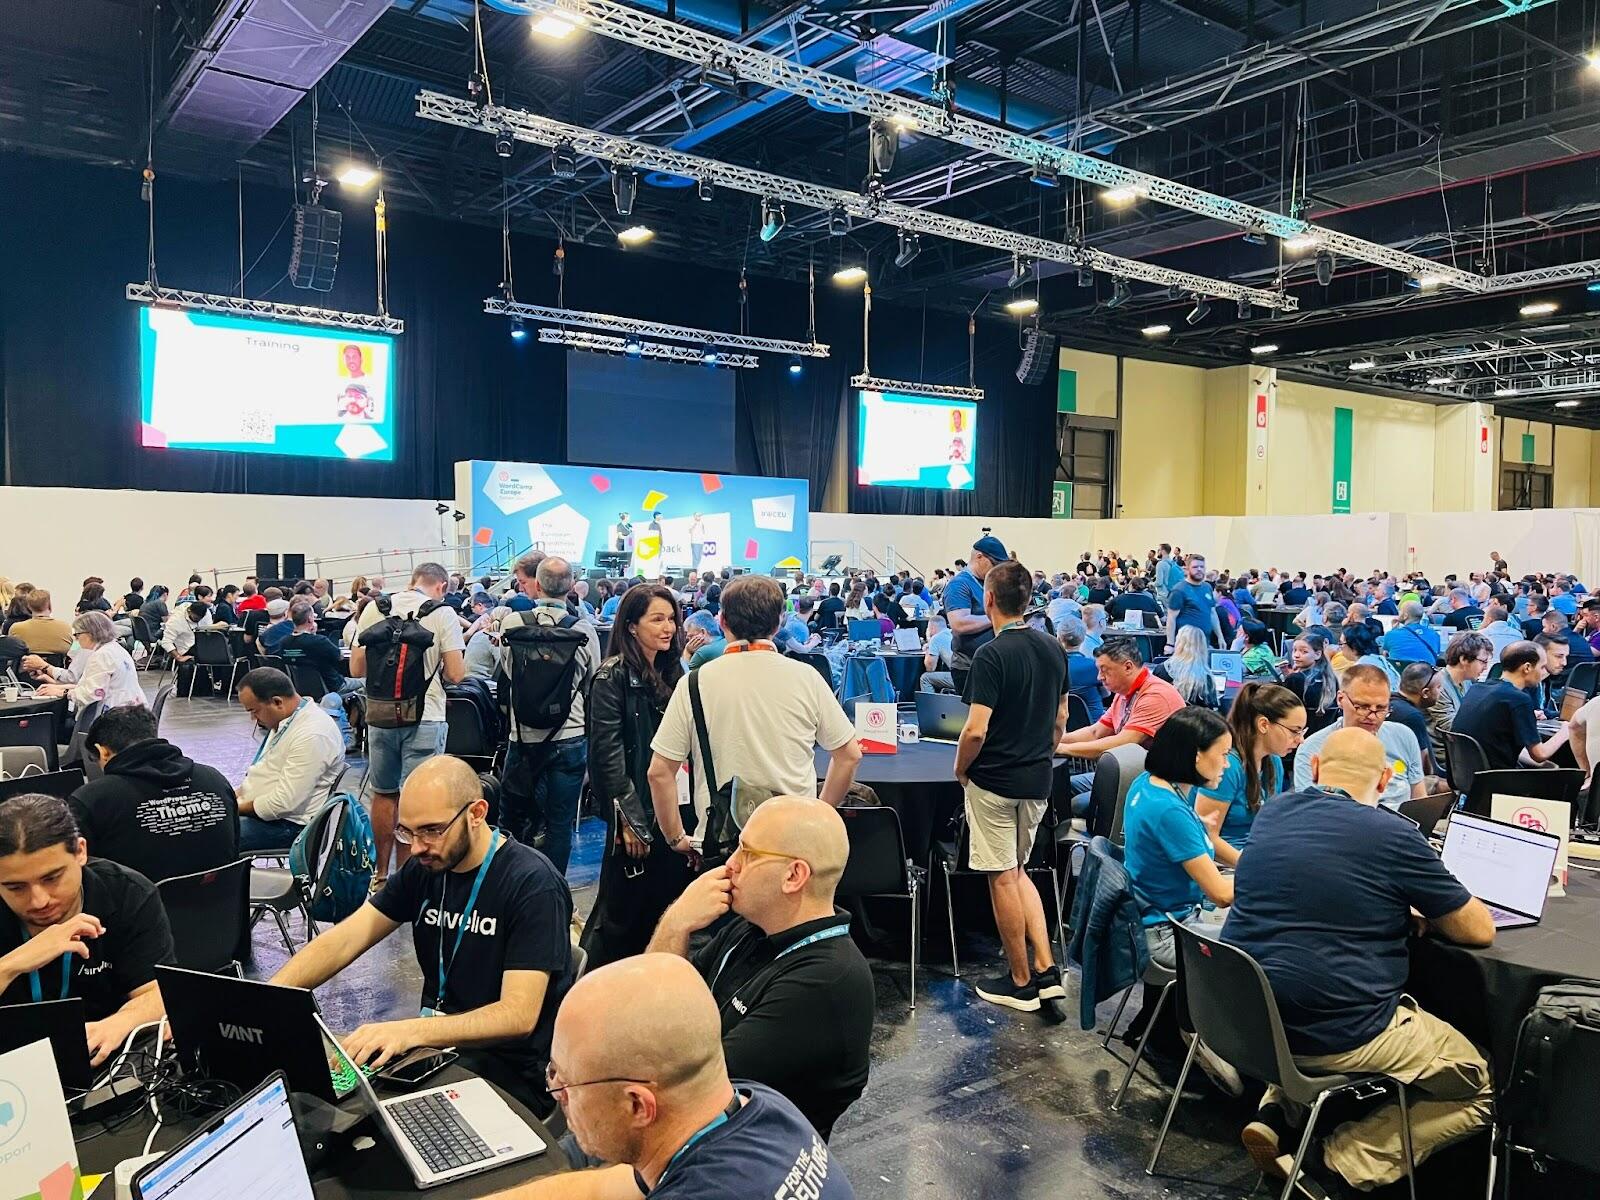
# Recap of WordCamp Europe 2024: Our Experience as Sponsor
Source: https://uichemy.com/blog/recap-of-wordcamp-europe-2024/
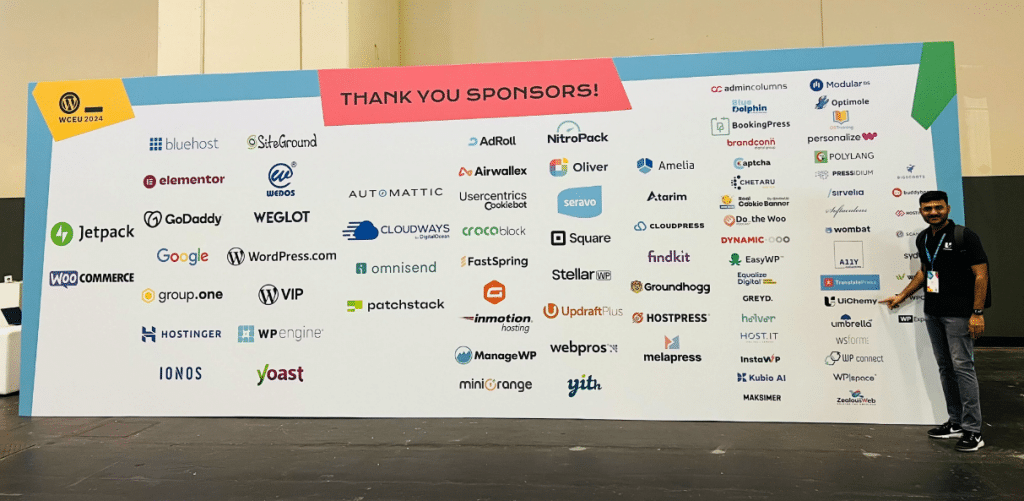
[**WordCamp Europe 2024**](https://europe.wordcamp.org/2024/), one of the most anticipated events in the WordPress community, took place this year in the beautiful city of Torino, Italy from 13th to 15th of June. As a company dedicated to enhancing the WordPress experience, [**UiChemy - Figma to WordPress**](https://uichemy.com/) was thrilled to be a sponsor of this event.
Our CEO, [**Sagar Patel**](https://sagar-patel.com/), led the charge, representing UiChemy in Torino. We're excited to share our journey from the planning stages to the energetic days of the event and the invaluable experiences gained along the way.
Here’s an inside look at how we organized our participation and the incredible impact it had.
### Planning for WordCamp Europe 2024
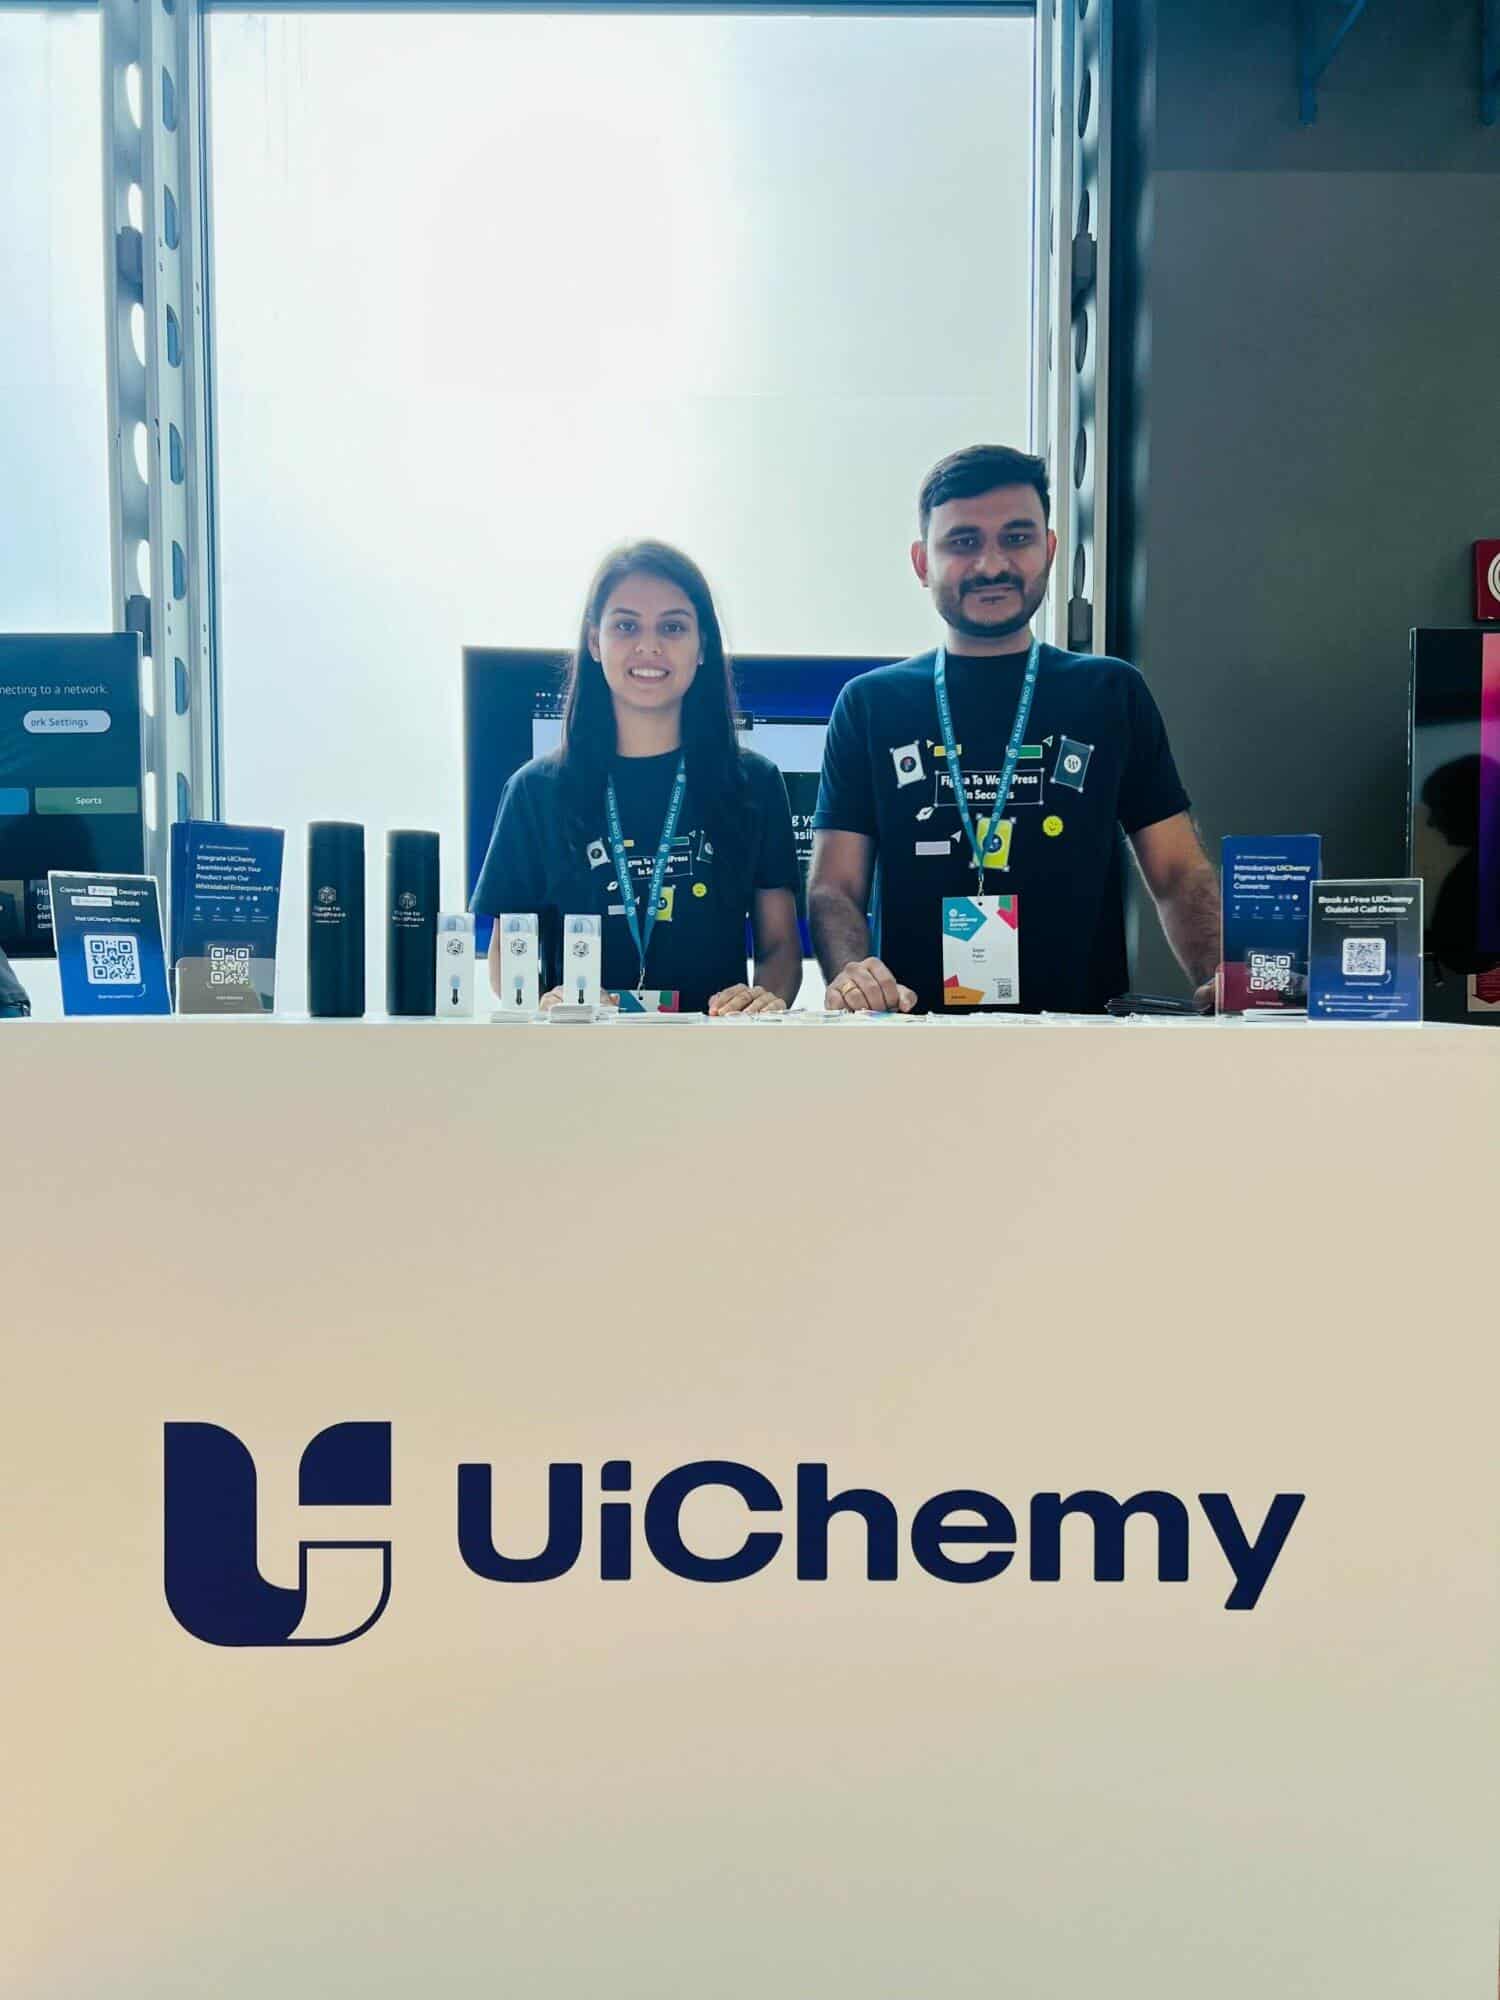
We wanted to make a big impact with our booth, so we prepared engaging product demos and designed eye-catching goodies. Our goal was to showcase not just UiChemy, but also our other products. We created unique stickers and packed attractive giveaways to ensure visitors remembered us.
https://twitter.com/uichemy/status/1800143493228339322
When our CEO, Sagar Patel, arrived in Torino, he took charge of setting up and organizing everything. His enthusiasm was evident in his tweet upon arrival:
https://twitter.com/sagarpatel124/status/1800921476973072663
## Days at WordCamp Europe
The event was a three-day program, starting with Contributor Day and ending with a lively after-party. Here’s a detailed explanation of our experience each day:
#### Day 1: The Contributor Day & Freemius Maker’s Meetup
The first day at WordCamp Europe is known as Contributors Day, a day dedicated to giving back to the WordPress community. It was a day filled with fun, learning, and invaluable insights.
All contributing to the growth and development of WordPress. The day was buzzing with activity, and we made numerous connections that we look forward to nurturing.
Following Contributors Day, we attended the Freemium party. This event was a delightful mix of fun, games, food, and networking.
https://twitter.com/freemius/status/1801230835984502801
It was a perfect opportunity to relax and engage with other product owners in a more informal setting. The Freemius Makers’ Meetup at WordCamp Europe 2024 was a highlight, allowing us to bond with like-minded innovators and creators.
https://www.youtube.com/watch?v=FtT-avxGbCo&t=178s
#### Day 2: The WordCamp Begins
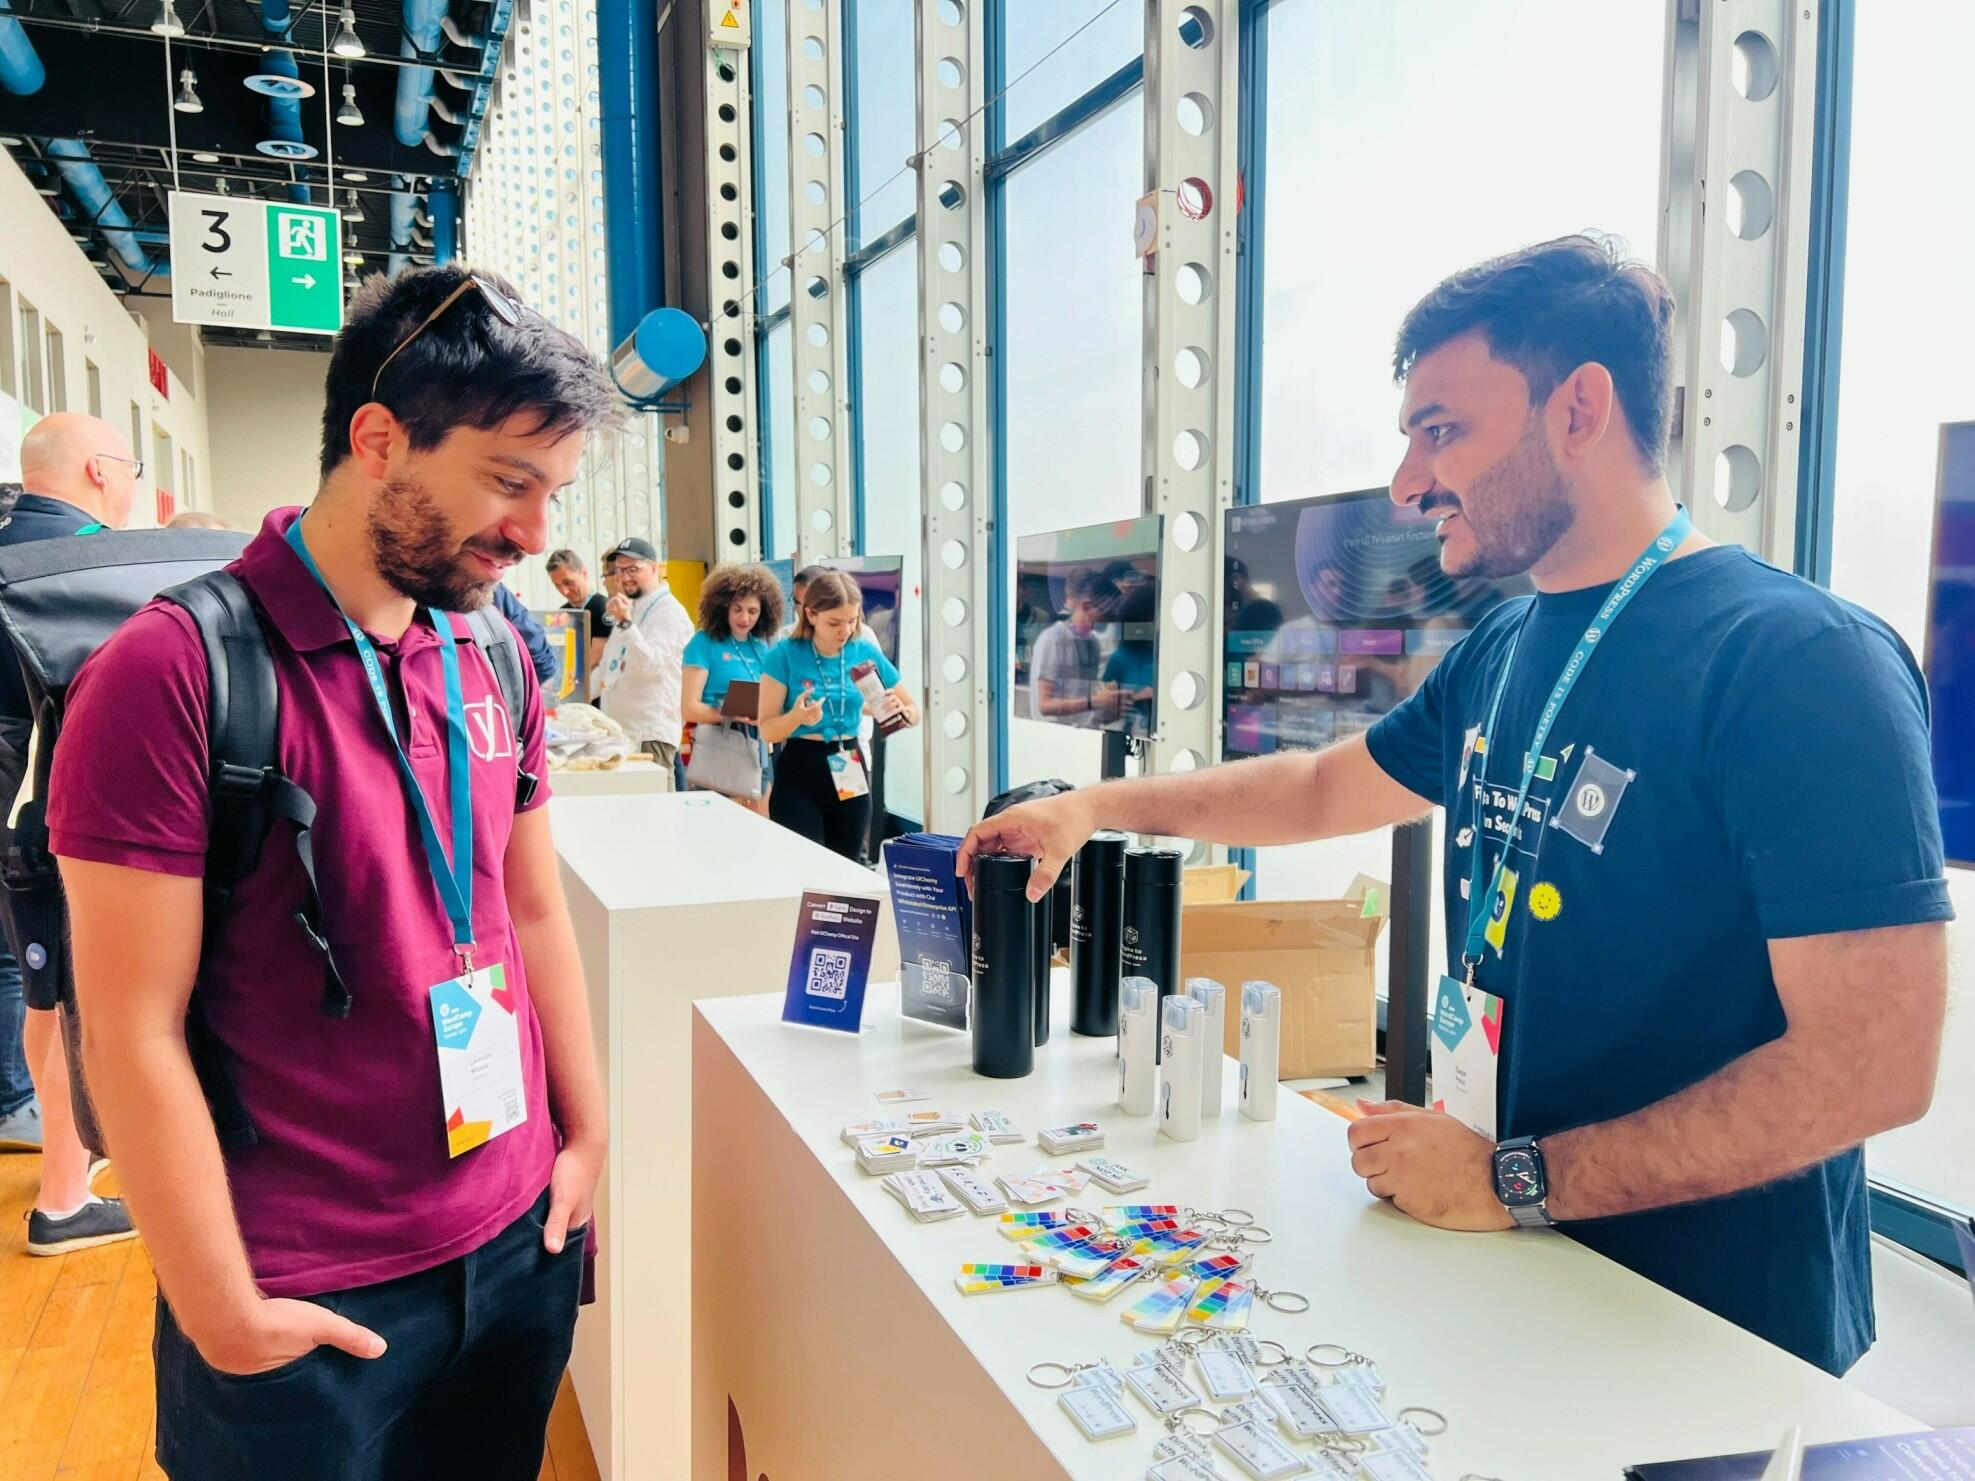
On the [second day](https://youtu.be/lhQDdSvt3IY), the main WordCamp activities began. Our booth was set up and ready, and we were thrilled to see many visitors. It was heartening to engage in meaningful conversations with so many attendees who were genuinely interested in our products.
We had the pleasure of meeting several amazing people, including [Leonidas Milosis](https://x.com/LeonidasMilosis), [Anne Bovelett](https://x.com/Bovelett), Luisa Fassino, Francesca Spampinato, [Zach Tirrell](https://x.com/tirrell), [Varun Dubey](https://x.com/vapvarun/status/1802009581859508484), [Adam W. Warner](https://x.com/wpmodder), and [Michelle Frechette](https://x.com/michelleames). Each conversation was insightful and inspiring, providing us with valuable feedback and new ideas.
https://twitter.com/uichemy/status/1801908675323335029
#### Day 3: The Final Day & End Note from Matt Mullenweg
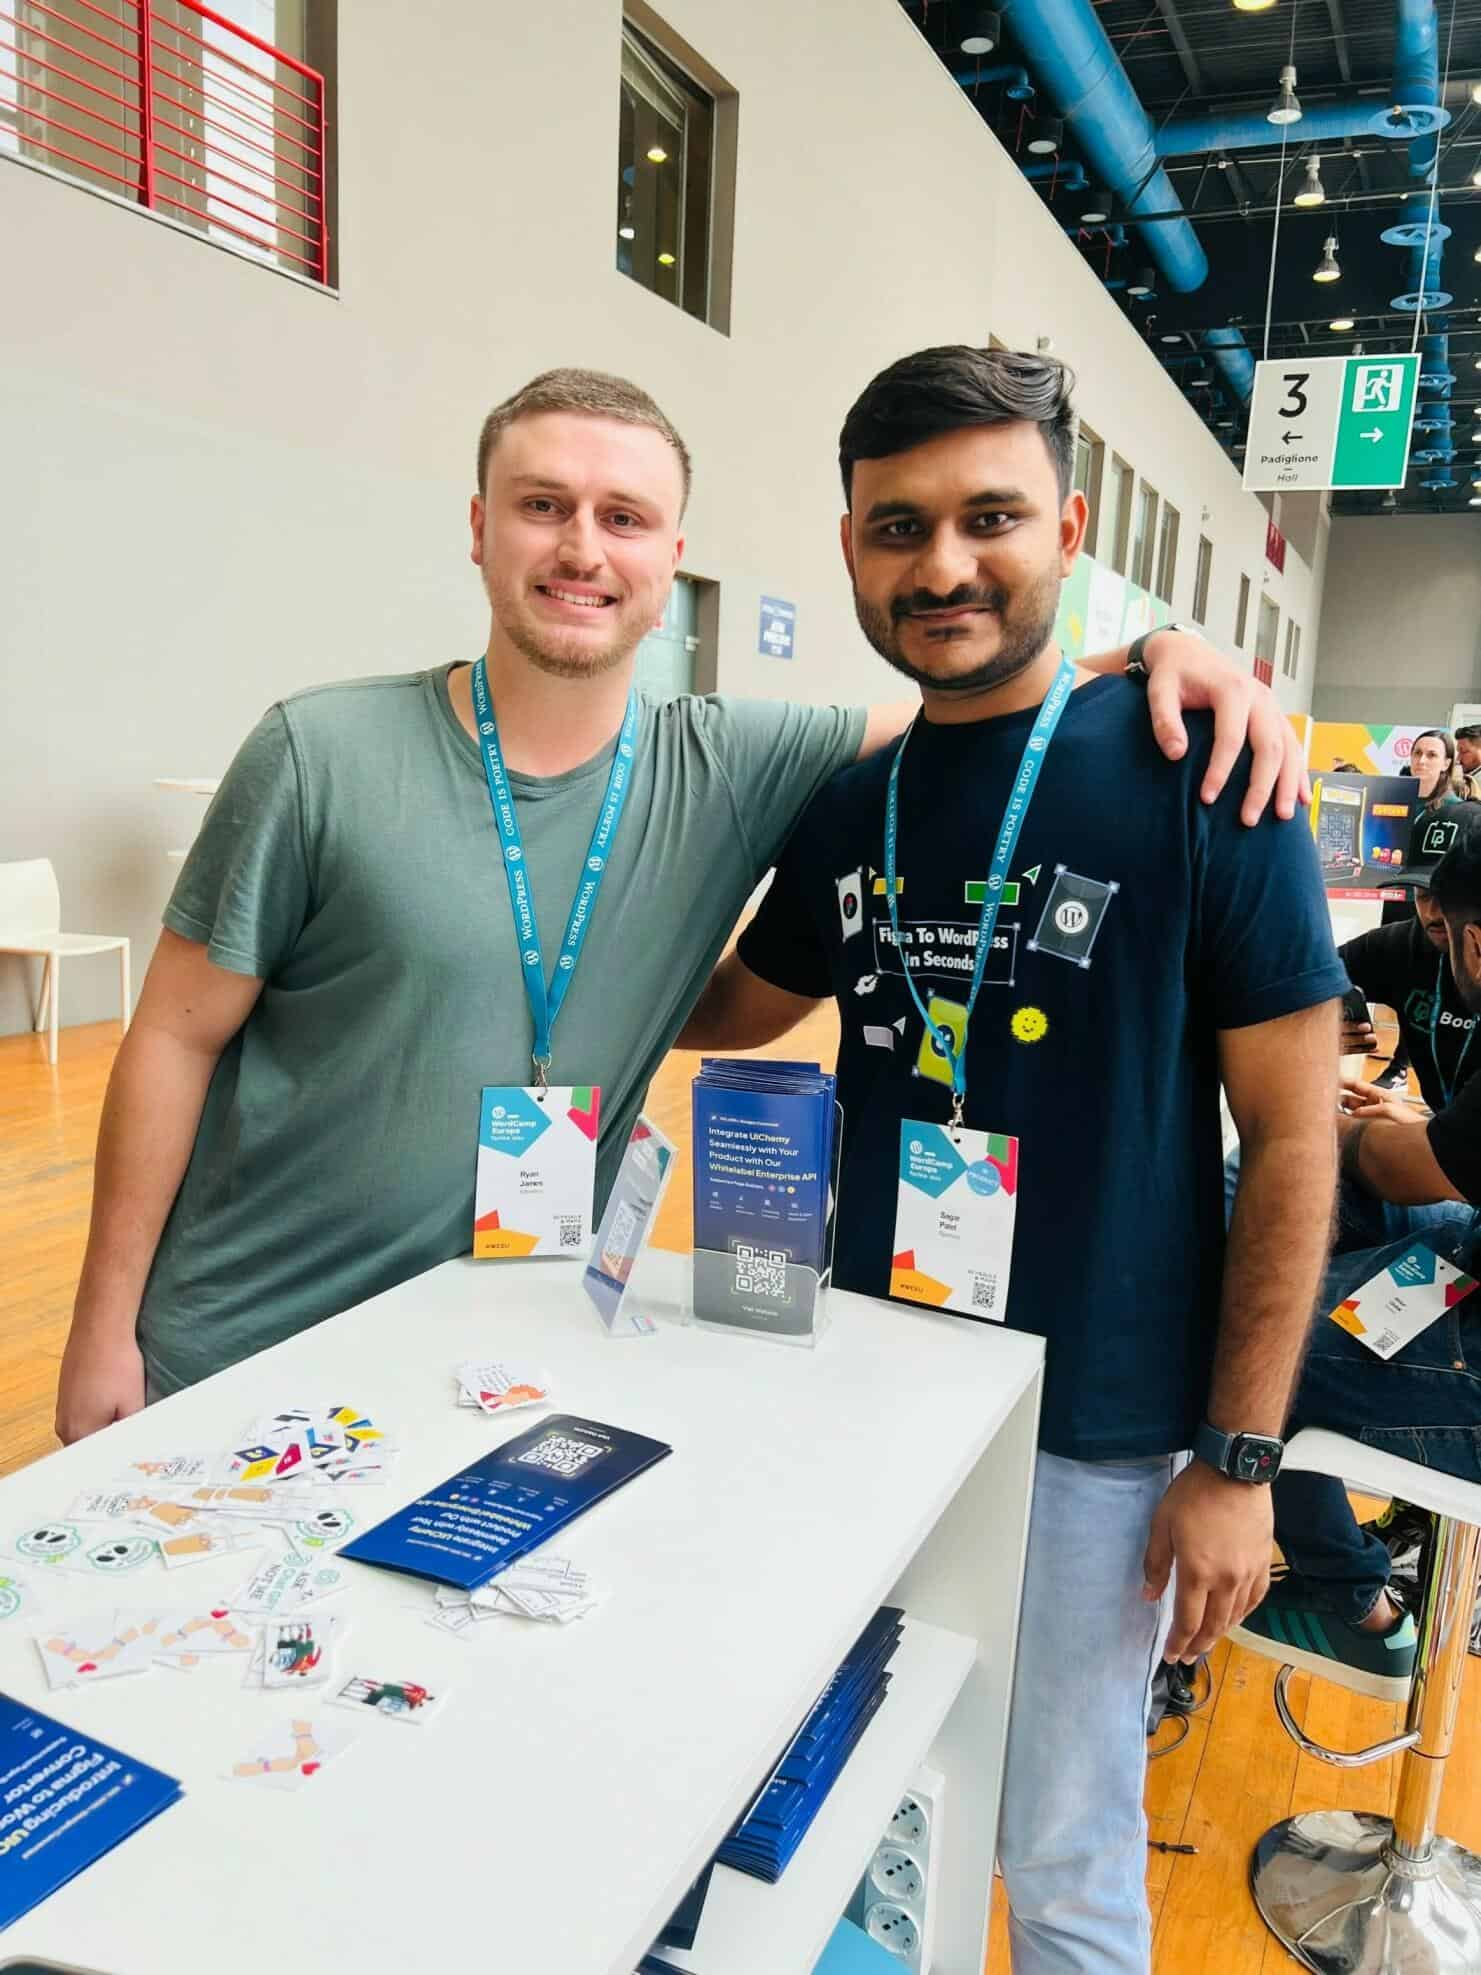
The third day was the best part of our WordCamp Europe experience. Our booth was very busy with activity as more people stopped by. We made new connections and strengthened existing ones with sponsors, organizers, volunteers, and speakers. It was all about building relationships and exchanging ideas, making it a truly memorable day.

During the event, Matt Mullenweg reflected on WordPress's 21-year journey, marveling at how much the world has transformed. His optimism about the future resonated deeply with us as WordPress enthusiasts, inspiring us to envision the evolving landscape of technology and community.
https://twitter.com/WordPress/status/1801992617523060757
#### The Afterparty
The after party was fun and the highlight was a special talk about UiChemy, our Figma to WordPress plugin. Matt shared his vision of Data Liberation and how we are making it happen for the WordPress community.
The positive response and feedback from [Matt Mullenweg](https://x.com/photomatt) gave us even more validation and support. We are excited to save millions of human hours with this tool.
https://twitter.com/sagarpatel124/status/1802098804893597883
### Conference Talks
The conference at WordCamp Europe 2024 covered a diverse range of subjects and featured many captivating speakers. Attendees had the opportunity to delve into various aspects of WordPress development, design, and community building, gaining valuable insights and knowledge.
A heartfelt shoutout goes to the incredible team of volunteers, sponsors, and everyone involved in orchestrating such a magnificent event. Their dedication and hard work ensured the smooth running of the conference, creating a welcoming environment for all attendees to learn and connect.
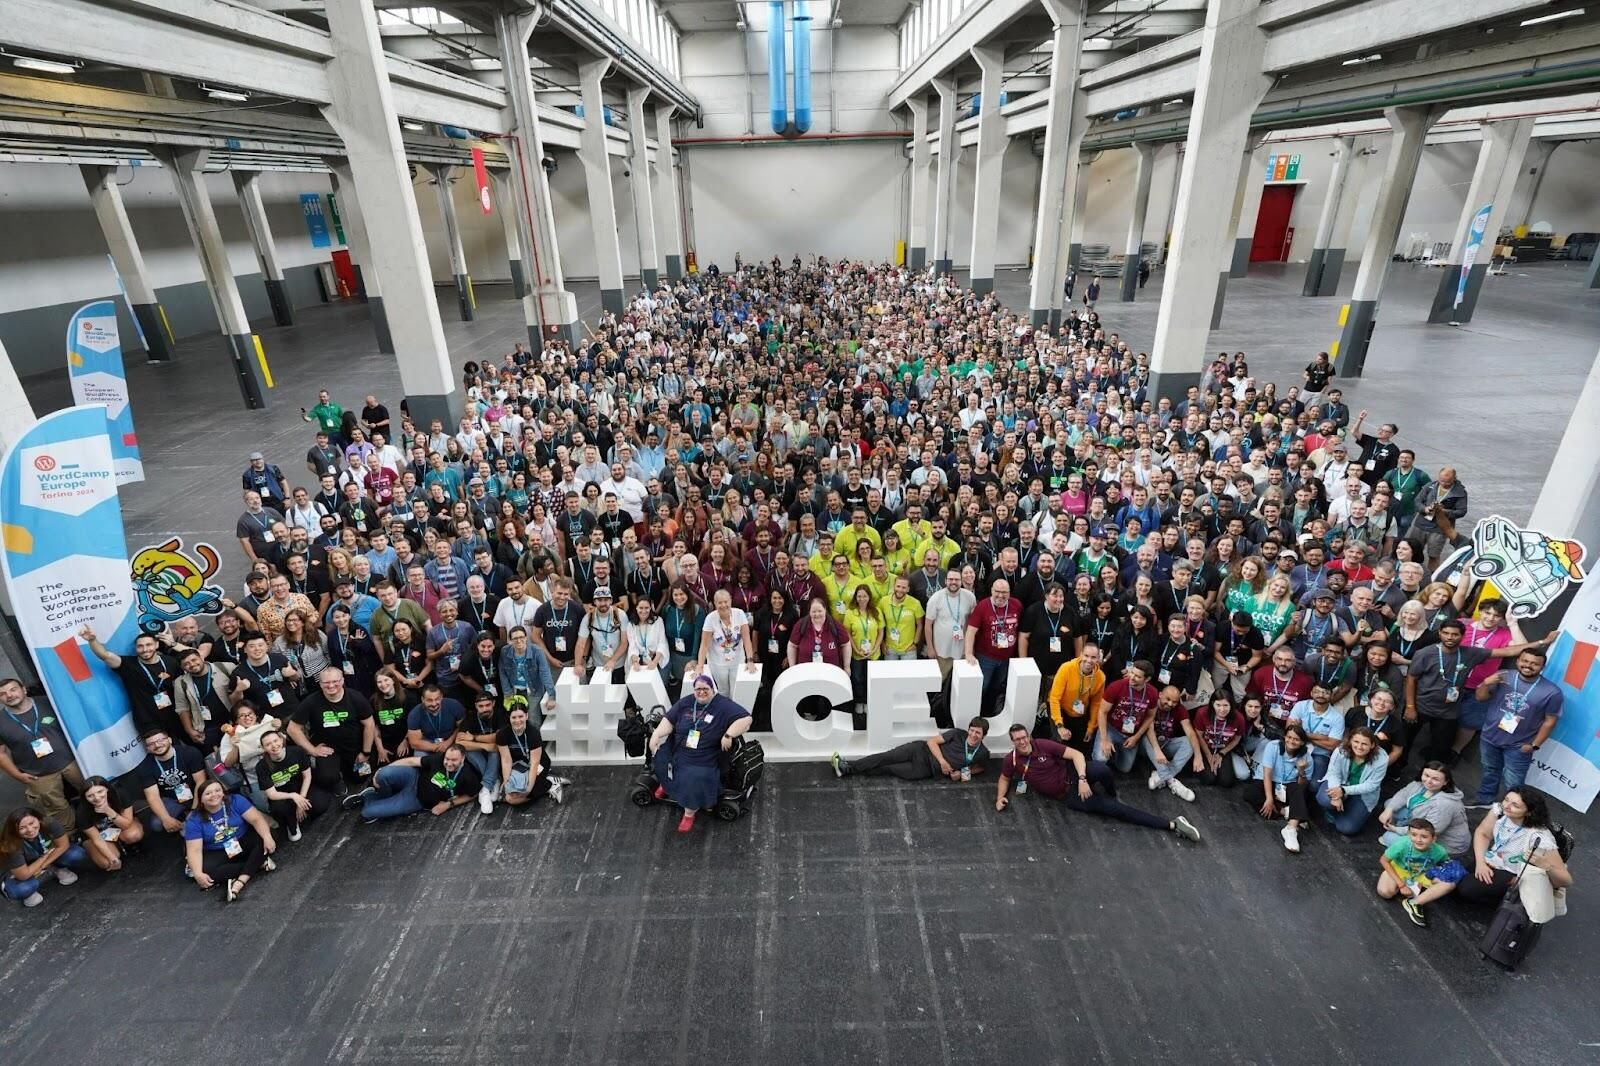
With over 2500 visitors at WordCamp Europe 2024, the event was a resounding success.
https://twitter.com/uichemy/status/1802002576696578339
If you missed any sessions, you can catch up by following the [WordCamp Europe YouTube channel](https://www.youtube.com/channel/UCaYQGYDpXpU4A17kxN-AgJQ), where sessions are archived for viewing.
### Our Final Thoughts
Sponsoring WordCamp Europe at a continental level for the first time was an incredible experience for us. We had the opportunity to connect with a diverse array of attendees and forge meaningful relationships.
Networking was enjoyable, and we appreciated the warm reception from everyone we met.
The enthusiastic audience allowed us to showcase the power of UiChemy and demonstrate how it can enhance the WordPress experience for users worldwide. We are eager to continue supporting future WordCamps and contributing to the WordPress community.
A heartfelt thank you goes to the entire volunteer and organization team of WordCamp Europe for their hard work and dedication in making this event possible.
We are excited to embark on this journey further and look forward to meeting you all again at WordCamp Europe 2025 in Basel, Switzerland!
https://twitter.com/uichemy/status/1802005323886006310
---
# Introducing UiChemy 2.0: More Powerful than Ever Before
Source: https://uichemy.com/blog/introducing-uichemy-2-0-more-powerful-than-ever-before/
We are embarking on an exciting journey with the release of UiChemy 2.0, a groundbreaking update that takes our Figma to WordPress conversion capabilities to new heights.
This new version introduces a host of innovative features designed to streamline and enhance the conversion process, making it faster, more efficient, and more accurate. Our mission has always been to bridge the gap between Figma and WordPress, and UiChemy 2.0 is a significant step forward in achieving that goal.
### A Heartfelt Thanks to Our 50+ Beta Agencies
Before diving into the details of the new features, we want to extend a heartfelt thank you to the 50+ early users who joined our beta feedback program. Your support and invaluable feedback have been instrumental in shaping UiChemy 2.0. We are committed to continuous improvement, and your insights have helped us fine-tune this release to better meet your needs.
We are still eager to hear more from our users. If you haven’t yet, please consider setting up a feedback or demo call with our team using [this link. ](https://uichemy.com/book-a-demo/)
We value your input and are always looking for ways to improve experience.
https://youtu.be/2drdmiQdhew
## UPDATE 1 : Select & Convert Multiple Figma Frames at Once
One of the most anticipated features of UiChemy 2.0 is the ability to select and convert multiple Figma frames simultaneously. This new functionality is a game-changer for designers and developers alike, as it significantly reduces the time and effort required to convert designs into WordPress pages.
In previous versions, converting multiple frames often involved a repetitive and time-consuming process. With UiChemy 2.0, you can now select multiple frames within your Figma project and export them in bulk.
This streamlined workflow not only saves time but also ensures consistency across your entire project.
## UPDATE 2 : New Smart Figma Design Optimizer
At the core of UiChemy 2.0 is the new Smart Figma Design Optimizer, one of the most advanced tools we’ve developed to date. This feature is designed to provide you with all the necessary suggestions and optimizations to make your Figma designs as compatible as possible with WordPress.
### Comprehensive Design Optimization
The Smart Figma Design Optimizer covers various aspects of design optimization, including:
- **Media Optimization:** Ensures that all media files are optimized for web use, reducing load times and improving performance.
- **Frame Optimization: **Analyzes and optimizes the structure of your frames to ensure they are converted accurately.
- **Text Optimization:** Adjusts text elements to ensure they are displayed correctly and consistently across different devices and browsers.
- **Mainframe Optimization: **Focuses on the overall layout and structure of your main frames, ensuring they are ready for seamless conversion to WordPress.
Check out our UiChemy Design Optimizer YouTube playlist for in-depth tutorials and tips!
https://youtube.com/playlist?list=PLFRO-irWzXaJtULGaE5MTNz2JKoLnJKkj&feature=shared
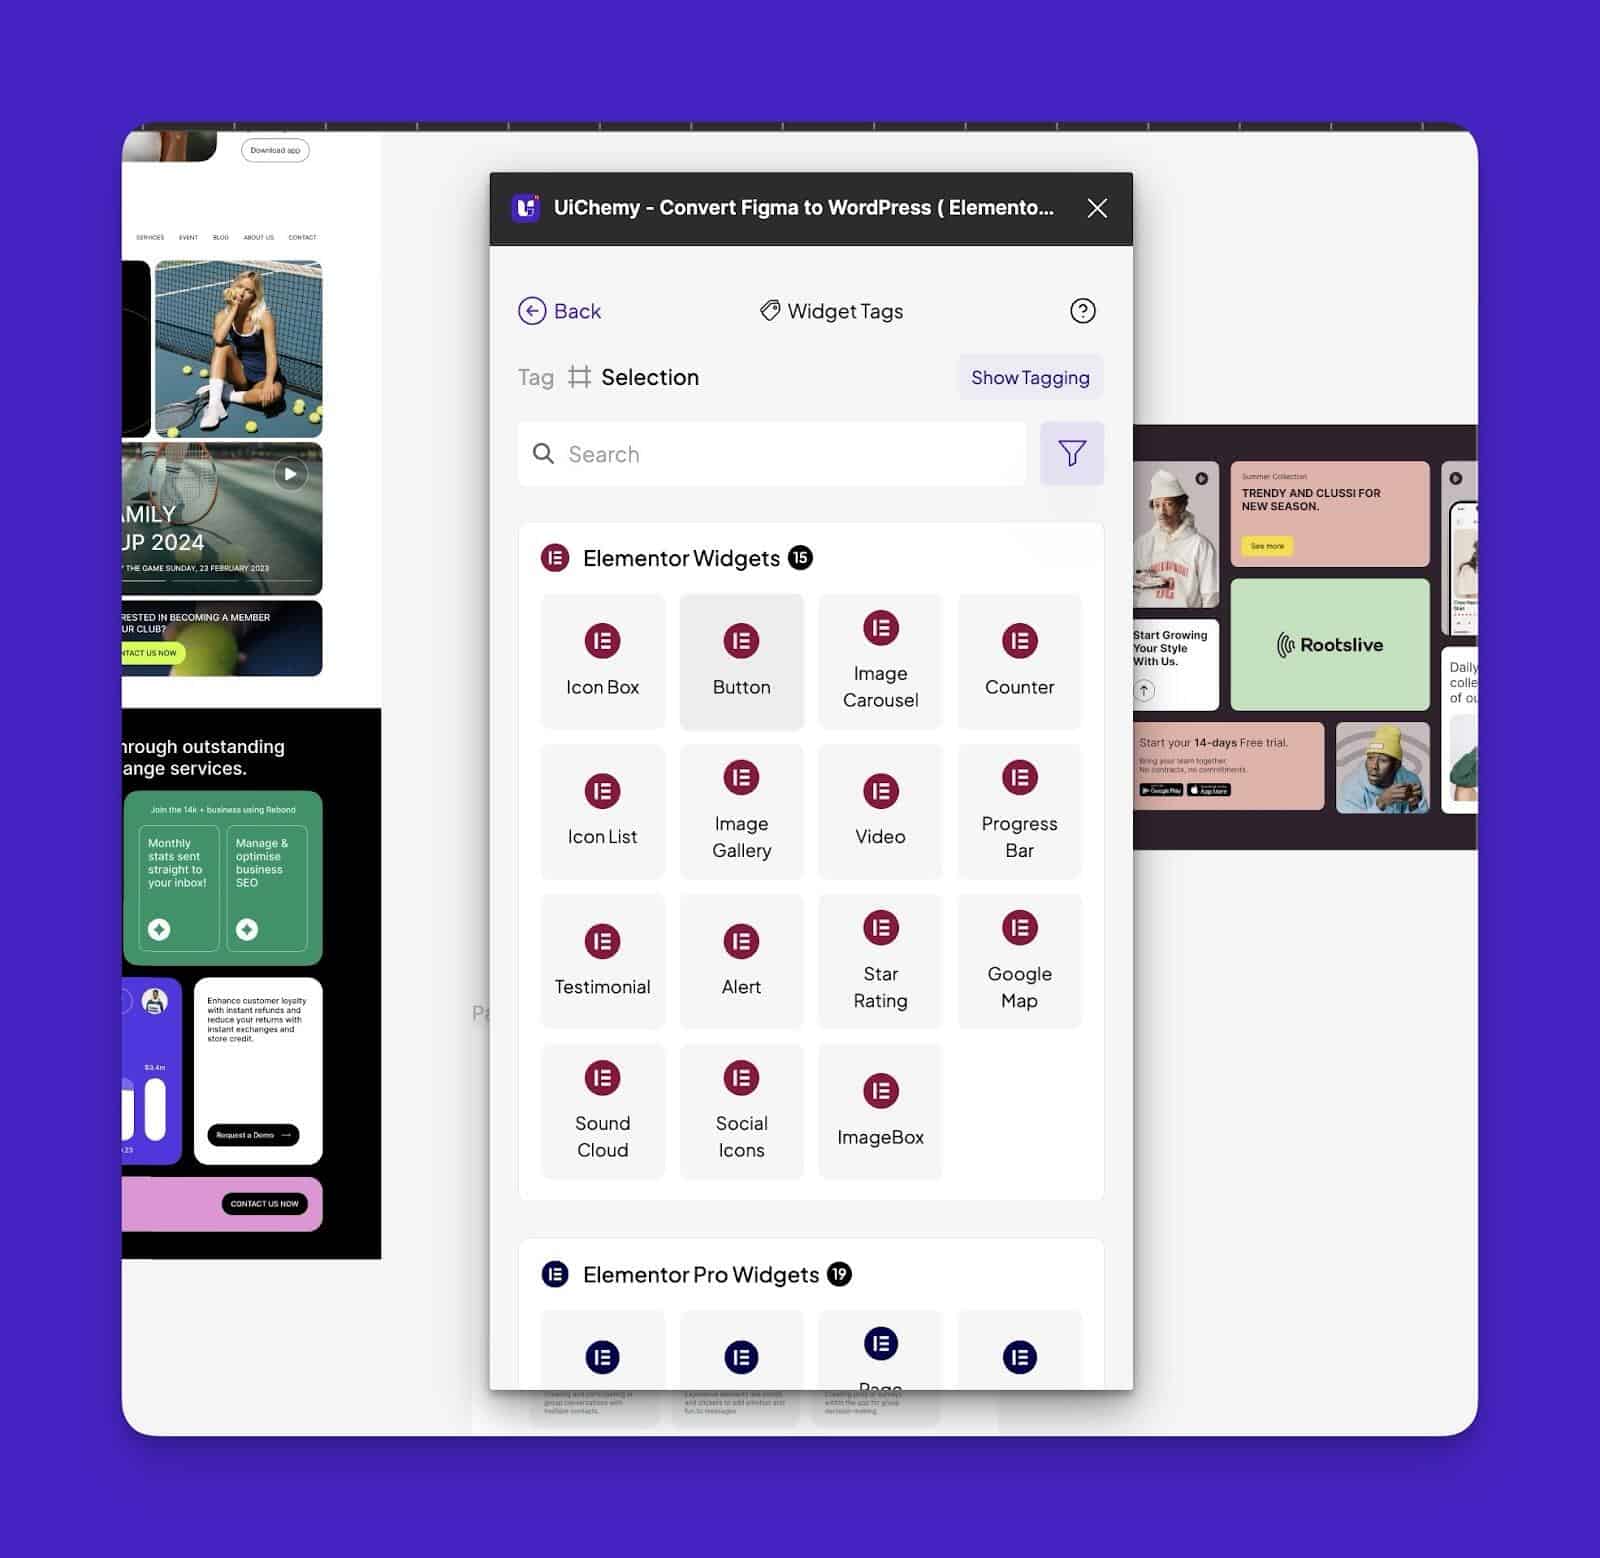
### Widget Tagging
Another exciting feature within the Smart Figma Design Optimizer is the ability to tag widgets. You can now tag Elementor or any other page builder widgets to specific sections of your design.
This tagging process allows you to specify which particular widget you want to use to create a given design element.
For example, you can tag a section as a “Hero Banner” and specify that it should use the corresponding Elementor widget. This feature not only streamlines the conversion process but also ensures that your designs are implemented exactly as intended.
### Advanced Responsive Manager
Responsive design is a crucial aspect of modern web development, and our new Advanced Responsive Manager ensures that your designs are fully optimized for all devices. This feature provides detailed settings and controls to adjust the responsiveness of your designs.
## UPDATE 3 : New UiChemy Panel Look
We’ve listened to your feedback and completely revamped the UiChemy panel to provide a more intuitive and user-friendly experience. The new panel design is based on extensive user research and testing, ensuring that it meets the needs of our diverse user base.
The updated UiChemy panel features a cleaner, more streamlined interface that makes it easier to navigate and use. We’ve reorganized menu items and added new functionalities to provide a smoother and more efficient workflow.
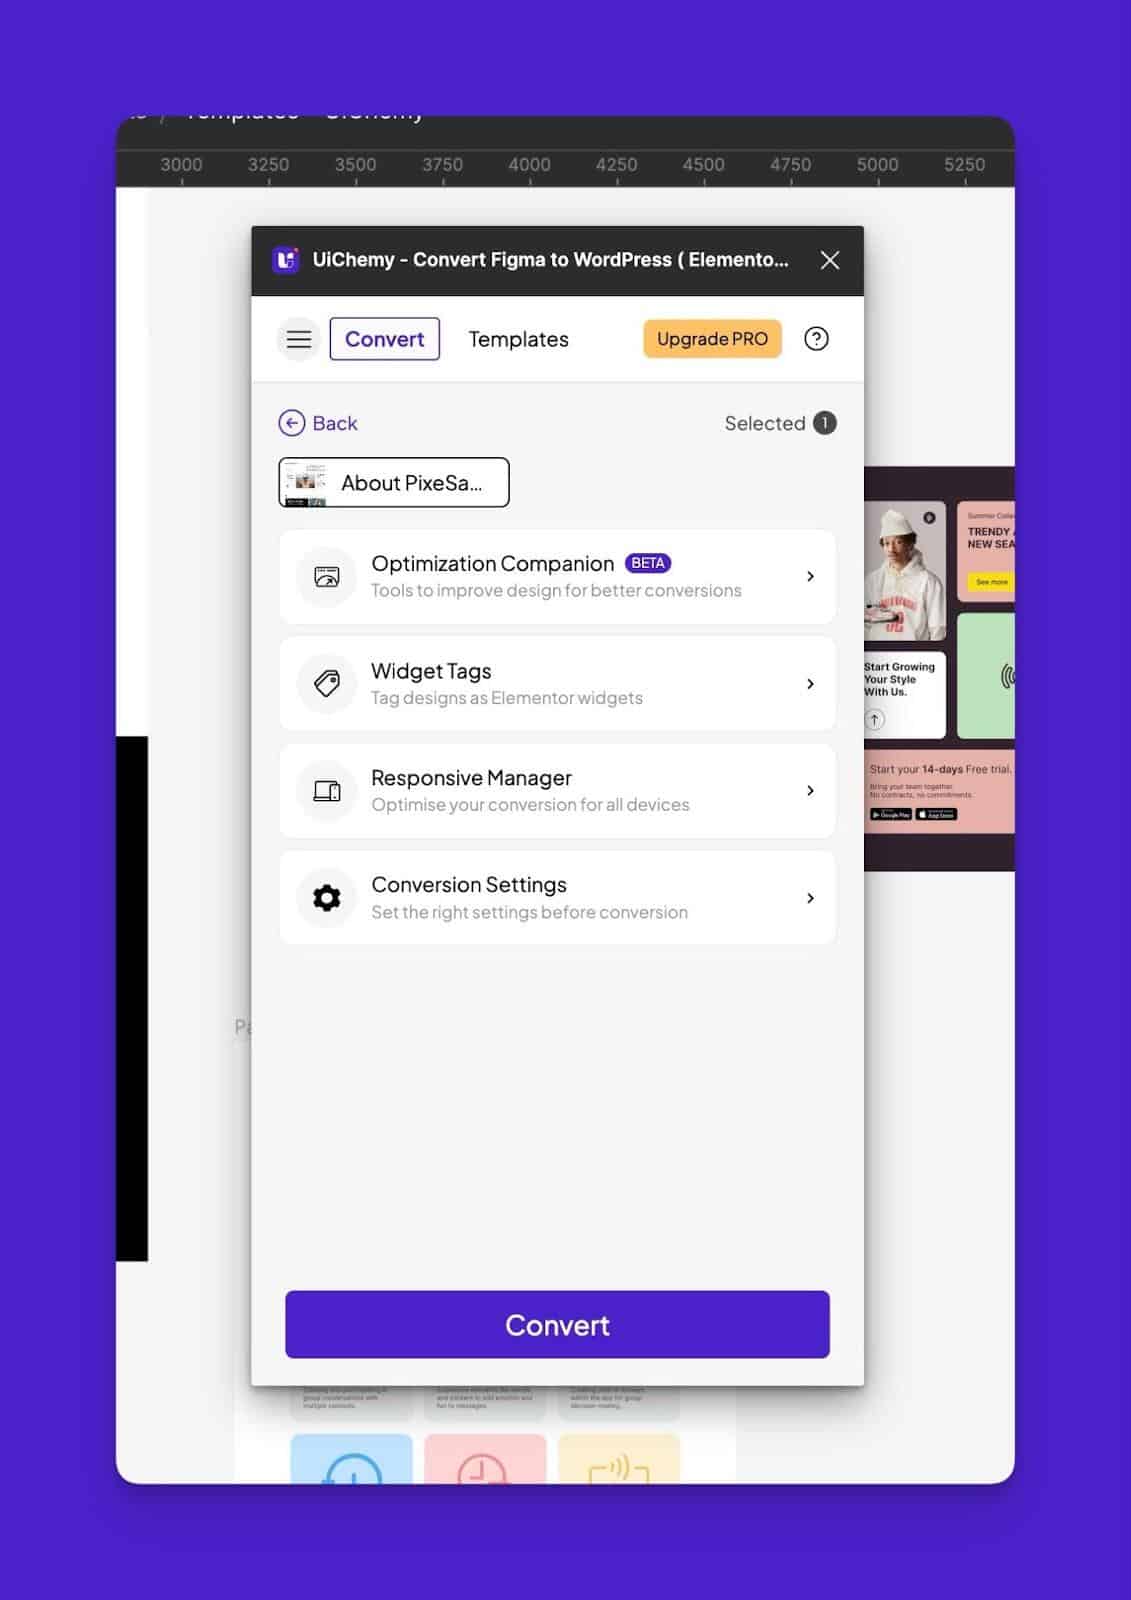
We’ve introduced two new import modes to provide greater flexibility and control over the conversion process:
- **Optimize & Convert in Home: **This mode provides more detailed customization options, allowing you to fine-tune your designs before converting them to WordPress.
- **Express Convert:** This mode allows you to quickly convert your designs with minimal customization, ideal for fast-paced projects.
These import modes provide you with the flexibility to choose the level of customization and optimization that best suits your project needs.
## UPDATE 4 : Revamped Import JSON File Mode
In UiChemy 2.0, we’ve reworked our JSON Import File mode to provide a more efficient and streamlined process.
The revamped Import JSON File mode allows you to export multiple JSON files simultaneously, saving you time and effort.
You can then upload these files to your site manually, ensuring that all sections are imported correctly and efficiently. This feature is ideal for complex projects where you need to manage multiple sections and pages.
## UPDATE 5: New Advanced Website Imported Mode (Add Section on New/Existing Pages)
One of the most exciting features of UiChemy 2.0 is the new Advanced Website Imported Mode. This feature is designed for agency owners and developers who manage multiple client sites. With this mode, you can import entire websites or specific sections to new or existing pages, providing greater flexibility and control over the conversion process.
### Import as Full Page or Section
The Advanced Website Imported Mode allows you to import your designs as a full page or add them as sections to existing pages. This feature is particularly useful for agencies managing multiple client sites, as it allows you to easily import and customize designs for different projects.
### Elementor PRO & Nexter Theme Builder Integration
We’ve also gone further by allowing you to import designs directly into your theme builder. You can now import designs into headers, archives, and other areas of your site, providing greater flexibility and customization options. This feature ensures that your designs are fully integrated into your site’s theme, providing a seamless and consistent user experience.
## UPDATED 6 : New UiChemy Compatible Templates — Powered by WDesignKit
To further personalize your experience, we are continuously adding more pre-designed Figma templates that are optimized for the best Figma to WordPress conversion.
These templates are powered by WDesignKit and follow standard design guidelines, ensuring that your designs are implemented accurately and efficiently.
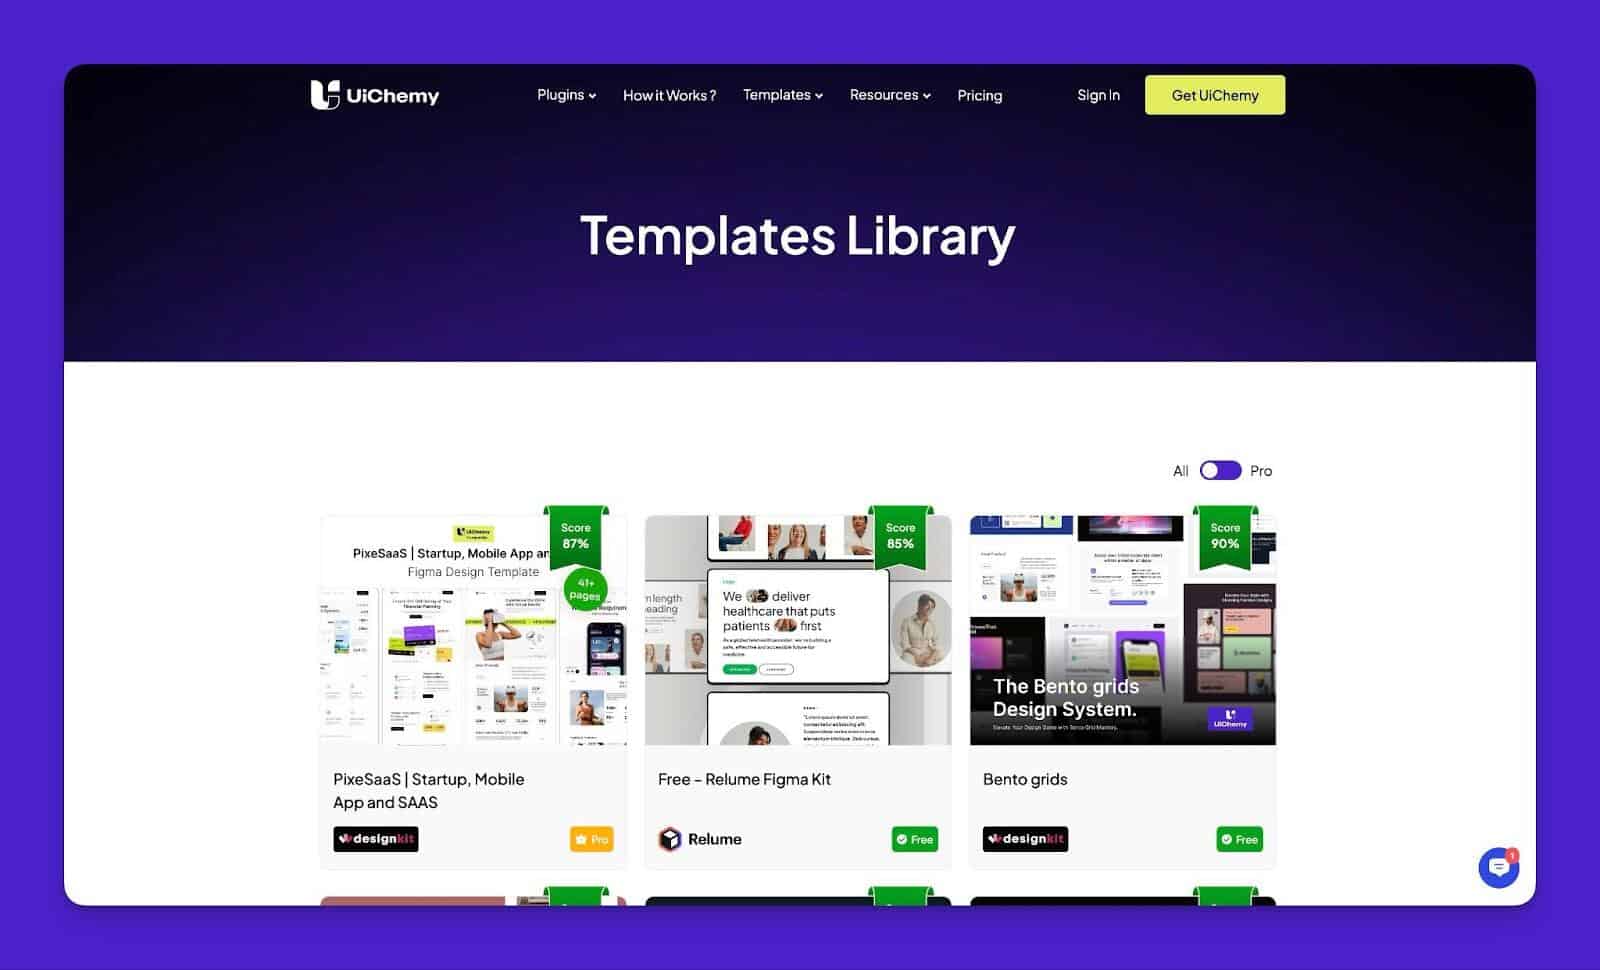
The new templates are specifically designed and optimized for Figma to WordPress conversion. They follow best practices and standard design guidelines, ensuring that your designs are converted accurately and efficiently.
The templates also include widget tagging, providing you with the flexibility to specify which widgets to use for different sections of your design. This feature ensures that your designs are implemented exactly as intended, providing a seamless and consistent user experience.
### Summing Up
You must have felt the massive efforts put into this release, but we won’t stop here. We are committed to continuously improving UiChemy and making it the best Figma to WordPress conversion tool on the market. Your feedback is invaluable to us, and we look forward to hearing from you as we continue to optimize and enhance our platform.
Our mission is to bring Figma and WordPress closer than ever, enhancing the productivity of web creators and making the design-to-development process as seamless and efficient as possible. We are sponsoring WordCamp Europe 2024 and would love to welcome you to our booth for an in-person demo.
Stay tuned for even more features coming soon in Bricks and Gutenberg! Thank you for being a part of our journey, and we look forward to continuing to serve and support you in your creative endeavors.
---
# Introducing UiChemy – Convert your Figma Designs to Elementor & WordPress
Source: https://uichemy.com/blog/introducing-uichemy-convert-your-figma-designs-to-elementor-wordpress/
Have you ever wished you could effortlessly transform your Figma designs into polished Elementor and Gutenberg websites? The wait is over!
Presenting [UiChemy – the ultimate Figma plugin ](https://go.posimyth.com/uichemy)designed for the WordPress community.
## Why UiChemy? - Reason for Building This
We've spoken to many freelancers and agencies, and they've expressed their main challenge as reducing the time they spend on each project, so they can finish projects faster. This helps them increase their profits or lower their prices to compete better with others.
https://youtu.be/vm8Ak5Oy9AU
With [UiChemy](https://go.posimyth.com/uichemy), we're focusing on speeding up the process of converting UI designs to WordPress websites.
We found that, on average, freelancers spend about 12 hours per page converting from Figma to Elementor/Gutenberg. This range can vary from 8 to 30 hours depending on how experienced they are and how complex the page layout is.
In total, this translates to saving around 11 hours per page. Additionally, if you need to quickly demonstrate the layout to clients, it takes just 1 hour to finalize everything and have your Elementor link ready to share with them.
## Here's where UiChemy steps in to revolutionize your Web Designing process!
Our solution cuts down this time to just 5 minutes for importing and exporting, along with tagging of widgets.
Here's a detailed video that covers everything you need to know about UiChemy before you start. We highly recommend watching this before you begin.
https://www.youtube.com/watch?v=8E2d7O0BZ3c
After that, it takes about 1-2 hours, depending on the complexity of the page, its responsive settings, and the level of UX options they want to set up.
According to feedback from our beta users, they spent an average of 1 hour on post-processing.
This range varied from 20 minutes to 4 hours, depending on how well they understood Figma and Elementor.
## Now, the question is, How do you embark on your UiChemy journey?
UiChemy functions as an automation tool that relies on the functionalities provided by [Figma and Elementor.](https://uichemy.com/help/design-guidelines/) To illustrate, when we want to ensure consistent typography on both platforms, we retrieve data from Figma and accurately place it within Elementor.
There are instances where we must adapt our system according to the setup of Figma and Elementor, which might result in a slight learning curve for UI Designers using Figma.
Here are a few areas where designers need to pay attention:
- **Using the Auto Layout Option: **This feature, which is straightforward to implement in Figma, comes in handy.
- **Reducing Frame Usage:** It's recommended to minimize the use of frames in Figma. Unused frames can lead to the creation of additional containers.
- **Optimizing Images in Figma:** To streamline the process, it's a good practice to include optimized images in Figma. These can be directly uploaded to WordPress or utilized with image optimization plugins. Alternatively, you can employ Figma's Lock Feature to export smaller image sizes.
- **Minor Learning Points:** Some issues arise from the distinct endpoints of Figma and Elementor/Gutenberg. We've [compiled a list of these differences for your convenience.](https://uichemy.com/help/design-guidelines/)
Although there might be a bit of a learning curve initially, spending a few hours to familiarize yourself with the process will set you up for success. We've taken measures to simplify this for you so that you can proceed confidently once you've completed the initial learning phase.
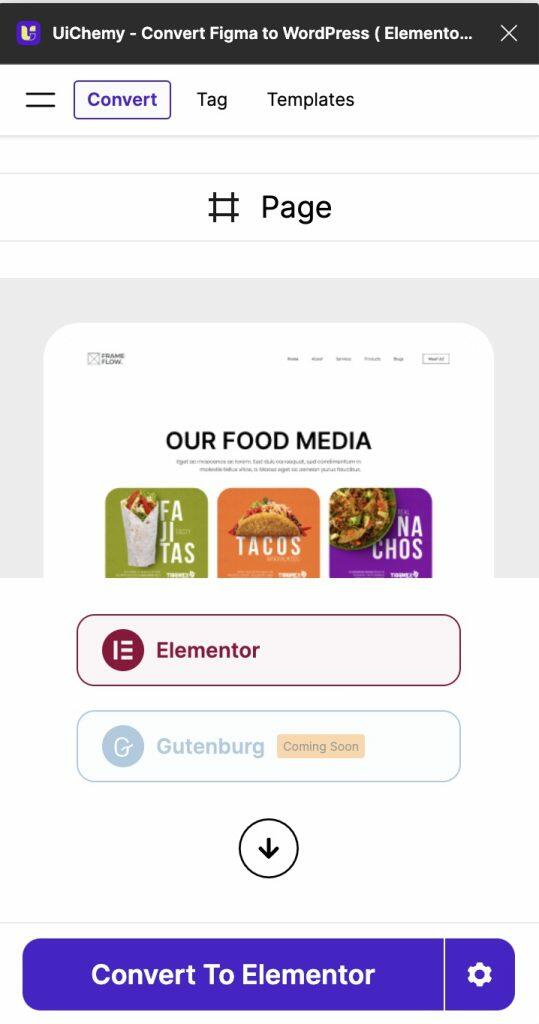
### Converting Figma to Elementor !
Once you've prepared your Figma design file according to our guidelines, you'll have two options for exporting. The default choice is the Auto Tagged Export. With this option, we use Elementor's Free Plugin's Container, Heading Title, and Image Widgets to construct the complete page—there's no need for any other widgets.
The second export method is the semi-automatic export, where you can tag frames with your preferred widgets.
For instance, if you want to include a Gallery in a specific location, you just need to tag that frame as a gallery. We offer options to select images from that frame using our tagging tool, along with a few additional choices available directly in Figma. These selections will be configured into the Elementor widget.
Our support extends to the [Flexbox Container Widget exclusively](https://theplusaddons.com/blog/how-to-use-elementor-flexbox-containers/). Before importing, ensure that it's enabled by going to Elementor → Settings → Features. Although Elementor has enabled this widget by default, but for older versions, you'll need to activate it manually before importing.
Also ensure safe filter upload is enabled for JSON & SVG.
You're free to choose either method based on your needs. We're continually expanding the range of widgets available for tagging, and this will undoubtedly enhance your workflow once you export.
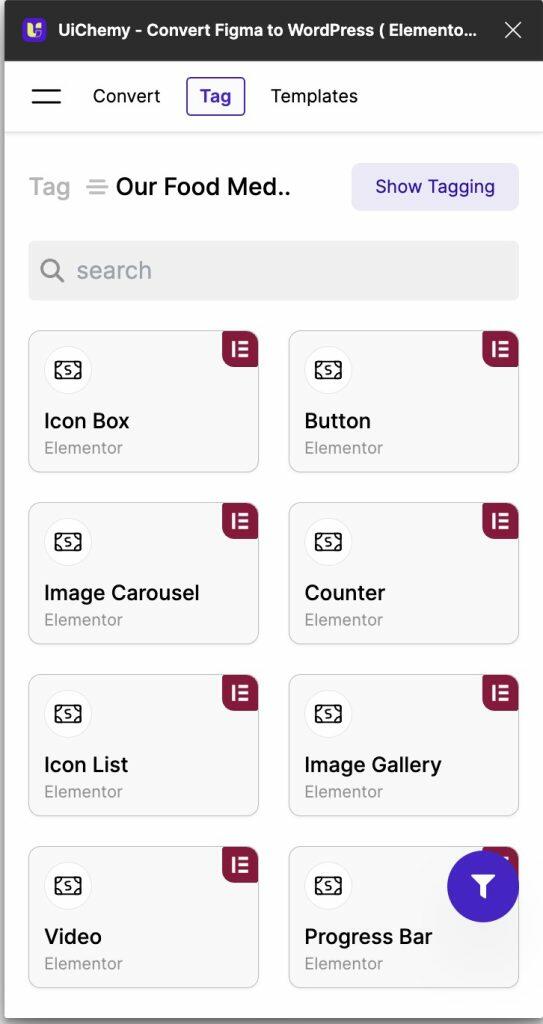UiChemy Tagging page
Most servers are compatible, but for larger pages with numerous images, you might need to configure your server settings. We've compiled a [common list of requirements that include actions](https://uichemy.com/help/troubleshooting/) like increasing the maximum execution time and other adjustments if necessary.
If increasing these settings isn't feasible, you also have the option to download the file without image files. This won't cause any problems for you.
### What about Performance of Websites Converted?
Ensuring high performance has always been our top priority in all of our products. This is because the attention span of human beings is decreasing, and we aim to ensure that websites created using our products load as quickly as possible.
In this particular product, we've taken great care to ensure that site performance isn't compromised after exporting. Our conversion process mirrors your Figma design exactly.
We strongly advise optimizing your Figma file thoroughly to achieve the best output. This involves using the fewest possible frames since each frame translates to one container in Elementor/Gutenberg.
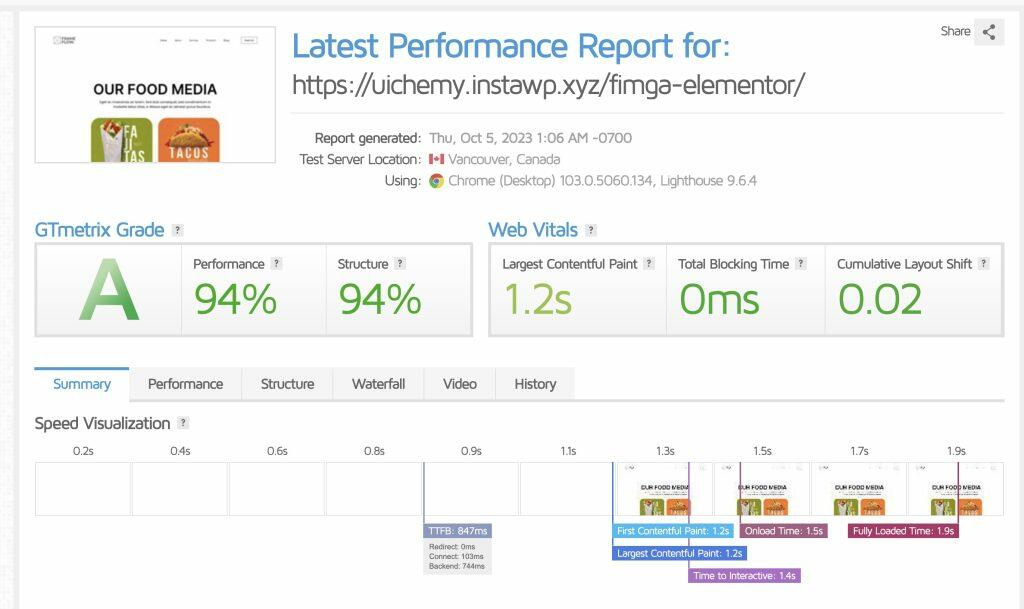*GTmetrix score of UiChemy converted website on fresh WordPress website with no cache or performance plugin*
What's more, we've made sure not to add any extra CSS/JS to your site during the conversion process. All of our code is contained within the Figma Plugin itself, and we simply provide a standard JSON file for import.
For images, we utilize the original images uploaded to Figma. Additionally, we have developed an option to automatically use smaller-sized images based on the visible size of the image in the Figma file. You have the choice to use optimized images or adopt our approach during the conversion.
From our end, we've maintained a clean and transparent approach so that you can achieve exceptional performance by applying optimization techniques directly within the Figma file itself.
## Our Future plans with UiChemy
We've recently introduced the beta version of our product. We're actively seeking feedback from users like you to ensure that we create the best possible version.
We encourage you to share your thoughts with us through our [Private Facebook Community of UiChemy ](http://www.facebook.com/groups/uichemy/)or by leaving comments below. Your feedback is incredibly valuable, and we're dedicated to taking prompt action based on your suggestions.
Regarding features, we're focusing on covering all the useful widgets found in the Elementor Free version initially. Subsequently, we'll extend our efforts to include [Elementor Pro](https://elementor.com/pro/) features, as well as [The Plus Addons for Elementor's Free and Pro Widgets.](https://theplusaddons.com/elementor-widgets/) If there's a particular feature you'd like us to prioritize, please feel free to share [your ideas here.](https://roadmap.uichemy.com/boards/feature-requests)
This is just the beginning. We have exciting and innovative plans in the works with the aim of enhancing the productivity of the Web Creator Community. Stay connected with us by subscribing, and we'll keep you updated with the latest developments.
---
Generated by RankReady v0.6.5.0 (https://github.com/adityaarsharma/rankready)