

Trusted by 80k+ users

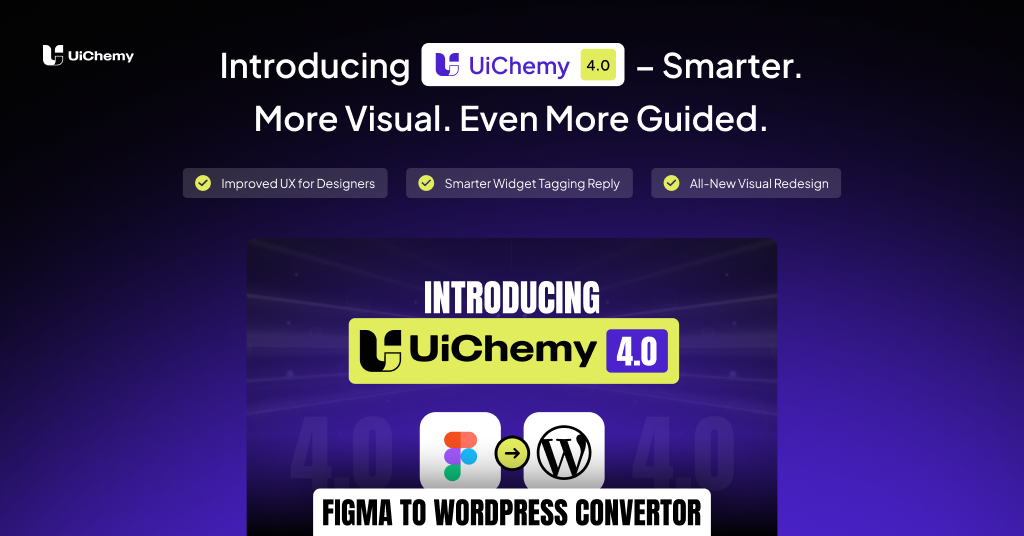
More Visual. Even More Guided.
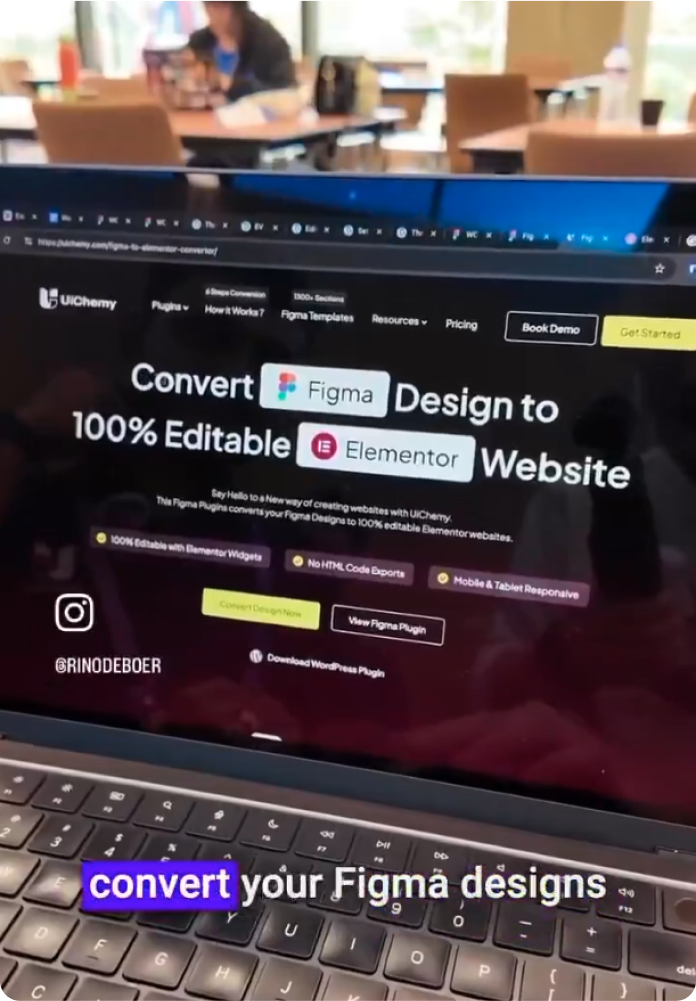
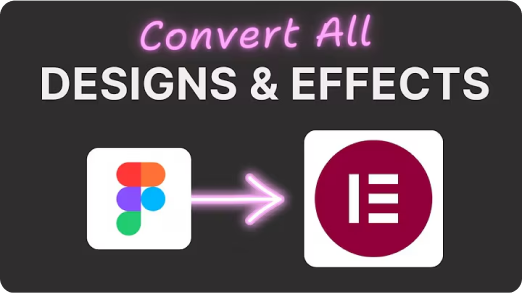
Convert your Figma designs into responsive WordPress pages faster, smarter, and without the guesswork. With a fully guided flow and optional express mode, UiChemy 4.0 keeps you focused on design, not the technical stuff.
Experience the Next Evolution of UiChemy
We’ve supercharged our plugin with powerful new tools—so you can focus on creativity and let UiChemy handle the rest.

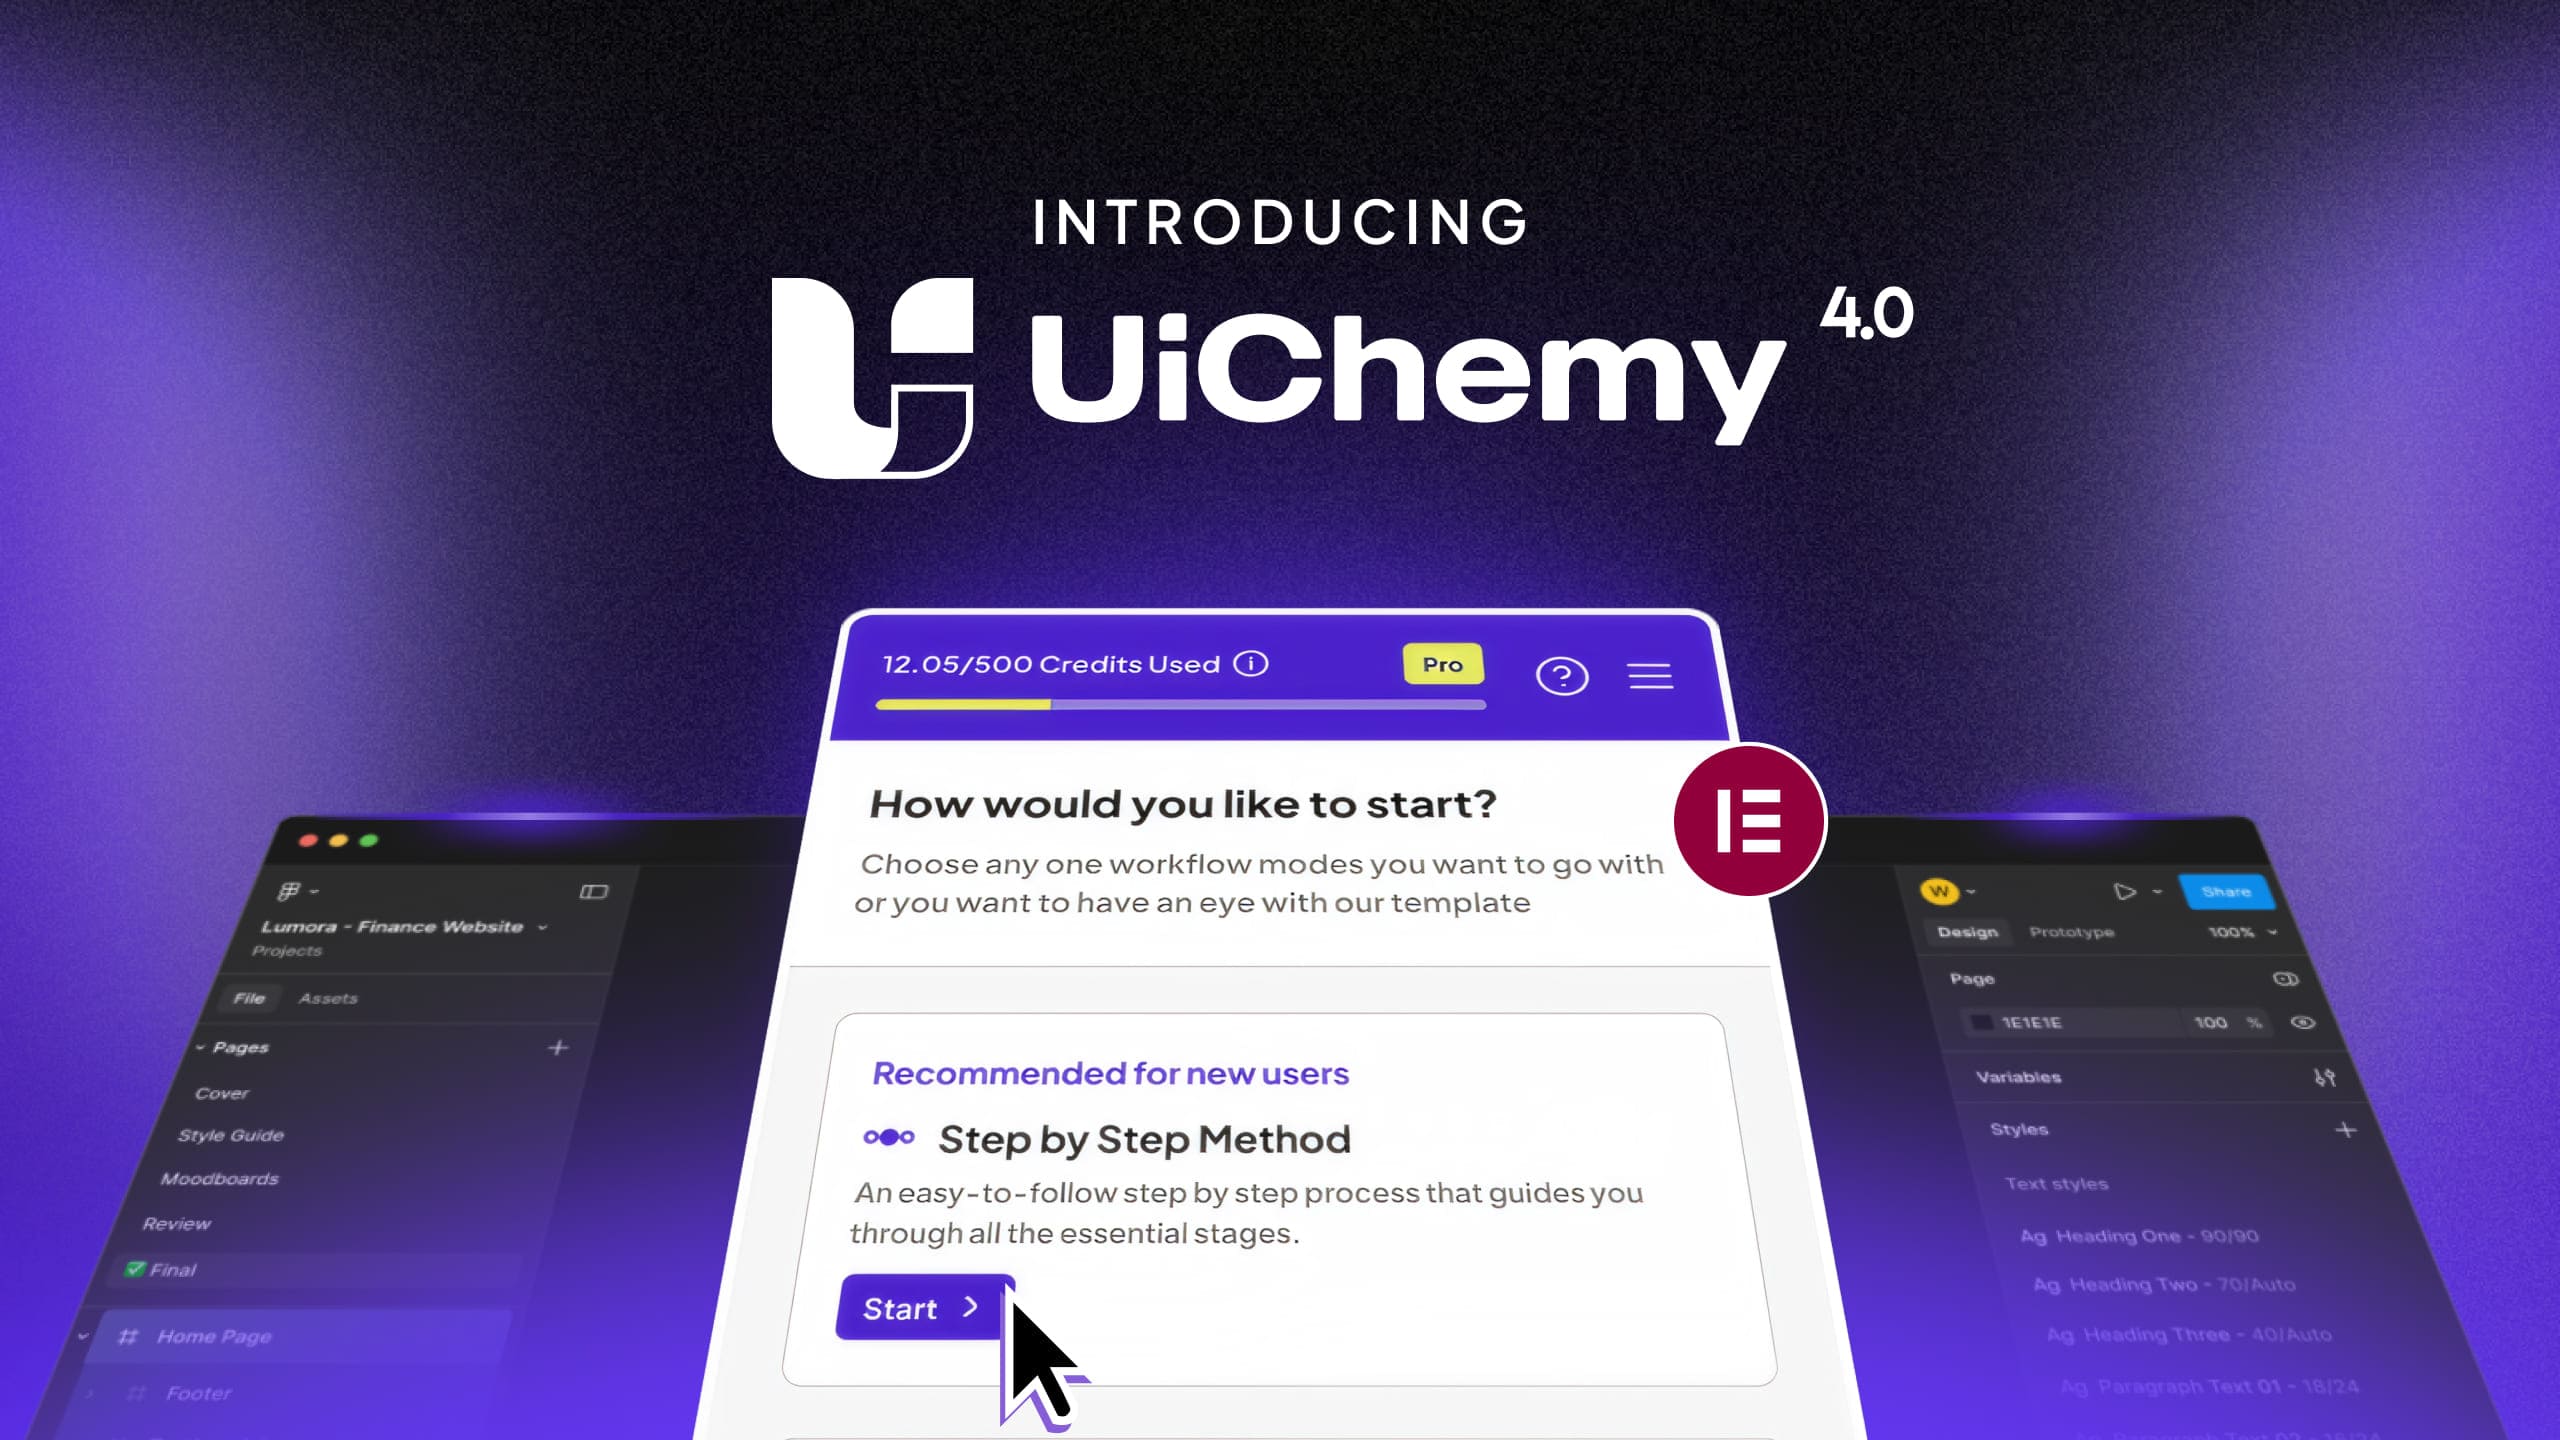
All New Step by Step Guided Flow
Follow a clear 8 step flow from frame selection to export, built for clarity and control at every level.

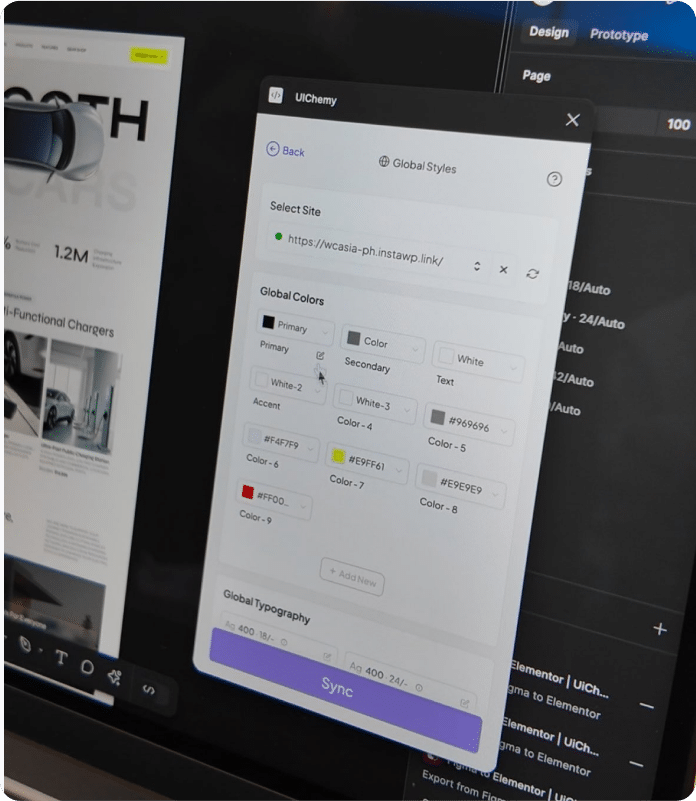
Enhanced Global Style Sync
Experience the enhanced way to sync Figma styles with Elementor. From colors and typography to container widths, UiChemy 4.0 ensures every design detail is carried over with precision and consistency.

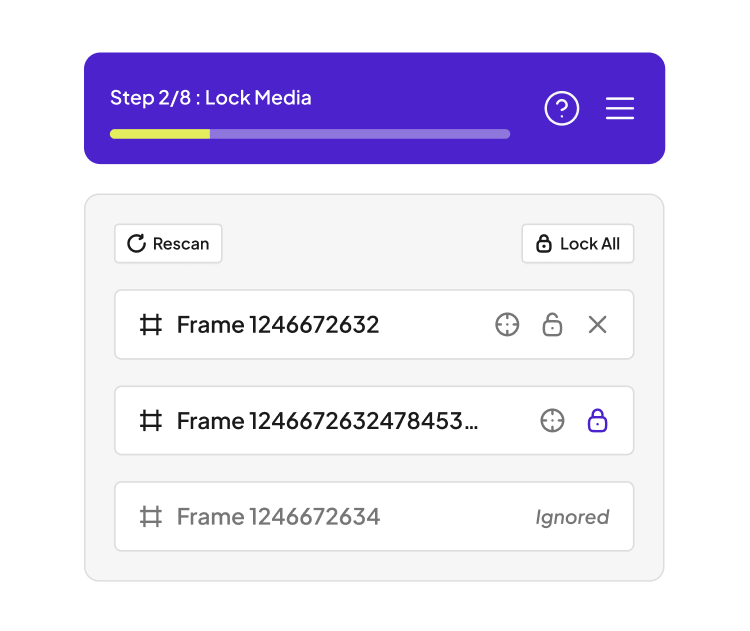
Lock Multi-Layer Vectors for Better Performance
Unnecessary vector layers can slow you down. We’ve made it easier to lock and optimize them so your designs stay fast, light, and conversion-ready.

Choose Your Preferred Import Method
You decide how to bring your design into WordPress. Select between Direct Import or Copy to Clipboard to paste into your editor manually.

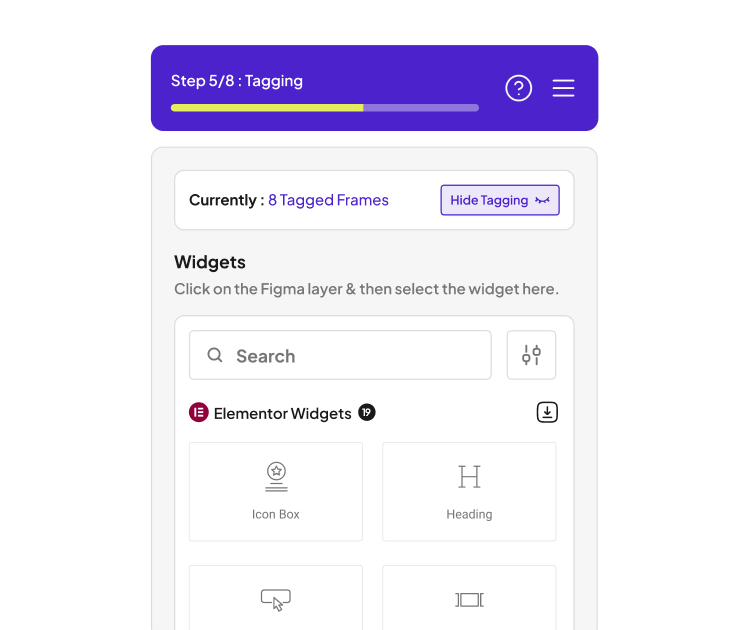
Improved Widget Tagging Experience
The new widget tagging experience makes it easier than ever to tag, manage, and organize your elements helping you work faster and with more accuracy.

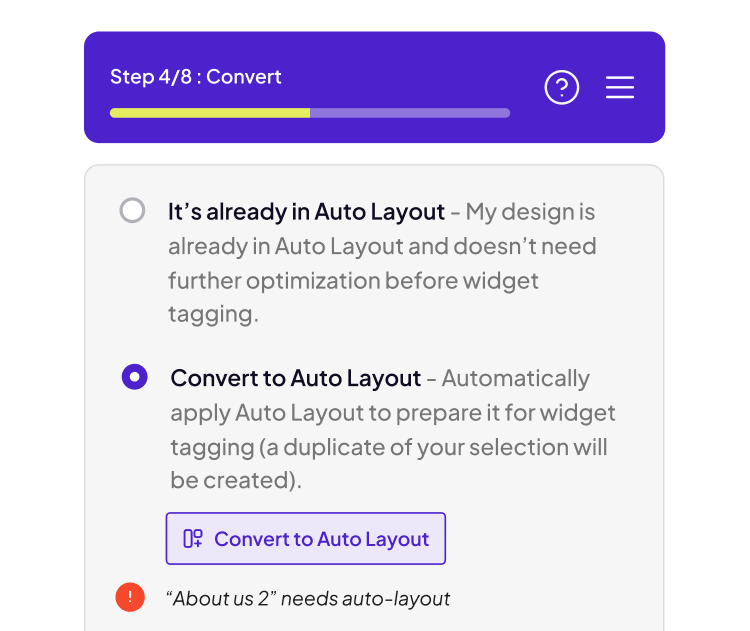
Convert Non AutoLayout to AutoLayout
Prefer tagging in AutoLayout first? Our one-click convert option transforms non-auto layout designs so you can refine and tag before the final export.
Step-by-Step Flow in UiChemy 4.0
UiChemy 4.0 walks you through each essential step with no guesswork and no missed layers. From selecting your frame to fine tuning export settings, it is built for clarity and control.
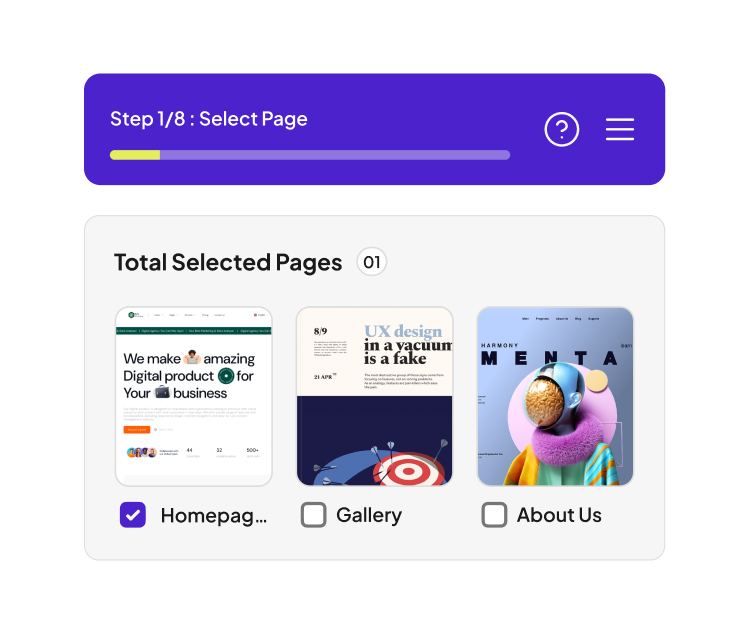
 Pick the Figma frame or page you want to export.
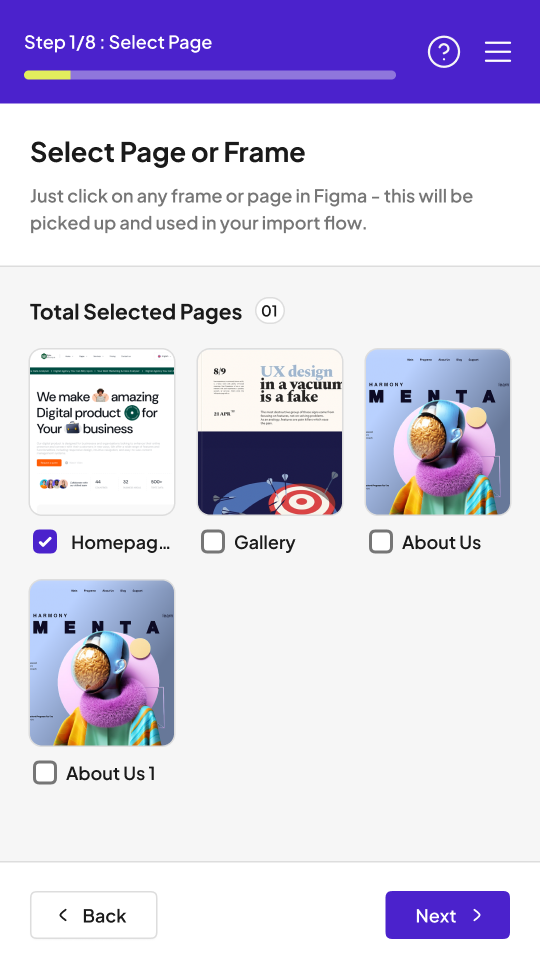
 Lock image and media layers for better performance.
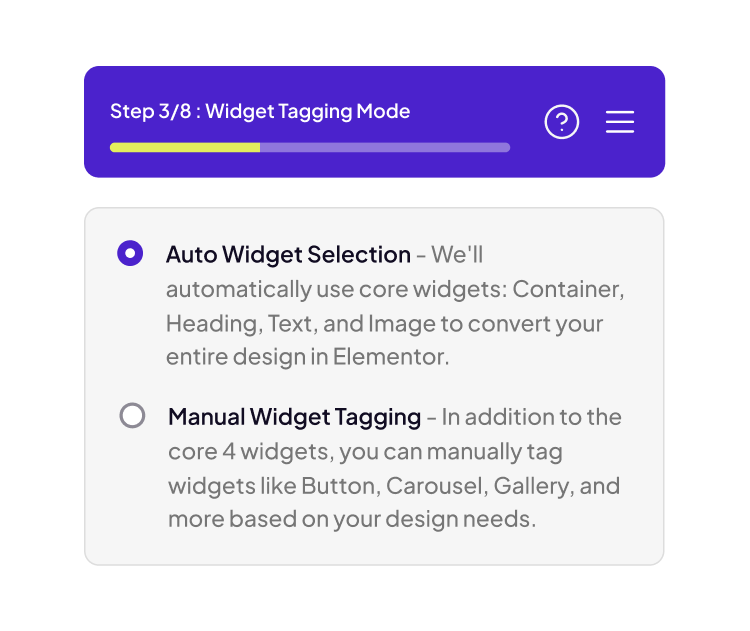
 Choose between auto or manual widget tagging.
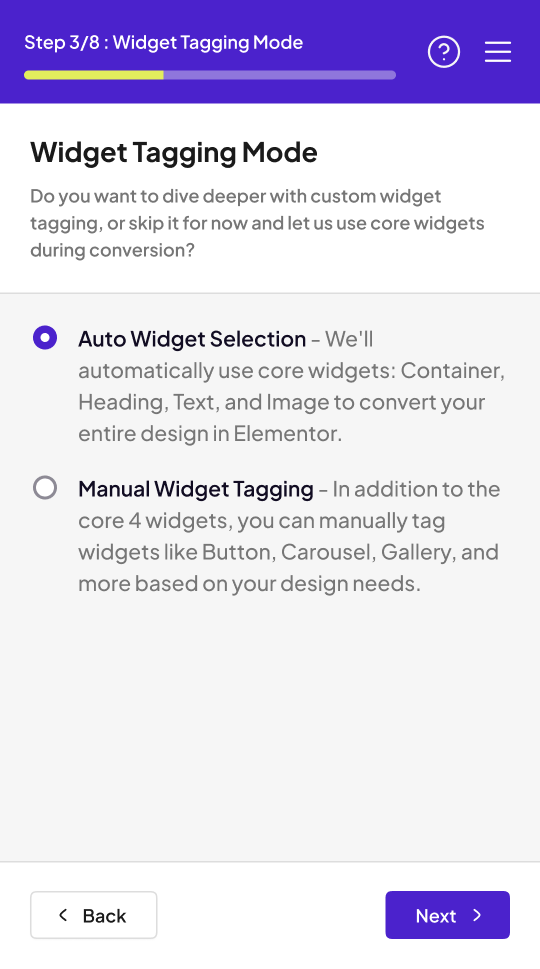
 Apply Auto Layout if the design is not structured
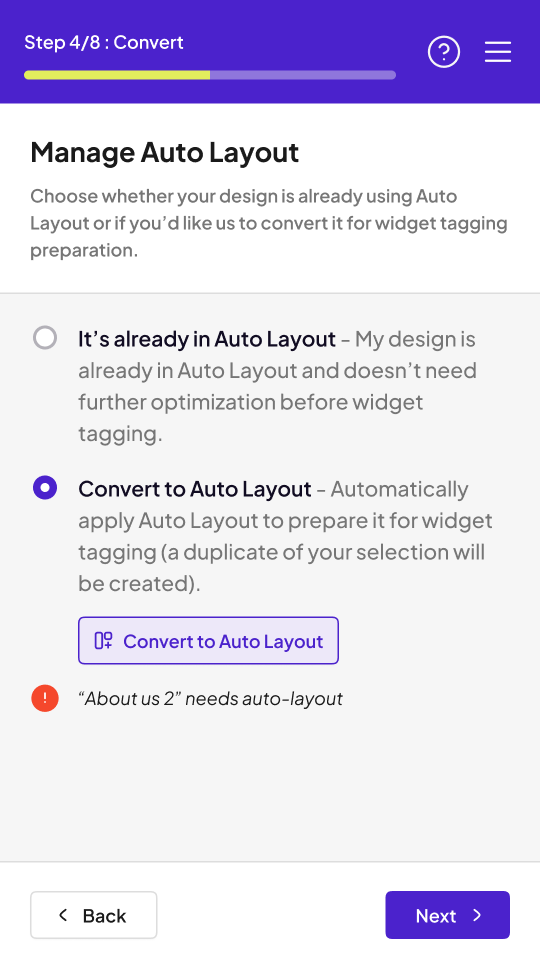
 Tag advanced widgets manually
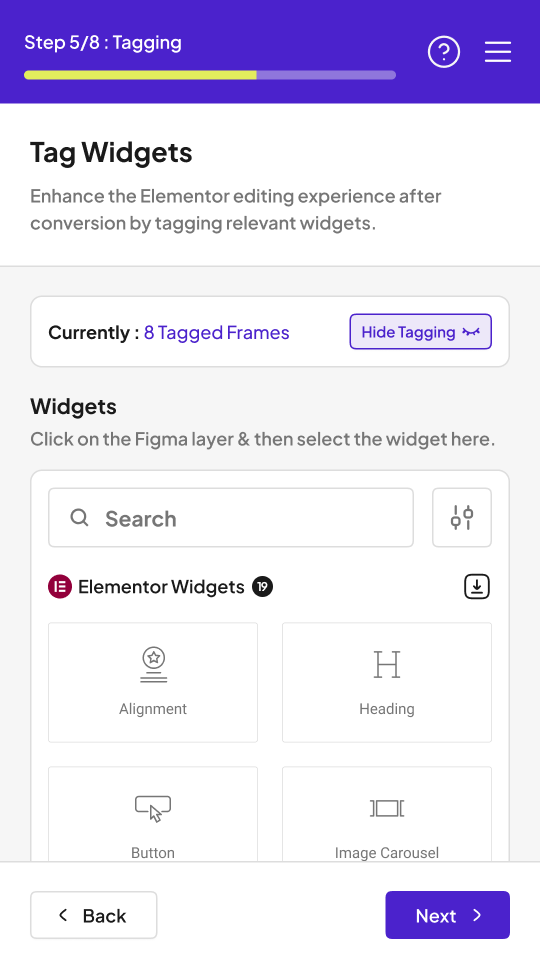
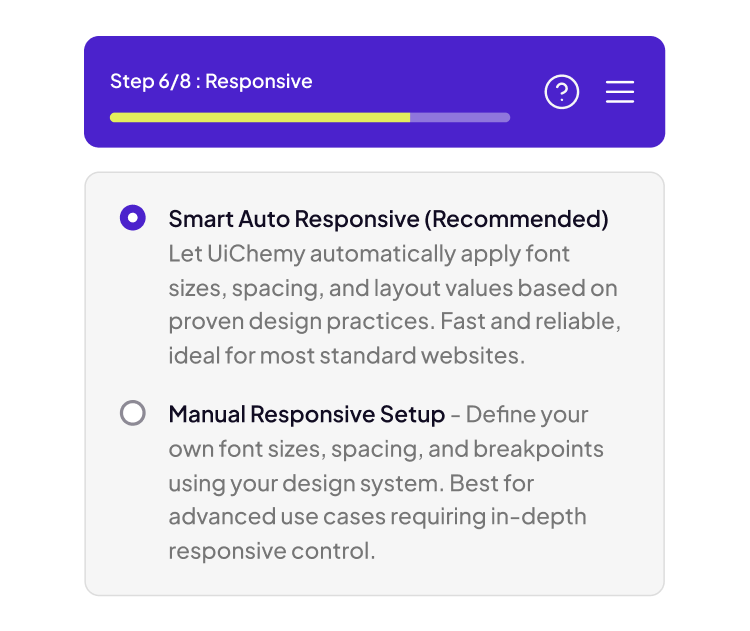
 Choose auto or custom responsiveness
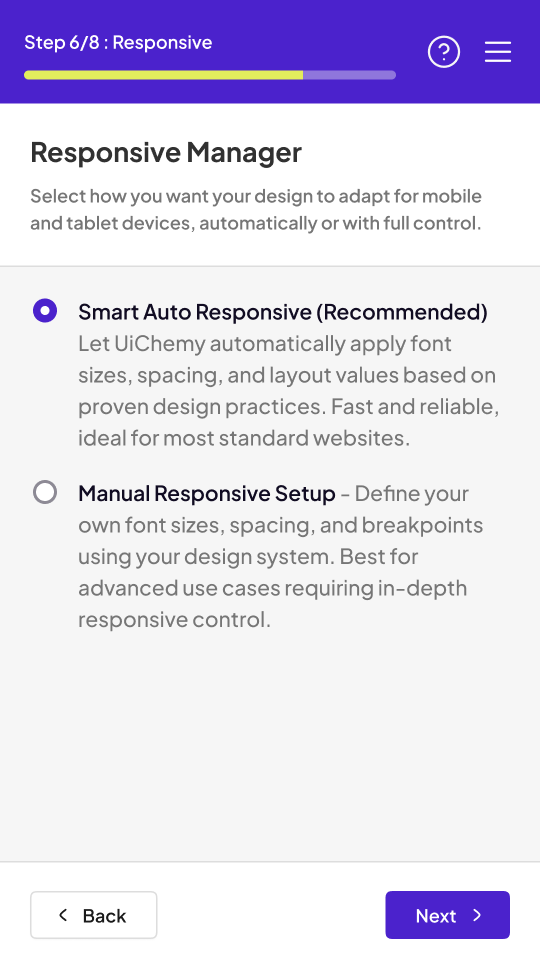
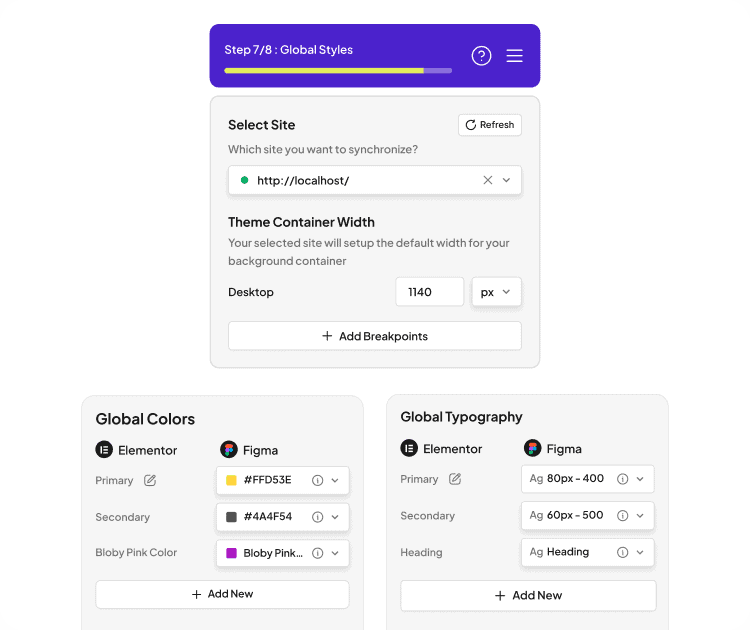
 Sync global colors and typography
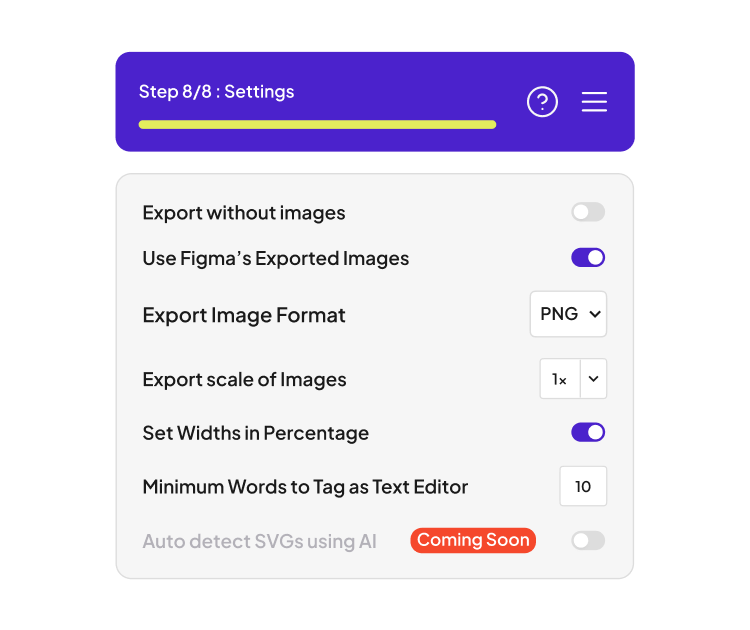
 Customize export settings
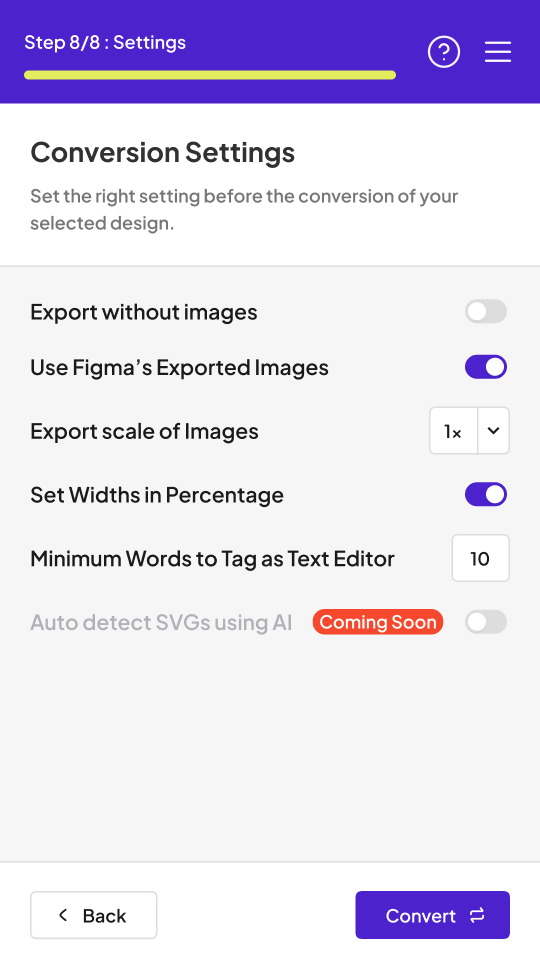
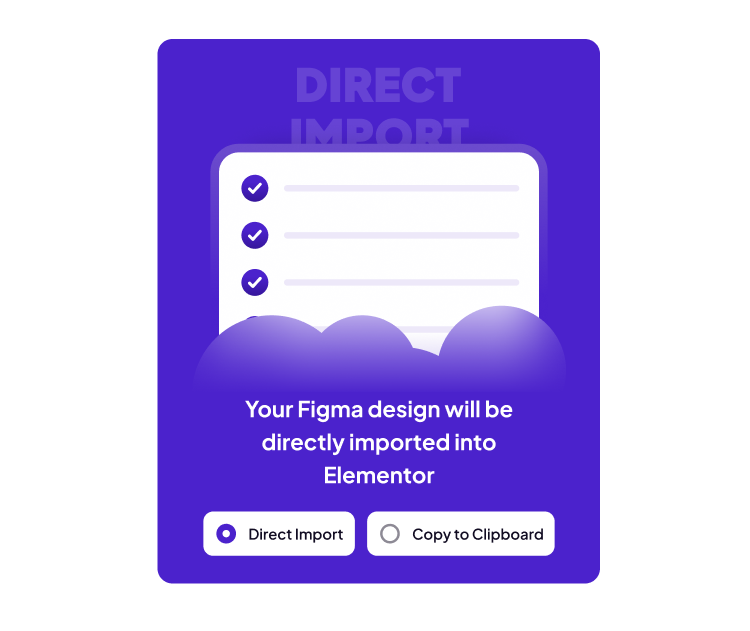
 Choose export method based on your workflow.
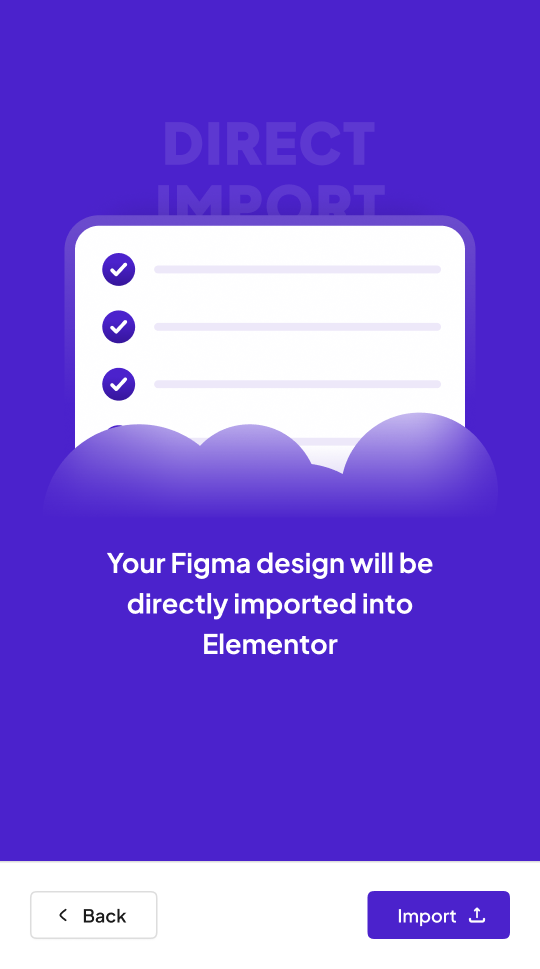 Pick the Figma frame or page you want to export.Lock image and media layers for better performance.Choose between auto or manual widget tagging.Apply Auto Layout if the design is not structuredTag advanced widgets manuallyChoose auto or custom responsivenessSync global colors and typographyCustomize export settingsChoose export method based on your workflow.
From Figma to WordPress – Step by Step
Easily follow each step to convert your Figma design into a fully functional layout inside Elementor. From frame selection to widget tagging, global styles, and final export, UiChemy gives you full control at every stage.
Start by selecting the design you want to export. This could be a full page or any individual frame, whether it’s in Auto Layout or not. UiChemy supports multiple frame selections and even multi-page exports. You can also select nested sections or inner frames; everything you pick will be included in the conversion process.
Boost performance by locking complex media layers like grouped images, background shapes, vector groups, or masked elements. You can flatten them manually or let UiChemy take care of it with a single “Lock” click. This helps reduce load during conversion and ensures faster rendering in WordPress.
Decide how detailed you want your export to be. UiChemy can automatically detect and tag core widgets like Containers, Headings, Text, and Images. Or, if you prefer more control, switch to manual mode and tag advanced widgets like Buttons, Gallery, Carousels, Social Icons, and more to align precisely with your design intent.
Take your Elementor editing experience to the next level by tagging widgets that match your design elements. While basic widgets like Containers, Images, Headings, and Text are automatically handled, you can tag other advanced elements such as Buttons, Icon Lists, Carousels, Gallery, and more for a smooth and editable layout after export.
Choose between smart automatic responsiveness and full manual control. UiChemy can intelligently adjust typography, spacing, and layout for different screen sizes, or you can define your own breakpoints and rules for pixel-perfect responsiveness across all devices.
Keep your design system intact by syncing Figma’s global colors, typography, and section widths with Elementor’s Global Style settings. This helps maintain a consistent look and feel across your site, whether you’re building a single page or working with a full design system.
Finalize your export setup with advanced options like skipping images, using Figma-exported assets, scaling visuals, defining width units, or setting text tagging preferences. These conversion settings help tailor the output exactly to your needs before sending it to WordPress.
Once everything’s set, choose your export method. Go with “Direct Import” to instantly import your layout to a connected Elementor site, or use “Copy to Clipboard” and paste it right inside the Elementor editor. Both options produce clean, structured output; just pick the one that fits your workflow.

Rino De Boer
Living for PixelsA special thanks to Rino De Boer of Living for Pixels for helping shape the redesigned experience in UiChemy 4.0.
His deep dive into our Figma files — live on YouTube — and his years of expertise with Figma and Elementor helped us rethink the journey from a designer’s point of view.
 YouTube Channel

Built by feedback from 200+ top WordPress Agencies & Experts
We are working closely with 200+ agencies, freelancers, industry experts and not only that our users to understand their problems and improve product further based on it.
0K+
Figma Designers are using UiChemy to Convert Figma to WordPress
0
We Support Elementor, Gutenberg & Bricks Page Builder for WordPress.
0K+
Figma Pages Have Been Converted Around the World.
0+
Pre-Designed Figma Templates & Sections to Save Time on Design Creation
Real Voices, Real Results: See How the Community Loves UiChemy
From rave reviews to user-made tutorials, explore how thousands of designers are sharing and celebrating UiChemy.

@RinodeBoer

A very interesting product from UiChemy that allows you to convert a Figma design into Elementor with a plugin. I am excited to test this because other plugins I've tested lacked in global settings features.
@uichemy
wordpress #uichemy #figma

@micha777 ⭐⭐⭐⭐⭐

Excellent service! I encountered a problem, and they resolved it immediately without any hassle. I highly recommend both the app and their customer support!

@rinodeboer

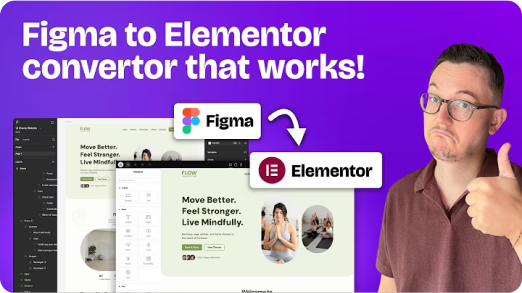
Finally, a Figma to Elementor plugin that actually works

@garrymetz ⭐⭐⭐⭐⭐

Bingo !! UiChemy has saved me so much time! Converting designs to WordPress is a breeze now. I love the responsive manager feature.

@liongabriel ⭐⭐⭐⭐⭐
Had an update issue, and I sent a support request and had a response the same day, and it was fixed on my website within 2 days. Thanks for the quick response!

@zojazak ⭐⭐⭐⭐⭐
I had the pleasure of receiving assistance from Divyang Chaudhary from support UiChemy in solving serious issues during the migration process from Figma to WordPress. I received professional support, a lot of patience, and very courteous communication. The problem was resolved. Thank you very much, and I highly recommend UiChemy. Zoja

@codestroyer ⭐⭐⭐⭐⭐
Amazing plugin! UiChemy makes Figma to WordPress super easy and works perfectly. Their support team is so kind and helpful. Definitely a 10/10 – highly recommend!

@andreaegli
I Tried a Figma to Elementor Converter Plugin (Here’s What Happened) | UIChemy plugin demo


@archana99 ⭐⭐⭐⭐⭐
This plugin is incredibly useful, and I highly recommend it! It handles about 70% of the design work and leaves the remaining 30% for us to fine-tune using Elementor, which is completely fine because it saves a tremendous amount of time in designing sections. I truly recommend this plugin, and I especially want to highlight their exceptional customer support. Mohit Ahuja, in particular, helped me with my Figma design, and his assistance was outstanding. I appreciate the customer support so much—it’s truly one of the best parts of the experience. Great job, Mohit Ahuja, and the entire team! I would also suggest that the management consider recognizing Mohit Ahuja for his hard work.

@Gazanfar-Ali

@RinodeBoer
The team of @uichemy just showed me the latest version of their Figma to Elementor converter. Global fonts and colors are now being synced with Elementor via a plugin. Really cool stuff they are building. Will be testing it soon #wcasia2025

@seanwillekens ⭐⭐⭐⭐⭐
Really Impressed with this so far, for relatively simple static sites, it imports very nicely / cleanly. Looking forward to seeing more features / functionality incorporated
@WPDev
Convert Figma Designs/Effects to Elementor (Free)

@HardikSodavadiya
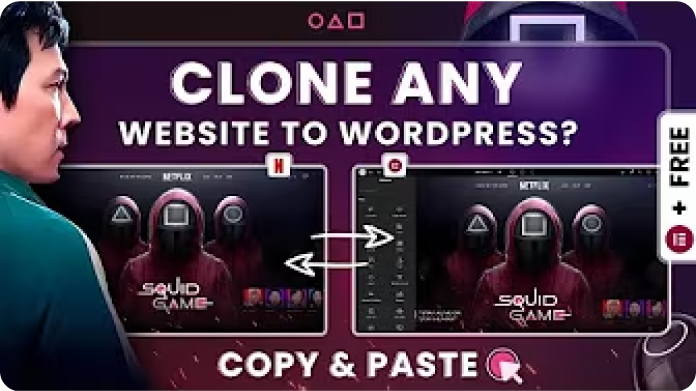
How to clone a Website or Sections to WordPress in 10 minutes
Frequently Asked Questions
For any further help, reach us at [email protected]
or connect via live chat.
• Select Page or Frame – Choose the frame you want to export.
• Optimize Multi-Layer Media – Lock key assets like images, icons, or masked groups.
• Widget Tagging Mode – Pick Auto (Container, Image, Heading, Text) or advanced tagging to define how elements convert.
• Manage Auto Layout – If your design isn’t already structured, UiChemy will optimize it.
• Tag Widgets – Tag additional widgets like Buttons, Carousels, or Galleries.
• Responsive Manager – Control responsiveness through font-size, line-height, padding, flex-gap, etc.
• Sync Global Styles – Map your Figma colors and typography to your WordPress site.
• Conversion Settings – Finalize export preferences like image options and layout behaviors.
Each of these phases is designed to give you control, confidence, and clarity during export.
New design. Same powerful engine. Explore what’s inside.
UiChemy 3.0 introduced the smart core features, now enhanced by a fresh UX in v4.