Case Study #2

Wheely – Bicycle Website

Introducing Wheely – the Figma template that revolutionizes the way you showcase and celebrate bicycles online. Available on Envato Elements, 'Wheely' seamlessly combines a sleek dark mode aesthetic with a sporty infusion of red, creating an immersive and dynamic user experience.

Before
35%
After
98%

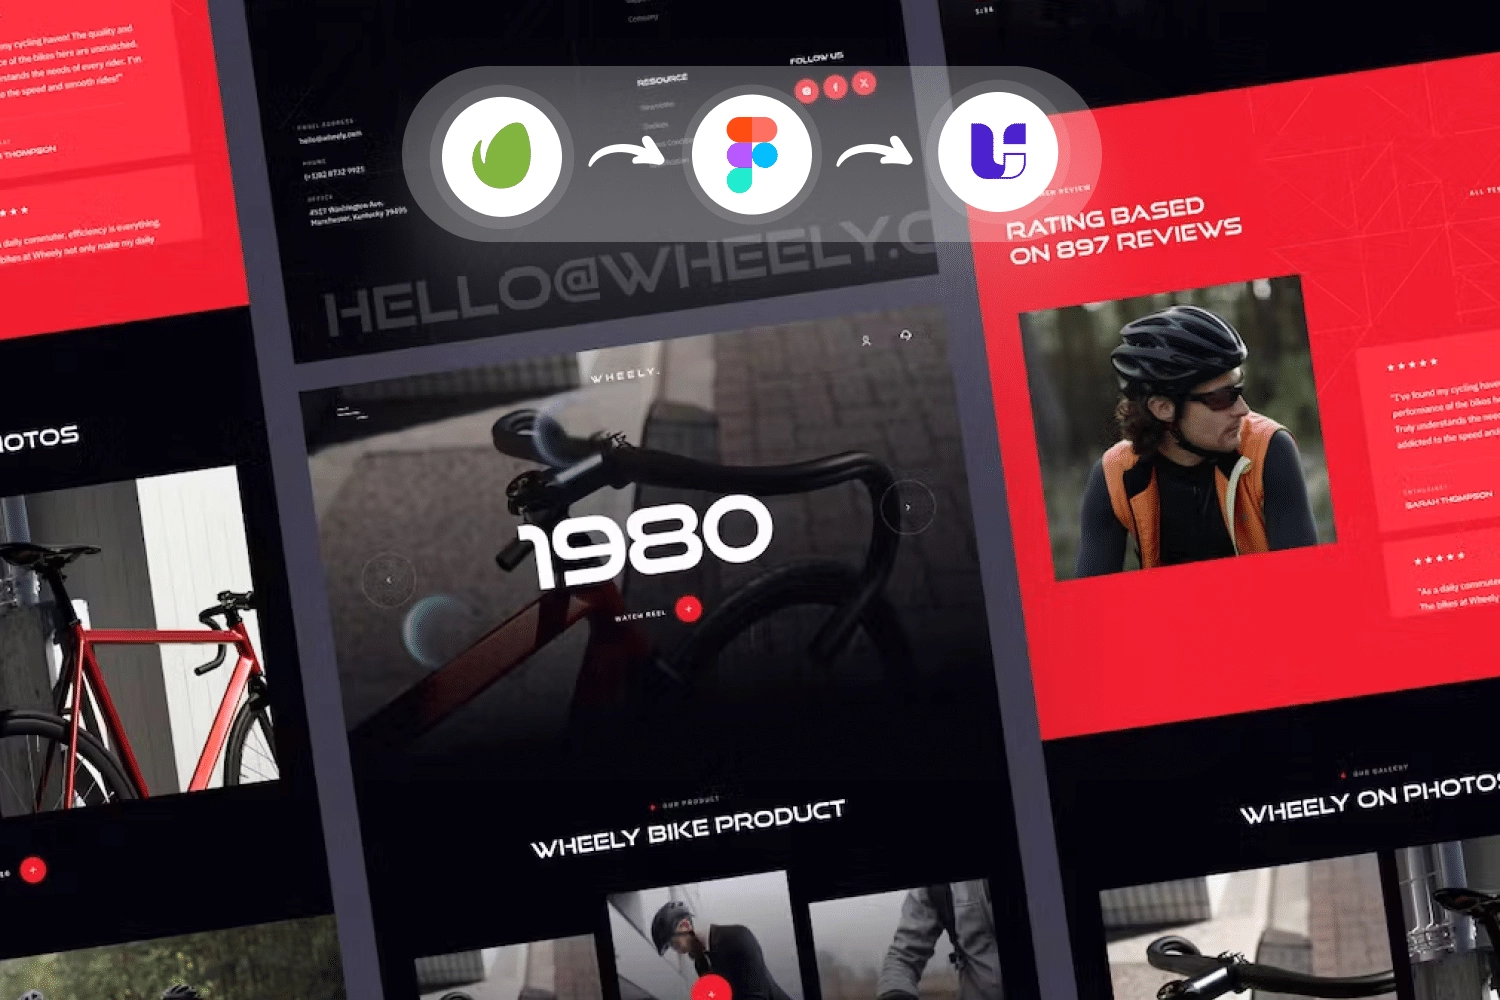
Envato Elements to Elementor – One-Click Export using UiChemy Plugin

Importing Random Figma Design from Envato Elements:

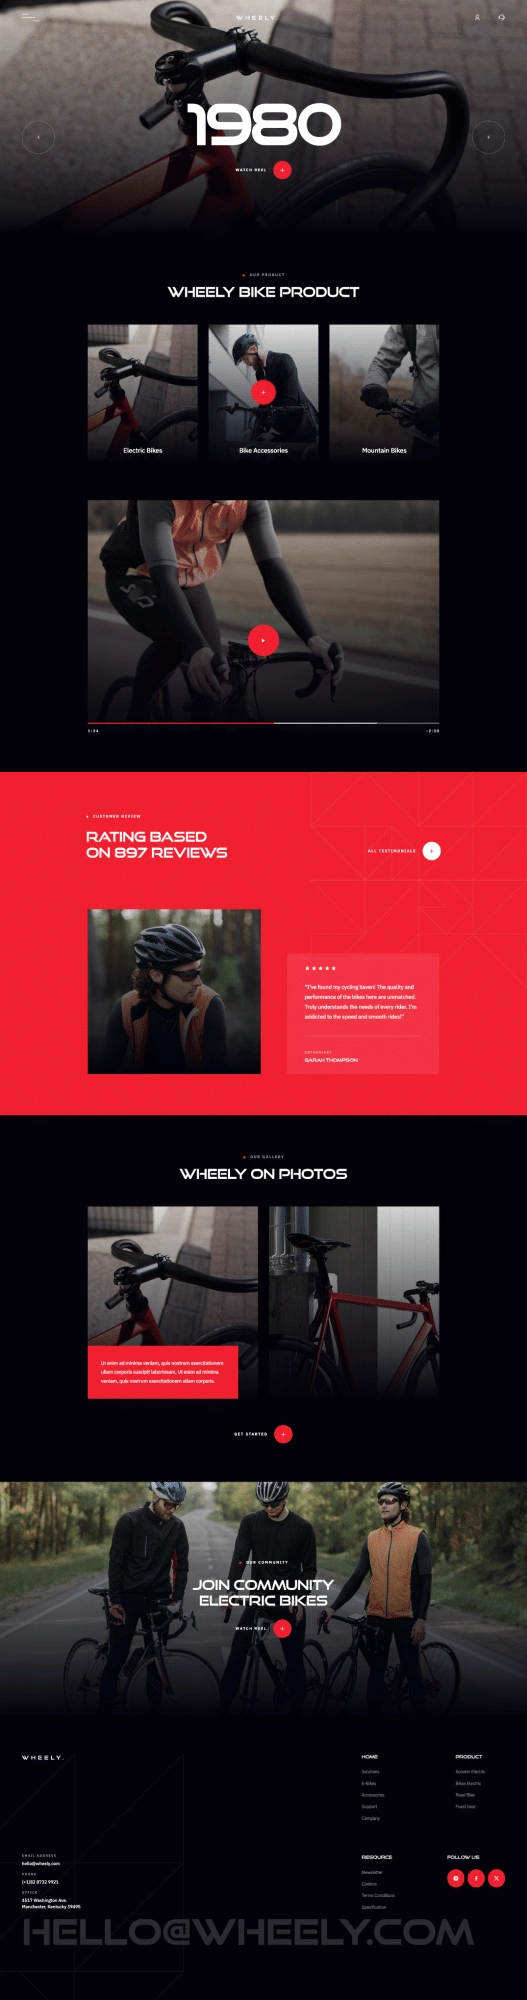
We purchased a random template from Envato Elements and made modifications in Figma. The initial design used absolute frames, which we converted into Auto-layout. Additionally, we replaced placeholders with images.

Main steps we will take in this process :

Figma Optimisation for UiChemy

Using UiChemy to Export in WordPress

Final Touch-ups in Elementor/WordPress

Step 1: Figma Optimisation for UiChemy

  • Structure:
  • Ensure all elements reside within a main frame (top-level frame). Create sections within the main frame using frames, adhering to fundamental web layout principles.

  • Auto-Layout:
  • Apply Auto-layout to the top-level frame and essential sections for adaptability. Set appropriate widths (e.g., Fixed for the main frame, Fill for sections).

  • Background Images:
  • Apply background images directly to frames for smooth transfer.

  • Absolute Frames:
  • Convert absolute frames to Auto-layout for compatibility.

    1. Hero Section – Converting to Auto-Layout & Setting the Rectangle/image to Container’s background Image.

    Step-by-Step Guide:

    1. Apply Auto-layout to the “Homepage” (main frame) and set the width to “Fixed.”
    2. Apply Auto-layout to the “Hero-Section” (container), set the width to “Fill” and height to “Fixed” (850px), and remove any gaps.
    3. Set the background image directly on the “Hero-Section” frame.
    4. Apply Auto-layout to the “Navbar” and “btn-next prev” frames, set gaps to “Auto,” and remove absolute positioning.
    5. Position the “Navbar” above the “btn-next prev” frame.
    6. Move the “Heading” frame into the “btn-next prev” frame and adjust padding as needed.
    7. Lock the “menu” icon frame.

    Additional Tips:

  • Double-check the exported design in Elementor for any necessary adjustments. Explore UiChemy’s pre-built templates and additional features to streamline your workflow further.

  • Remember:

  • This guide offers a simplified overview. Specific designs may require adjustments to settings and properties in Figma. Refer to UiChemy’s documentation for detailed instructions and troubleshooting.
  • 2. Combining Multiple Layers and exporting as image as with Absolute Position & Setting their Z-Index value

    Step-by-Step Guide:

    1. Set Auto-Layout for “Customer Reviews” Frame: Repeat the steps mentioned in the “Hero Section – Converting to Auto-Layout” for the “Customer Reviews” Frame and its inner frames.
    2. Handling the “Pattern” Frame: Click on the “pattern” Frame, which is initially in Absolute Position. The “Pattern” Frame contains multiple vectors that will be converted into multiple images upon export.
    3. Locking the “Pattern” Frame: Lock the “Pattern” Frame to ensure it is exported as a single image.
    4. Adjusting Layer Order: Since the “Pattern” Frame might be above other frames, click on “send to back” to ensure it won’t show above the sections after exporting.
    5. Handling “Pattern” Frame in the Footer: Navigate to the “footer” Frame, where you might encounter another “Pattern” Frame. Repeat the above-mentioned steps for the “Pattern” Frame in the footer.
    6. Completion: After setting all frames in Auto-Layouts and handling the “Pattern” Frames, your design is ready for export. Export the Figma Design using the UiChemy plugin, and the “Pattern” Frames will be converted into single images.

    By following these steps, you can efficiently use the UiChemy plugin to export your Figma Design in WordPress, ensuring proper handling of Auto-Layouts and “Pattern” Frames. Adjust the steps according to your specific Figma design and WordPress requirements.

    Step-2: Using UiChemy to Export in WordPress

    Step-by-Step Guide:

    1. Select the “Main Frame”:
    Identify and click on the main frame or container that holds your complete Figma design.
    2. Access UiChemy Plugin: Look for the “Resource Icon” associated with the UIChemy plugin. Click on this icon to activate or run the UIChemy plugin.
    3. Initiate Conversion Process: Within the UIChemy plugin interface, locate and click on the “UiChemy – Convert Figma to WordPress” option. This initiates the process of converting your Figma design into a WordPress-compatible format.
    4. Convert to Elementor: After the conversion process begins, find and click on the “Convert to Elementor” button within the UIChemy plugin interface. This action prepares the design for use within the Elementor plugin in WordPress.
    5. Open Live Preview: Once the conversion and integration are complete, locate and click on the “Live Preview” button. This action allows you to view the exported Figma design within the Elementor plugin interface in WordPress.
    6. Verify Exported Design: Check the live preview in Elementor/WordPress to ensure that your Figma design has been successfully exported and integrated into the Elementor environment.

    By following these steps, you can utilize the UiChemy plugin to seamlessly export your Figma design into Elementor for WordPress. This integration enables easy use and customization of your design within the WordPress platform, leveraging the functionalities provided by Elementor.

    4. Final Touch-ups in Elementor/WordPress

    After Export – Background Overlay color

    Step-by-Step Guide:

    1. Navigate to Exported Template:
    Locate and navigate to the exported template on your WordPress site.
    2. Edit with Elementor: Click on “Edit with Elementor” to open the Elementor editor for the selected template.
    3. Select the “Hero-Section” Container: Identify and select the “Hero-Section” container within the Elementor editor.
    4. Access the Style Tab: Click on the “Style” tab in the Elementor editor to access styling options for the selected “Hero-Section”.
    5. Background Overlay: Under the “Style” tab, locate and click on the “Background Overlay” option.
    6. Apply Gradient Color: Within the “Background Overlay” settings, choose the “Gradient Color” option to apply a gradient to the background.
    7. Adjust Opacity: Set the “Opacity” to “1” to achieve the desired level of transparency for the background overlay.

    Similarly, perform the above steps for other sections where the background-color overlay is applicable.

    By following these steps, you can efficiently enhance the design of your exported Figma template in WordPress using Elementor, specifically focusing on background overlays. Adjust the steps as needed based on your template structure and design preferences.

    After completing the above steps, Here is the final output of the exported template:

    laptop macbook black
    Wheely bicycle Website 3

    UiChemy Templates

    Collection of templates, which is compatible with UiChemy and gives optimum output. We have personally verified and rated based on output they do produce.

    Your Figma Design To WordPress in Seconds!

    Shopify Website Converted in WordPress using UiChemy

    In this case study, we are trying to convert any website from its URL to WordPress Editable website. We will use Shopify Official website, https://www.shopify.com/in and convert that in Elementor with Uichemy.

    Main steps we will take in this process :

    Conversion of Website to Figma

    Figma Optimisation for UiChemy

    Using UiChemy to Export in WordPress

    Final Touch-ups in Elementor/WordPress

    Step 1 : Conversion of Website to Figma

    To commence, we'll convert any website into a Figma design using an HTML to Figma converter. Here, we utilized the html.to.design Figma plugin to seamlessly convert any website to a Figma file. Our process involved accessing the https://www.shopify.com website, copying its link, and seamlessly integrating it into the html.to.design Figma plugin. Remarkably, in just moments, the html.to.design tool effortlessly produced a comprehensive Figma file, faithfully representing the entire website design.

    Step 2: Figma Optimisation for UiChemy

    Main Frame - Applying Auto-layouts, Width management, and Alignment

    Step-by-Step Guide:

    1. Select Your Main Frame or Top-Level Layout:
    Click on the frame or container where you want to apply auto-layout and manage width.
    2. Apply Auto Layout: With the frame selected, look for the "Auto Layout" option in the top-right corner of the Figma interface. Click on it to enable auto-layout for the selected frame.
    3. Set Auto Layout Alignment: After enabling auto-layout, a series of alignment options will appear. Choose the "Center" alignment option to ensure the contained elements align centrally within the frame.
    4. Adjust Width Settings: Click on the "Width" settings within the auto-layout configuration.
    5. Set Fixed Width: Specify the desired width for the container. For example, input "1440 px" in the width field to set a fixed width of 1440 pixels for the container.
    6. Finalize and Apply Changes: Once you've set the width and configured alignment, you're done! Ensure everything looks as intended and that the layout is behaving correctly.

    By following these steps, you've successfully applied auto-layout, managed the width, and aligned elements within your chosen frame or container in Figma.

    Remember, this is a simplified guide. Depending on your specific design and elements, you may need to adjust other settings or properties in Figma to achieve your desired layout and design.

    Transforming Header section to use Auto-Layout & Adding Background-Color

    Background color was added so the header could be separated into the Header Template in WordPress.

    Step-by-Step Guide:

    1. Select the "Navigation Menu - Icon": Begin by clicking on the icon element within the navigation menu.
    2. Add Auto Layout Frame: Click on the "Auto Layout" option to create a frame for the icon, ensuring elements within it can be organized and adjusted together.
    3. Set Auto Layout Alignment to "Center": Configure the auto-layout frame to have a "Center" alignment to ensure the icon stays centered within its container.
    4. Repeat Steps 1 & 2 for Other Navigation Menus: Create frames for the remaining navigation menu items by selecting both the text and icon elements, then applying auto-layout to these combined elements.
    5. Combine Navigation Menu Frames into One: Select all the individual navigation menu frames created previously and combine them into a single frame by applying auto-layout. Ensure to set the alignment to "Center" for this combined frame.
    6. Apply Auto Layout to Text & Frame (Navigation Menu): With both text and frame selected, apply the "Auto Layout" feature to them, allowing better alignment and management within the navigation menu.
    7. Combine Navigation Menu Frame with Logo and Button Frames: Select the navigation menu frame along with the logo and button frames. Combine them into a single frame using auto-layout and ensure the alignment is set to "Center."
    8. Adjust Header Frame Width: Select the parent frame containing all the elements and stretch it to the full width of the design frame.
    9. Set Padding Values: Apply top and bottom padding values of 14 to the parent frame to create spacing between its contents and the frame edges.
    10. Apply Background Color: Click on the "Fill" icon and choose a suitable background color to apply to the parent frame, providing a distinct visual separation for the header section.
    11. Finalize: Review the changes, ensuring the elements are aligned, spaced, and colored as intended to create the transformed header section.

    Following these steps will help you effectively transform the header section by utilizing auto-layout and incorporating a background color in Figma. Adjustments can be made based on specific design needs or preferences for your project.

    Union / Locking

    Instead of using two separate vectors/SVGs, combining them into a union results in importing as a PNG.

    Converting Header & Sections Frames to Auto-Layout (Container)

    Step-by-Step Guide:

    1. Select the Header Section Frame: Identify and click on the designated frame that represents your header section in your Figma design.
    2. Enable Auto Layout: Once the header frame is selected, click on the "Auto Layout" option located in the top-right corner of the Figma interface.
    3. Check Width Property: Verify whether the width property is set to "Fill." This step ensures that the header spans the full width of the container.
    4. Set Width to Fill: If the width property isn't set to "Fill," select the "Fill container" option to ensure the header occupies the entire width of its container.
    5. Apply Center Alignment: Configure the auto layout by setting the alignment to "Center." This alignment ensures that the elements within the header are centrally positioned.
    6. Remove Left-Right Padding: Set the left and right padding values to 0 to eliminate any unnecessary spacing at the edges of the header, ensuring it fits seamlessly as a full-width element.

    Repeat the Method for Other Sections: Follow the same steps (from selecting the frame to adjusting settings) for other sections where you want full-width headers or similar configurations.

    Remember, adapt these steps based on your specific design needs and layout requirements. Making headers or sections full-width using auto-layout ensures a consistent and visually appealing design across your Figma project.

    Converting Absolute Frames to Auto-Layout (Container)

    By following these steps and referring to the GuideJar interactive demo, you'll successfully transition from absolute Frames to Auto Layout, creating a more flexible and responsive design.

    Removing Unnecessary Frames

    Removing unnecessary frames/containers speeds up the editing experience and improves web performance.

    3. Using UiChemy to Export in WordPress

    Step-by-Step Guide:

    1. Select the "Main Frame":
    Identify and click on the main frame or container that holds your complete Figma design.
    2. Access UiChemy Plugin: Look for the "Resource Icon" associated with the UIChemy plugin. Click on this icon to activate or run the UIChemy plugin.
    3. Initiate Conversion Process: Within the UIChemy plugin interface, locate and click on the "UiChemy - Convert Figma to WordPress" option. This initiates the process of converting your Figma design into a WordPress-compatible format.
    4. Convert to Elementor: After the conversion process begins, find and click on the "Convert to Elementor" button within the UIChemy plugin interface. This action prepares the design for use within the Elementor plugin in WordPress.
    5. Open Live Preview: Once the conversion and integration are complete, locate and click on the "Live Preview" button. This action allows you to view the exported Figma design within the Elementor plugin interface in WordPress.
    6. Verify Exported Design: Check the live preview in Elementor/WordPress to ensure that your Figma design has been successfully exported and integrated into the Elementor environment.

    By following these steps, you can utilize the UiChemy plugin to seamlessly export your Figma design into Elementor for WordPress. This integration enables easy use and customization of your design within the WordPress platform, leveraging the functionalities provided by Elementor.

    4. Final Touch-ups in Elementor/WordPress

    Some Touch-ups in Elementor/WordPress

    While importing from the HTML.to.design plugin, the background video and overlay color are not missed to the Figma. Therefore, we need to make final touch-ups by editing it on the Elementor/WordPress.

    Removing Unnecessary Containers From Elementor/WordPress

    On the Elementor/WordPress side, Identify frames that are not needed or are causing clutter in your exported design.