Figma has become a go-to design tool for many designers, offering a collaborative and versatile platform. With UiChemy, designers can now take their Figma designs and export them as an Elementor template to directly use in the Elementor website builder, unlocking whole new design possibilities.
Recommended Server Requirement
Make sure you have the following server settings to smoothly import the template in Elementor.
- PHP Time Limit (max_execution_time): 300s
- PHP Memory Limit: 256M
- PHP Upload Limit: >100M
- max_allowed_packet for MySQL: >5 MB
You can check the following guides to make the changes yourself, or you can contact your hosting provider for the same.
Increase PHP time limit (max_execution_time).
Increase PHP memory limit and upload limit.
Required Elementor Settings
Make sure you have the free Elementor plugin (3.11.5 or above) installed and activated.
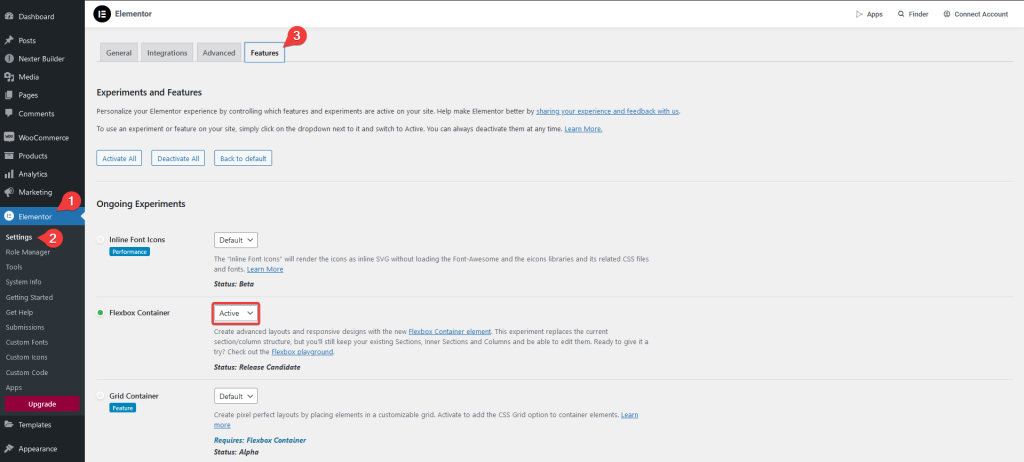
Before importing the template, make sure the Elementor Flexbox container is enabled.
To do so from the Dashboard, go to Elementor > Settings > Features, then select Active from the Flexbox Container dropdown and save the changes.
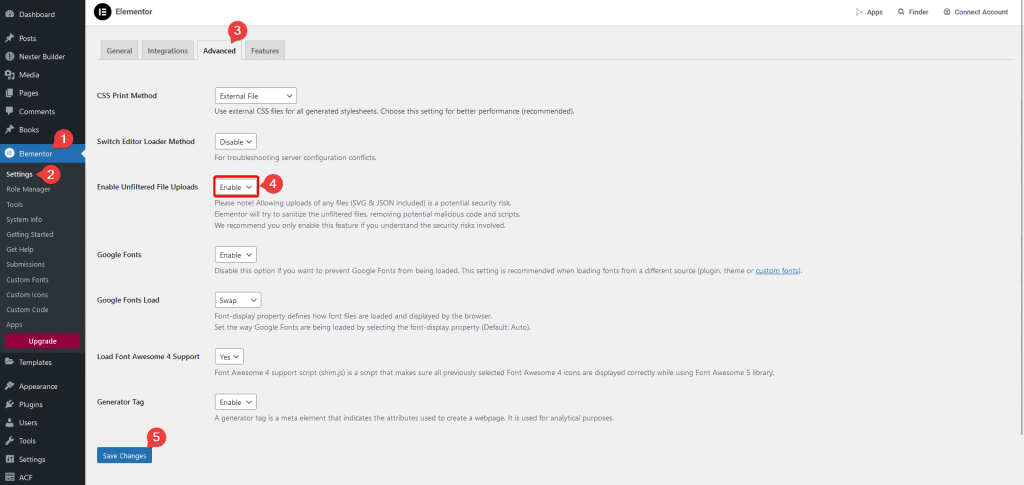
Also, make sure the SVG file upload option is enabled from the Elementor settings.
To do so from the Dashboard, go to Elementor > Settings >Advanced.
On that page, select Enable from the Enable Unfiltered File Uploads dropdown and click on the Save Changes button.
Export Design from Figma
To export your Figma design using UiChemy, follow the steps –
- Go to Resources > Plugins and search for UiChemy and click on it. It will open the UiChemy plugin interface and log in to your account.
- Now select the section of the layout that you want to export. You can select the top frame to export the entire layout, or you can select a section to export that section only.
- Then select either the Optimize or Express option and click the Optimize or Convert button as per your selection.
- Click on the Convert button on the next screen.
- Now, based on your selected frame, UiChemy will automatically decide the export method. If you’ve selected the top frame of your layout, you’ll see two options –
- Copy to Clipboard – In this process, you can directly copy and paste the design to Elementor.
- Live Import – In this process, you directly export the design to your WordPress site, or you can download and upload the template manually.
- But if you’ve selected a particular section, then you’ll see the Copy to Clipboard option only.
How to Use Copy to Clipboard
- Click on the Copy to Clipboard button. Once the design is copied, you’ll see a green tick.
- Open the page or template where you want to paste the design in the Elementor editor.
- Then right click on the dotted border section and select the Paste from other site option and then press the Ctrl + V button to paste the design. Now the design will be added to your editor.
How to Use Live Import
To make the Live Import work, make sure you’ve installed and activated the UiChemy plugin on your WordPress website.
- Click on the Live Import button.
- In the Select Site dropdown, click on the + Add Site button under the Import tab.
- Then you’ll see a Live Import popup here, you have to add the Site URL and Security Token.
- Once you’ve added the URL and Token, click on the Connect button. If everything is correct, you’ll see a success message otherwise, you’ll see an error message if anything is wrong.
- Then you’ll see your website URL is selected in the Select Site dropdown.
- Once the dot beside the website URL turns green, click on the dropdown under the Import Settings.
- Then select New from the Select Method section. You can also update an existing template or page.
- After that, from the Export To dropdown, you have to select the template type. You can import as a Page, Elementor Template or Nexter Template.
- Then click on the Next button.
- On the next screen, you can import individual layouts or import all layouts at once by clicking the Import All button. It will import the layout directly to your website.
- Once the layout is uploaded, you can preview the layout by clicking the button beside the layout.
Note: For Elementor Template and Nexter Template, you have to select the template type as well.
How to Use Manual Download (For Elementor and Bricks)

- Click on the Live Import button.
- Then go to the Download JSON tab.
- On the next screen, you can select the pages you want to download and then click on the Download JSON button. You can also download individual pages by clicking the download icon beside each page.
- Then save the template as a JSON file.
We recommend using the Live Import option to reduce the manual work.
Copy Code Method (For Gutenberg)
When you are using the Figma to Gutenberg plugin, you’ll see the Copy Code option to import the template on your WordPress website. For this to work, make sure you’ve installed and activated the UiChemy and The Plus Addons for Block Editor plugins on your WordPress website, then follow the steps –
- Click on the Copy Code button.
- On the next screen, click on the copy icon beside the page.
- Now go to your WordPress dashboard and add a new page.
- Click on the Plus Paste button (purple color) at the top.
- Now a popup will open, press Ctrl+V and the template will be imported on your page.
Import Template in Elementor
To import your exported template in Elementor, follow the steps –
- From the WordPress Dashboard and go to Templates and click on the Import Templates button.
- Click on the Browse button and select your exported template, then click on the Import Now button and your template will be imported. Depending on the complexity of your design and file size it may take some time to import the template.
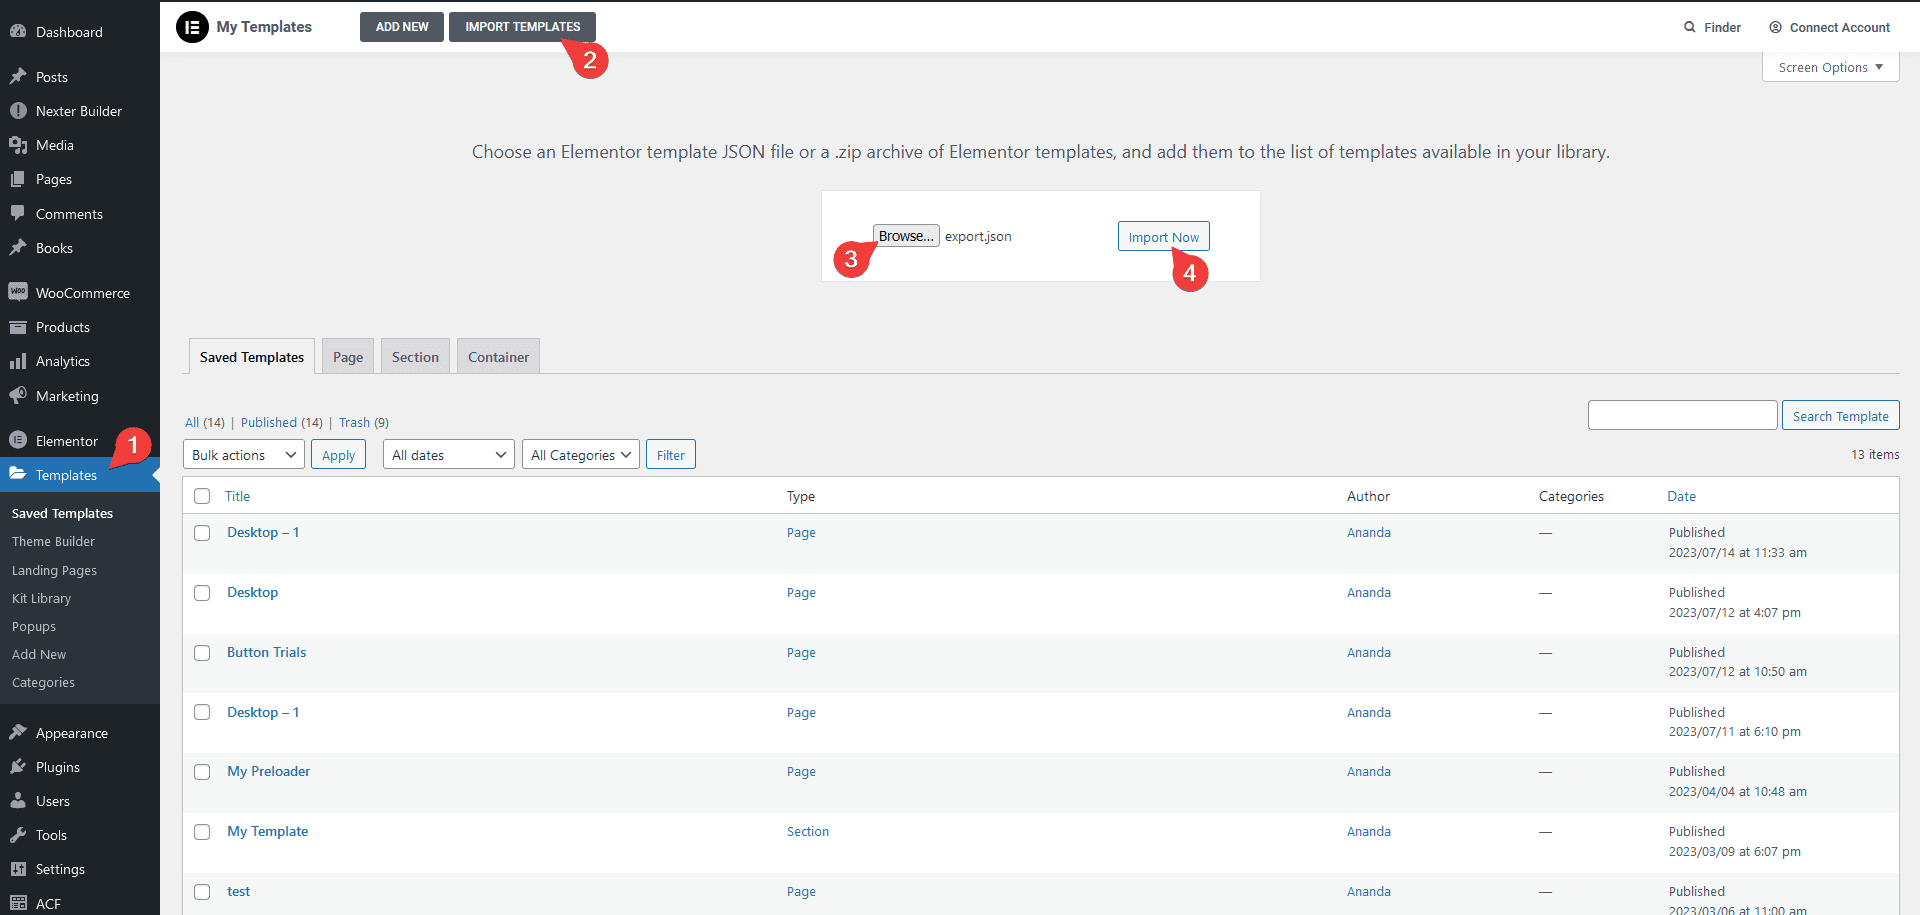
- You can click on View to check the template.
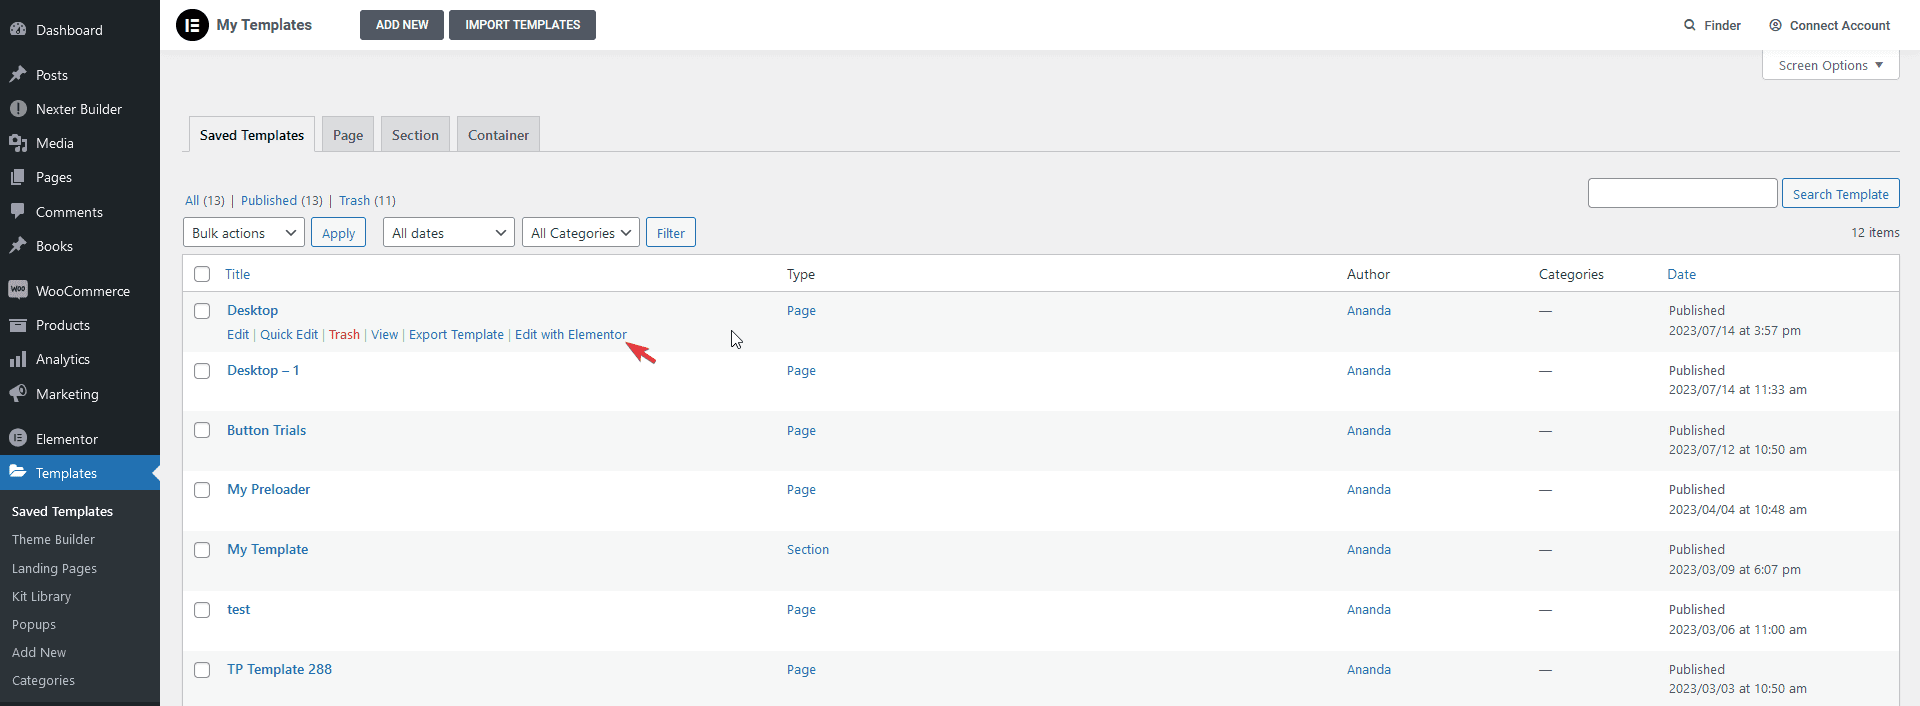
- Open the template in Elementor by clicking on Edit with Elementor.
- To make sure the layout shows perfectly, from the Elementor editor panel go to Settings and set the Page Layout to Elementor Full Width or Elementor Canvas (only if you want to create a single page website with header, footer etc.)

Note: If your layout contains a common sidebar, then you can keep the page layout to default and add the sidebar in a separate template.
Note: If your layout contains common sections like header, footer etc. you should create separate templates like header, footer etc. and add them in their respective templates from your current template. For creating these templates, you can use the free Nexter theme.
Use the Template
To use the template, follow the steps –
- Add a new page, after saving the page, click on Edit with Elementor.
- On the next screen, click on the Folder icon (Add Template).
- In the popup, go to the My Template tab, go to your template, and click on Insert to add the template on the page.
- When prompted to apply the settings from the template to the page, click on Apply, this way, the page will have the same page settings as the template.
For any issue, do check our troubleshooting documentation.