


Sometimes when you import an Elementor template (large size) exported through UiChemy, it shows blank even though the JSON file has the data.
This happens due to a couple of reasons –
Elementor Flexbox Container Not Enabled
One of the main reasons for a blank page template is that Elementor Flexbox Container is not enabled. When you export your Figma layout using UiChemy it uses Flexbox containers so if you haven’t enabled the Elementor Flexbox Container option from Elementor settings your template might show blank.
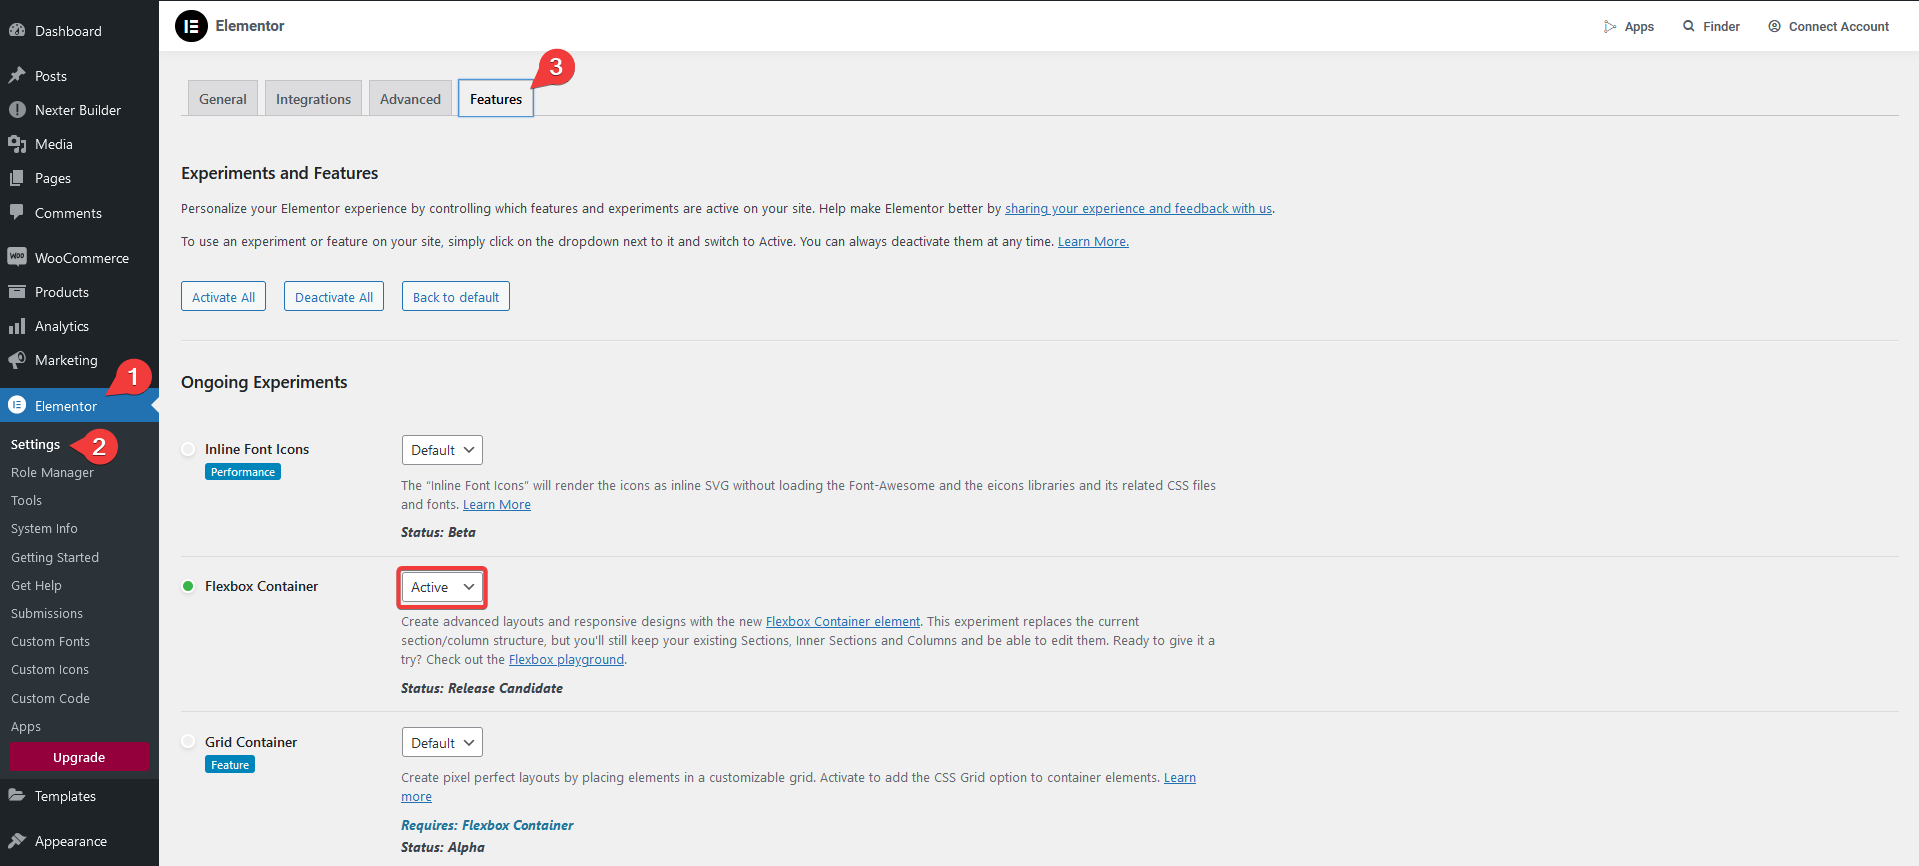
Enable Elementor Flexbox Container
To do so from the Dashboard, go to Elementor > Settings > Features, then select Active from the Flexbox Container dropdown and save the changes.
Low MYSQL max_allowed_packet Size
In MySQL, when you send data to or receive data from the database, there’s a limit set by max_allowed_packet. If the data you’re trying to send or receive is larger than this limit, it won’t work properly and might cause errors.
We recommend setting max_allowed_packet > 5MB, so if your server has set a lower limit for max_allowed_packet in MYSQL, then you might face this issue, especially while importing a large template.
How to Increase the max_allowed_packet Size?
In most cases, you’ll face this problem in your local host setup.
Increase max_allowed_packet in Wamp
To increase the max_allowed_packet size in Wamp, follow the steps –
- Start the Wamp Server.
- Once the server starts, click the Wamp icon in the taskbar.
- Then go to MySQL > MySQL settings > max_allowed_packet and then select the desired value.
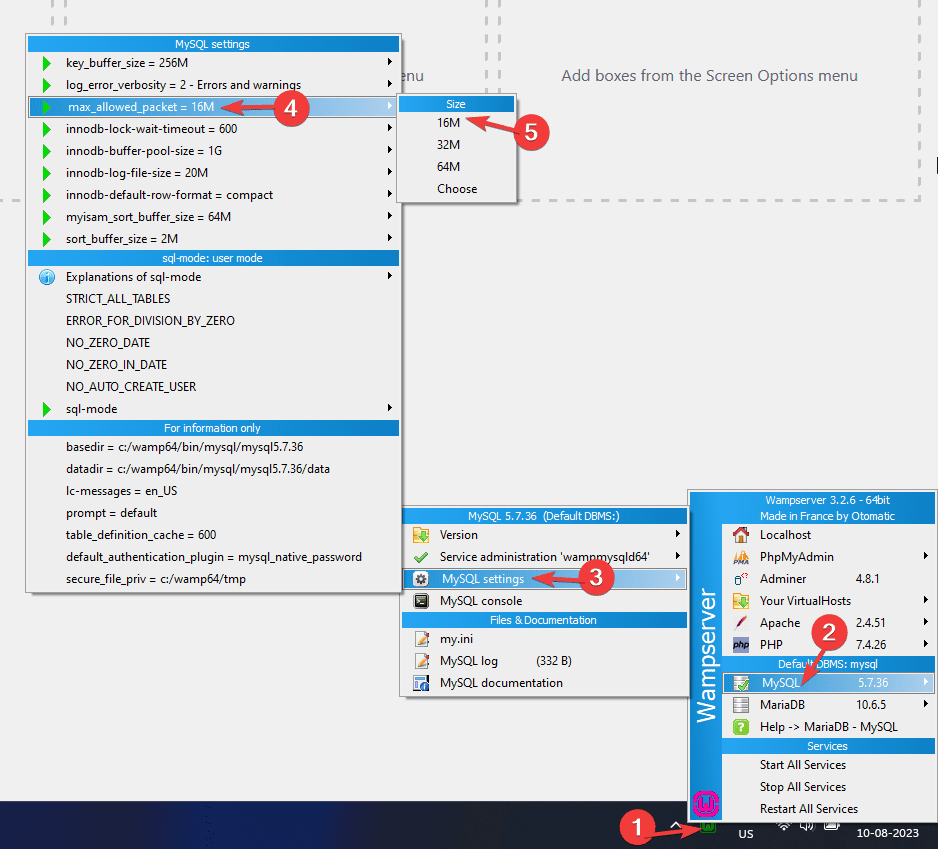
- Once you have made the changes, restart MYSQL for the changes to take effect.
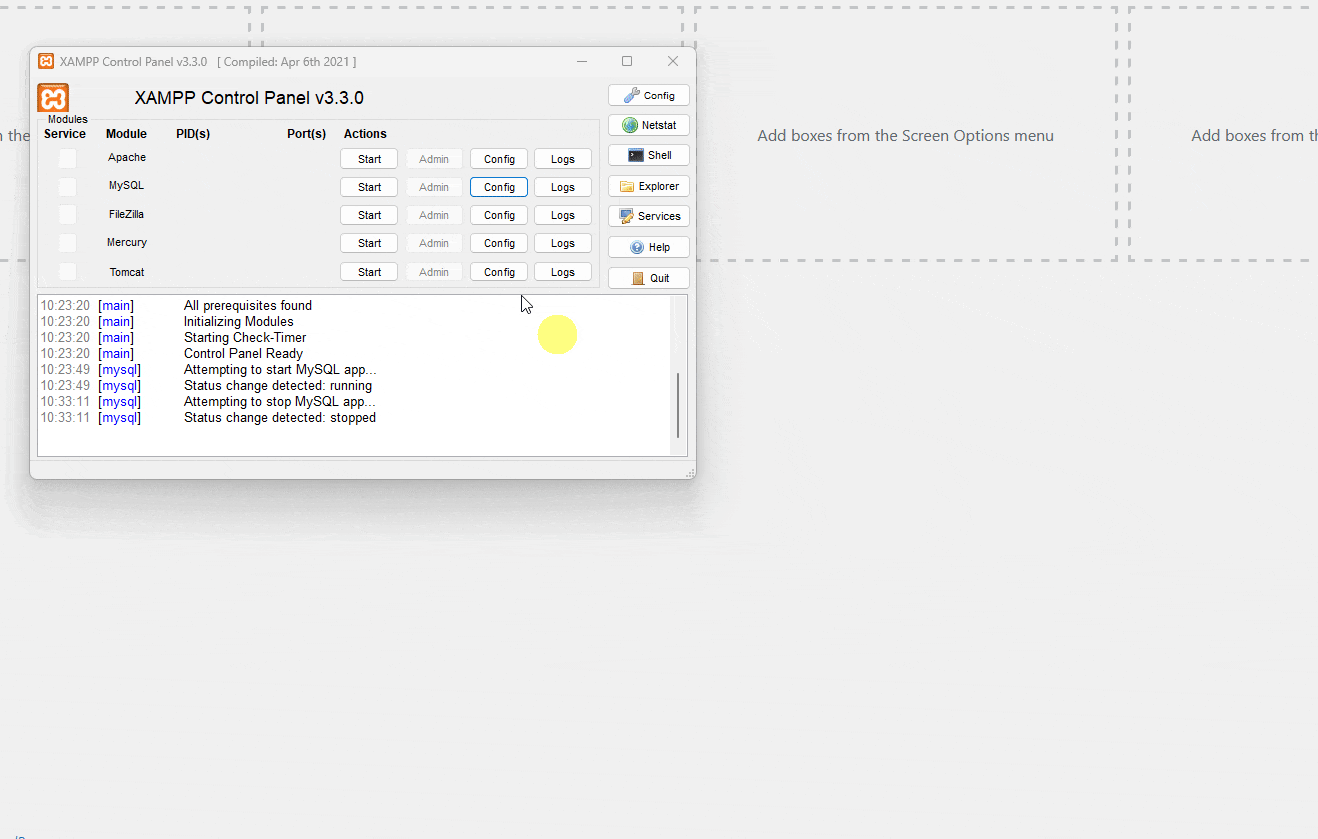
Increase max_allowed_packet in Xampp
To increase the max_allowed_packet size in Xampp, follow the steps –
- Open the Xampp Control Panel.
- Then in the MySQL row click on the Config > my.ini and it will open the my.ini file.
- In the my.ini search for max_allowed_packet, you’ll find it in a couple of places and change the value as per your requirement. Make sure to set the same value for both instances, then save the file.
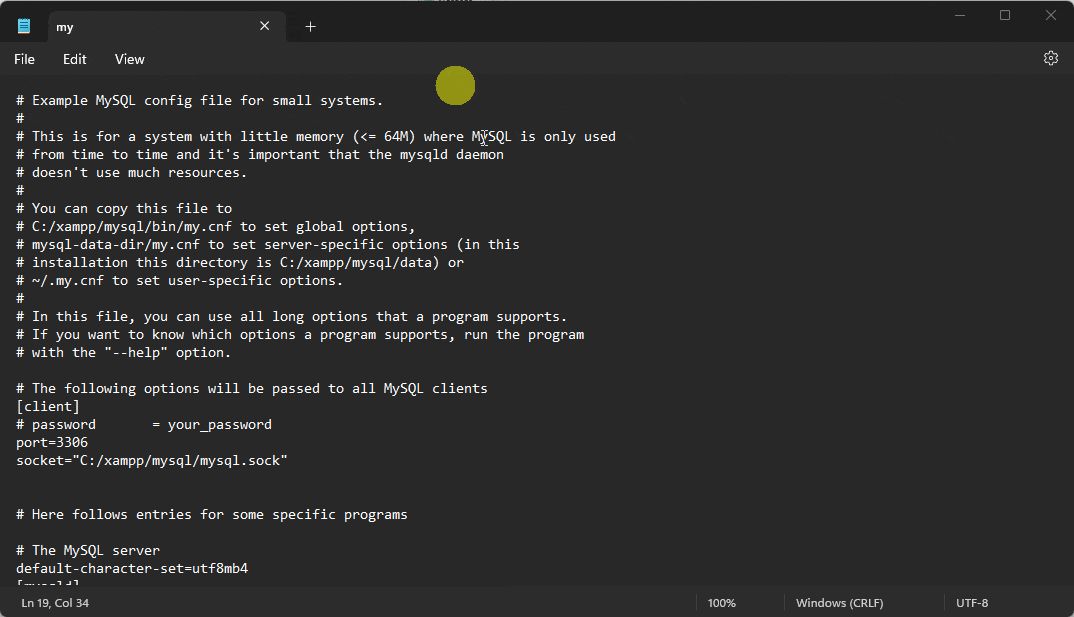
- Once done, restart MySQL for the changes to take effect.
Increase max_allowed_packet in LocalWP
To increase the max_allowed_packet size in LocalWP, follow the steps –
- Start the LocalWP app.
- Then select the site from the left panel and click on the Go to site folder.
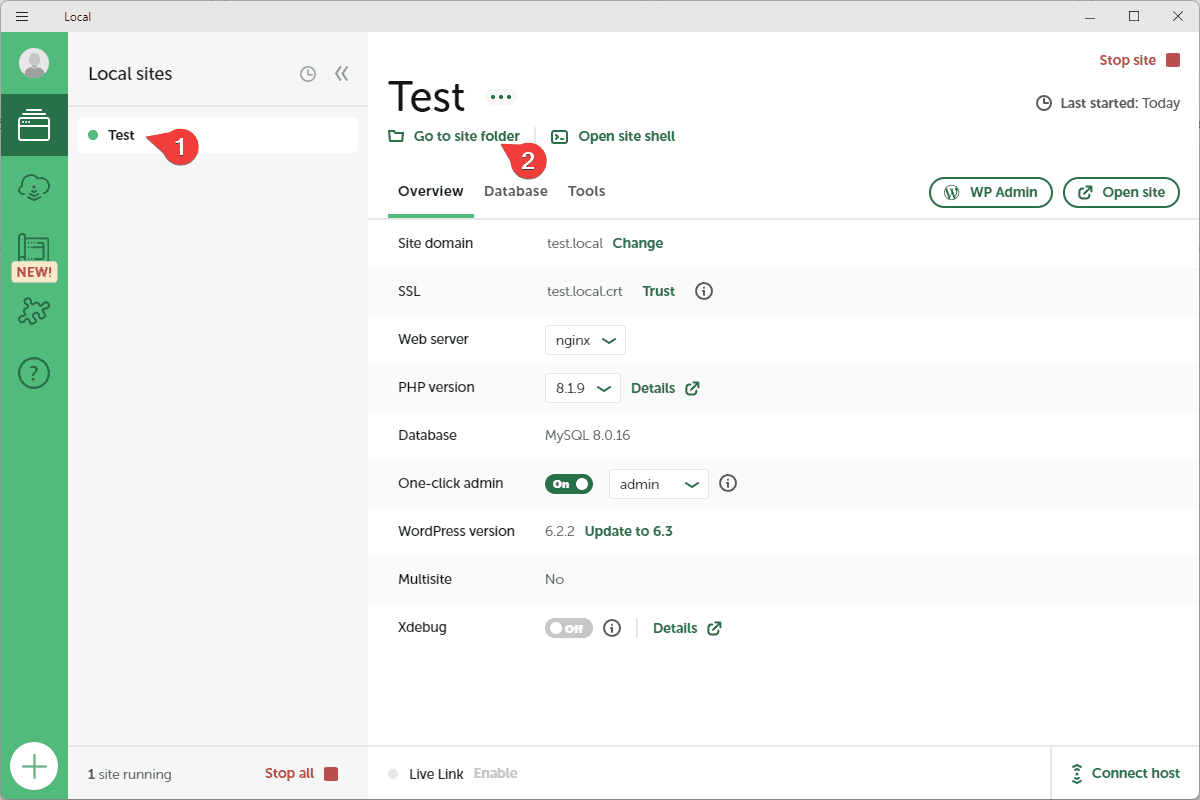
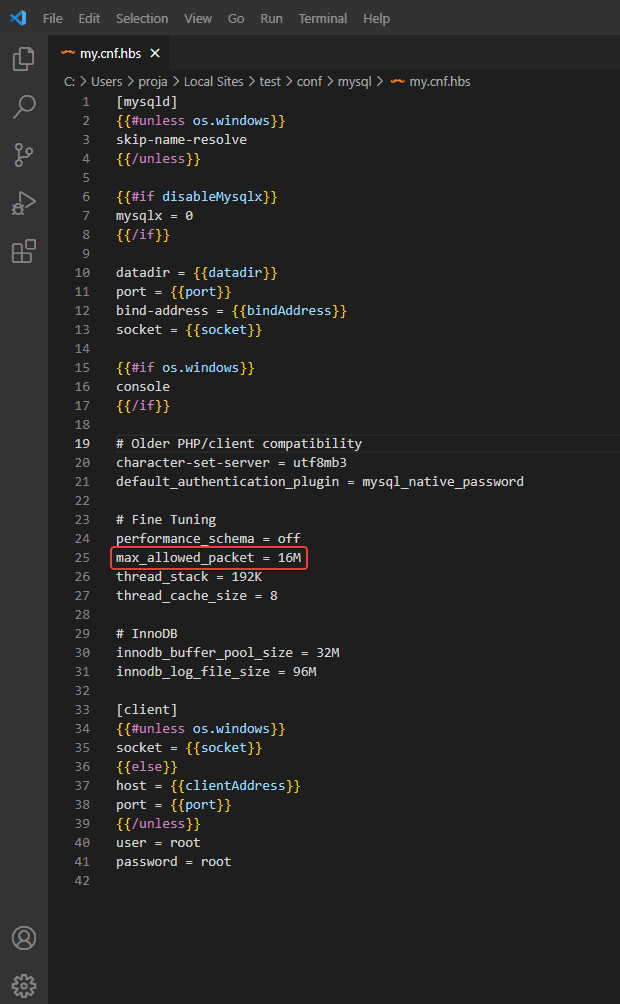
- Then open conf > mysql folder and open the my.cnf file.
- Search for max_allowed_packet and change the value as per your requirement and save the file.
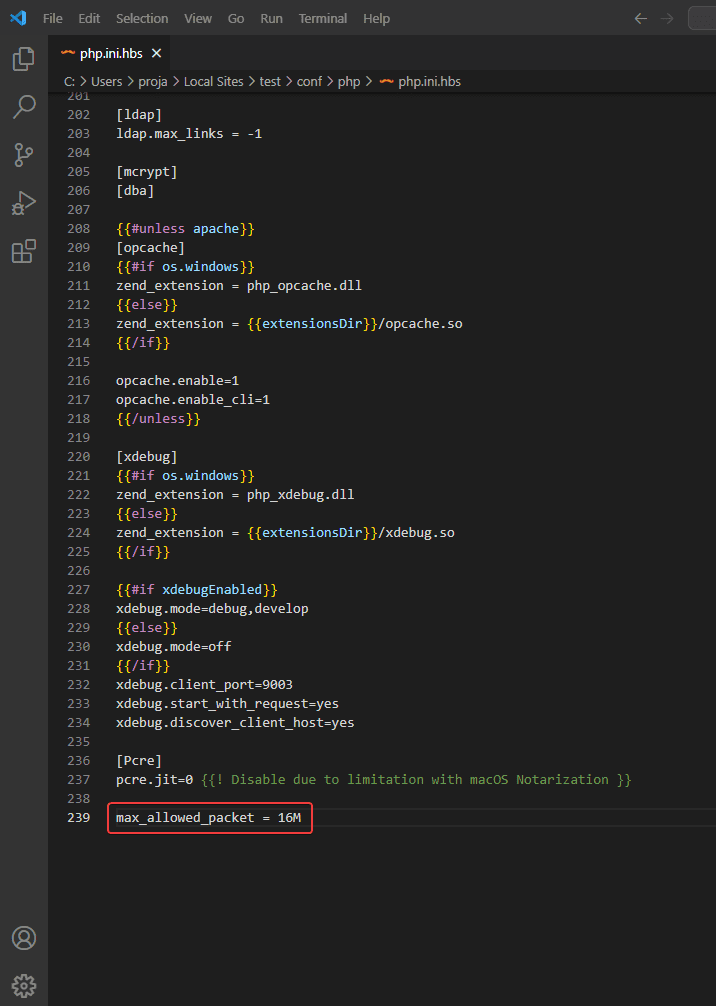
- Then again, go back to the conf folder > php folder and open the php.ini file.
- Add or update the max_allowed_packet value as per your requirement and save the file.
- Once done, click on Stop site and then Start site in the LocalWP app for the changes to take effect.
Increase max_allowed_packet in Live Server
Most good web hosting will have sufficient value for max_allowed_packet to import decent-size templates.
If you are still facing this issue in a live server the best option would be to contact your hosting provider and ask them to increase the max_allowed_packet size.
But if you want to do it yourself, you can check the following guides –
https://wp-staging.com/docs/increase-max_allowed_packet-size-in-mysql/
https://stackoverflow.com/questions/8062496/how-to-change-max-allowed-packet-size
https://dba.stackexchange.com/questions/45087/max-allowed-packet-in-mysql